

You are using an out of date browser. It may not display this or other websites correctly.
You should upgrade or use an alternative browser.
You should upgrade or use an alternative browser.
To Veneer or Not to Veneer - Impact on Value?
- Thread starter Westlind
- Start date


malden
Lunatic Member
Twelve years - no deep ever!
no what?
malden
Lunatic Member
Let's take a step back jnoyes, here is my post...
to which you replied...
I had never done veneering until about a year ago when I decided to restore some JBL's that were trashed. I went to a local hardwood supplier and they gave me 3 options
1) traditional veneering which requires elaborate clamping or hydraulic press
2) paper backed veneer that is applied with contact cement
3) heat applied veneer
Since I had some experience with plastic laminates (Formica), I decided to try option 2. So I bought a sheet of walnut (which came in a roll) and a gallon of water-based contact cement by Wilsonart.
As with plastic laminate, the pieces are cut 1/2" larger than the substrate they will be adhered to, that leaves 1/4" extra on all sides to be trimmed. The nice thing about the paper backed veneer is it can be cut with a utility knife unlike plastic laminate which needs either a handsaw or circular saw.
Tools required:
paint brush or small roller
tape measure
utility knife
straight edge (preferably metal)
sanding block
The next step is to plan which sides get veneered first. For a turntable, I would do the following:
1) back
2) sides
3) front
4) top, this will be the hardest because the corners will need to be mitered
The contact cement can be applied with a brush or roller, just make sure it's applied evenly. Both the substrate (plinth) and the veneer get a coat of cement and must dry completely before they are adhered to each other. Once applied, there is no turning back. If you screwed up and have to remove it, the only thing that will remove water based contact cement is lacquer thinner.
Do one side at a time, do not apply cement to the entire plinth. You don't want finger prints, dust , etc sticking to the cement before the next piece is applied.
Once the piece of veneer is applied to the plinth, burnish it in with the palm of your hand to ensure proper adhesion. Pay special attention to the edges, use a block of wood or small roller to make sure the edges are completely adhered. On large surfaces like a speaker cabinet, use a rubber roller.
After it is burnished in, trim the veneer with a utility knife, flush with the edges. Then use a sanding block (not power sander) with 100 grit sandpaper to make sure that the edges are perfectly flat.
Proceed to the next side.
Try it on some wood scraps first, doing adjoining sides so that you can see how it will come together. This can be done by anyone who is meticulous and detail oriented, you don't have to be a woodworker to master it. Most carpenters, especially the ham-fisted ones will have a hard time with the intricacies of the process...
to which you replied...
The wood glue/iron on method is easier and you can align pieces better. Lots of info on the net. Been using this method for years on turntables, speakers, cases, etc.
Contact cement is old school, it will work, but...
malden
Lunatic Member
Based on the one turntable you've done, laughable!
35 years in the construction business as a journeyman carpenter and supervising professional carpenters and craftsman, not amateurs. Building and renovating custom high-end homes, not turntable plinths. Go ahead and laugh yellow glue boy...
Last edited:

silver faced
Active Member
This is not geared towards anyone,just a quote from my deceased Uncle who was a master carpenter of which i followed in his foot steps.
Give an a--hole a hammer and he thinks he is a carpenter, Make someone build the hammer and he is a craftsmen .
Give an a--hole a hammer and he thinks he is a carpenter, Make someone build the hammer and he is a craftsmen .
malden
Lunatic Member
This is not geared towards anyone,just a quote from my deceased Uncle who was a master carpenter of which i followed in his foot steps.
Give an a--hole a hammer and he thinks he is a carpenter, Make someone build the hammer and he is a craftsmen .
amen

boreas
"If it sounds good, it IS good." E.K.E.
35 years in the construction business as a journeyman carpenter and supervising professional carpenters and craftsman, not amateurs. Building and renovating custom high-end homes, not turntable plinths. Go ahead and laugh yellow glue boy...
malden
Lunatic Member
This is the product I have been using for plastic laminate (Formica) and is also the most durable adhesive for paper backed wood veneer. I find it easier to use than solvent based contact cement, it also doesn't stink-up your workshop...
http://www.wilsonart.com/wilsonart-h2o-waterbased-contact-adhesive-wa-h2o
http://www.wilsonart.com/wilsonart-h2o-waterbased-contact-adhesive-wa-h2o
Last edited:
malden
Lunatic Member
Another nice feature of water based contact cement is that after both surfaces are coated, there is no time limit to when they have to be adhered to each other. If I spend the day building a counter-top and shelving, I'll often glue everything up at the end of the day and then adhere the laminate to the substrate the following morning.
Last edited:

Great timing lol,I am also restoring a pl12d, but instead of vinyl, chose to paint it gloss black this coming weekend, they are a great table when modded, and with a nice cart, I added a maple TV tray top, to the plinth bottom, also lead tire weights stuck under the plastic top, and stones/slate/rubber to the plinth. The little pl12d is a belt drive with rca jacks running directly to the cart, just like the best tables you can buy. I cant wait to get mine finished. I have the platter suspension springs tightened direct ,and will make the suspension in the feet like my direct drives. I am also doing a similar table to your pl570, I will be leaving the top wood and adding the larger thorens style wood sides boxing in the actual table it adds some heft and size, also going to spend on some nice feet. Great table platforms you have Westlind. For finish ideas I usually google thorens custom plinths
That's a 112d .... not 12d. But both are fine turntables, no issue there.
I'm not sure if you got around to painting .... but just a warning that my experience with that plastic substrate used under the vinyl woodgrain may blister / crack with application of paint. That's happened to me with a Sansui 6060 I sprayed satin black.

freQ(*)Oddio
Super Member
Thanks, yes i saw that odd surface under the vinyl; so prepping the surface was important for paint to lay down nice and stay down. I take a long time using alcohol to remove finger oils and light sanding, with very very light coats of paint giving much time between coats for each to dry, then building up to the final shine coat, Cracking is from trying to get instant gratification results without this procedure, many people cant hold back from dumping on the paint, then it cracks from the top drying first and the paint underneath is still wetThat's a 112d .... not 12d. But both are fine turntables, no issue there.
I'm not sure if you got around to painting .... but just a warning that my experience with that plastic substrate used under the vinyl woodgrain may blister / crack with application of paint. That's happened to me with a Sansui 6060 I sprayed satin black.
Attachments
-
 20170507_090158.jpg41.5 KB · Views: 36
 -
 20170506_212433.jpg41.7 KB · Views: 34
 -
 20170506_211437.jpg37.2 KB · Views: 31
 -
 20170506_211341.jpg36.4 KB · Views: 32
 -
 20170506_144549.jpg39.5 KB · Views: 32
 -
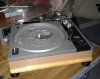 20170501_095515.jpg71.5 KB · Views: 33
 -
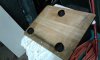 20170506_195413.jpg57.8 KB · Views: 32
 -
 20170506_142758.jpg83.2 KB · Views: 33
Last edited:
malden
Lunatic Member
another source for water-based contact cement...
http://www.veneersupplies.com/products/Better-Bond-Titan-DX-Premium-Contact-Cement.html
http://www.veneersupplies.com/products/Better-Bond-Titan-DX-Premium-Contact-Cement.html
Last edited:
Thanks, yes i saw that odd surface under the vinyl; so prepping the surface was important for paint to lay down nice and stay down. I take a long time using alcohol to remove finger oils and light sanding, with very very light coats of paint giving much time between coats for each to dry, then building up to the final shine coat, Cracking is from trying to get instant gratification results without this procedure, many people cant hold back from dumping on the paint, then it cracks from the top drying first and the paint underneath is still wet
Just to clarify, it wasn't the paint that bubbled and cracked ... but the plastic substrate.

Westlind
Rank Amateur
An update after doing some finishing work: I will never, ever used the pre-glued iron-on stuff again. The heat-sensitive glue they use never hardens fully, so when you sand an edge or corner that has that stuff, it doesn't sand away but instead forms a gooey, rubbery mess. As try to sand it away, and it just gunks up while you oversand and risk sanding into the substrate. The contact cement and wood glues don't do that - they dry hard and sand away nicely. A lesson learned. (And, no, I'm not trying to reopen the wood glue and ironing vs. contact cement debate; on that issue, I remain firmly agnostic).

Blue Shadow
Waiting for Vintage Gear from this century
This was getting good. I don't understand why there needs to be an argument about WG/IO vs. PB/WBCC. Seems one could present the pros and cons and move on. Once someone decides they like Pioneer they keep buying Pioneer even though there are other better out there. Oh Well, seems folks know a bit about the differences in the application of veneer and which one is cheaper seemingly always important on ak. Heck if all these folks can do it, I ought to give it a try. Won't have results like malden, he's a pro, but for the rest of us, I've seen some pictures of good work done by many here on AK.
There is something to be said for that.
firmly agnostic).
There is something to be said for that.
Last edited:

Robert Boyer
Member
Hello all. I know this is an older thread, and not certain it's the best place to post this, but is there someone on here or a service listed that would be willing to re-do the veneer on my Marantz 6200 turntable? I'm not even sure it's veneer. I also have a Marantz 6300 and they look completely different. The 6300 has very nice color and grain, the 6200 looks like wallpaper. I'd really like to have it done and just don't have the time or patience to do it myself. Thanks in advance.

totem
Addicted Member
not certain it's the best place to post this
Your correct, start a new thread and welcome to AK.
Robert Boyer
Member
Thank you sir. Would this be the correct area of the Forum?Your correct, start a new thread and welcome to AK.