• The move to the new server is done. There are some software and database maintenance updates in process. This has us passing the hat around to help out. We appreciate any donations. Seriously, even a dollar helps. The payment page may be found here - https://www.audiokarma.org/support.html

Wharfedale W60D-Homecoming

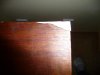
So turning to Youtube I found many ways to repair such damage , but the one that looked best for the damage I have involved making a template from masking tape(and thank you David Termini for generously sharing your knowledge and expertise-YouTube post is "David Termini demonstrates how to patch missing veneer quick-shop cam no frills").

You cut and place the masking tape over the void in the veneer and then push it down to form an edge where the veneer has been torn away. You then take a lead pencil and trace it along the edge on the masking tape. After that is done you carefully place the masking tape over a new piece of veneer and then follow the line you have drawn as you cut out a patch to fit into the void in the veneer.
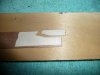
P1040377.jpg
 
Last edited:
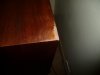
Now you stop, take a moment and try out your patch to make sure it fits into the void, a dry (no glue) test run. As you can see on one patch there is still a tiny void and that is because there is a partial tear in the veneer. Rather than trying to sand down a too thick patch, or, thin a patch to fit where there is still part of the original veneer I just decided that this would be Ok. Yes, it's there if you look, but it is still much better than exposed particle board.

P1040378.jpg

P1040379.jpg

I do worry some about tiny sliver on the end of the bottom patch. My experience with such small pieces is that they can move under pressure and leave a gap or hang out over the particle board. I may try two clamps, one clamping down and one clamping from the side to try and keep this small piece in place.
 
Last edited:
Here we are, swatting fleas with a sledge hammer. Actually this is the only clamp I have that is long enough to allow me to work with the patch. I am using 5 min. epoxy which will give me a little time to work, so I clamped then released pressure, checked out the patch, moved it a smidge and then clamped down again. And don't forget the wax paper, which is placed over the patch and between it and the jaw of the clamp. Now I will let it sit for the day to cure, tomorrow we see how things turned out, then sand off the excess glue and stain the patches.

P1040382.jpg
 
Last edited:
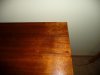
Ok, after half a day for the glue to cure here is one patch. The masking tape has been removed from the veneer and the surface has been hand sanded with 220 grit sand paper to remove excess glue and level the patch with the original veneer:

P1040386.jpg
 
Here are the two patches after they have been stained and excess oil wiped away.

P1040388.jpg

P1040389.jpg

The little sliver of veneer didn't pull loose or grind away during sanding, a very good thing, but... Ah yes, a teaching moment, even though I was using 220 grit sandpaper and hand sanding, while you can't see it in the bottom picture, I did sand through the veneer along the edge of the cabinet.

So if I did it again, I would first carefully remove as much of the excess glue with a fingernail or other small scraper, and then only sand with 400/600 grit paper and watch the pressure your hand is putting down.

But even so, it sure looks better :yes:.
 
...
The Lpads are the two volume controls on each speaker. They look like potentiometers but are in fact Lpads. My W90's called for two Lpads at 50 ohms each but you cannot find 50 ohm Lpads as they were custom made for Wharfedale so I went with standard 8 ohm Lpads found at my local parts house.
...

Teisco, I will do a little more investigating, but I am pretty sure that at least on the W60D (and probably the other models), the potentiometers are just that, potentiometers, and not L-pads. First the resistance between pins 1 and 3 (the outer pins) does not change as the potentiometer is varied. Second these are nominally 50 ohms and not 8 ohms (an L-pad should be matched to the design load.)

HOWEVER, although I believe that the original parts are 50 ohm potentiometers, 8 ohm L-pads do seem to me to be a better (albeit more expensive) solution. I'll have to investigate more later. There would be difference between the cross-over points as the attenuation is varied with a potentiometer. The L-pad should hold the cross-over circuit frequency response as the attenuation is varied.

Since many people are running with only modest attenuation, the question may be more academic than practical.

Also, although my capacitors are 6 uF and 64 uF, these values (at least the latter) do not seem right. 25 uF would seem closer to the desired value for the larger capacitor, I'll have to investigate further. Maybe the caps in the cross-over I am examining are not original.

P.S. Verified the capacitor values with other images on the web, my values are consistent with other posted images.
 
Last edited:
Look at them closely and if they are stamped "50 (ohm symbol) L" then they are L pads. If not stamped "L" after the 50 ohm stamp then they could be potentiometers but mine were all stamped "L" so replaced with same.
 
Teisco and Toups for what it's worth if you go back to my post #35 one of the pictures of the attenuators in my W60D speakers after I cleaned them up is pretty clear, and stamped on the attenuator is "AW-1601 50[ohm symbol] 137-6722". The second attenuator in the crossover isn't as clear. When the needle nose DeoxIT arrives I will try to clean the attenuators and will see if I can get the numbers off the case of all the other attenuators used in these speakers.
 
If after cleaning the attenuators in these speakers they are no longer working what have other W60D owners done to replace them? In briefly looking on the web there are 50 ohm variable attenuators, but from what I have found they are limited to 2-5 watts in power handling capabilities. The L-pad attenuators that Teisco has used are higher rated, up to 100 watts, in their power handling capacity, but are 8 ohm. They also look similar to what is currently in my cross over but there is the difference of going from a 50 ohm to an 8 ohm attenuator, will that matter? Thanks for you advice, again hopefully after cleaning there will be an improvement in the stock attenuators, but it could well be that there won't, which leaves my question-what can be done to replace them?
 
"Is there a difference of going from a 50 ohm to an 8 ohm attenuator, will that matter?"

I asked that question here and also to some techs in my area and the techs agreed that they could see no reason for a 50 ohm Lpad and that 4 or 8 ohm (depending on your speaker impedance) should be just fine.

I then tried an 8 ohm 15 watt Lpad in one speaker as a test and left it open so I could inspect it for heat while running the amp. It never did get hot or even warm and it also attenuated the sound from the mid/highs perfectly so I went ahead and changed all the old 50 ohm Lpads out for 15 watt 8 ohm Lpds and have been using this setup for weeks now with no problem.

But this is my experience and yours may be different, try at your own risk.
 
Last edited:
Here are the two patches after they have been stained and excess oil wiped away.

View attachment 551934

View attachment 551935

The little sliver of veneer didn't pull loose or grind away during sanding, a very good thing, but... Ah yes, a teaching moment, even though I was using 220 grit sandpaper and hand sanding, while you can't see it in the bottom picture, I did sand through the veneer along the edge of the cabinet.

So if I did it again, I would first carefully remove as much of the excess glue with a fingernail or other small scraper, and then only sand with 400/600 grit paper and watch the pressure your hand is putting down.

But even so, it sure looks better :yes:.

Beautiful job, Ishmael... You're gonna' appreciate those all that much more, having put so much effort into the restore. An investment in sweat is usually a good one.
 
Last edited:
While waiting for the needle nose DeoxIT and capacitors to arrive a lateral journey, audio accessories, and the wonder of a small world.

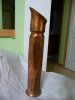
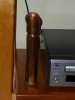
Yesterday while browsing in the local thrift shop, do we ever have too many projects, I came across this copper/brass (?) vase, picking it up I realized it was real metal, heavy, and that the marks of hand work formation were apparent. A copper/brass tube had been formed by a blacksmith into this vase.The end stamp was “Phoenix Forge”.

P1040392.jpg

P1040393.jpg

P1040394.jpg
 
Coming home I discovered again the small world we live in. Phoenix Forge was found online and is a partnership of two young master blacksmiths who live in Carmarthen, Wales. From Wales to the Pacific Northwest (Washington), a wonder.

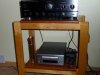
For the moment I will leave it as is and not get the Brasso out to polish it. It looks so right in the rack I made of maple, perhaps next spring when the Rhododendron’s bloom a blossom will be added. But for now, a unique opportunity to test a sound trap? :scratch2:

P1040398.jpg

P1040397.jpg

If there is a soul to things then these are their values, good design, style, craftsmanship and hand work
 
Last edited:
Interesting, the needle nose DeoxIt arrived today so I was able to gradually get some inside the treble and mid-range attenuators and work it about. Before treating the attenuators this speaker would cut out all sound when the mid-range attenuator was turned all the way down to the minimum setting, after treating with DeoxIt it now plays when the mid-range attenuator is turned down to the lowest minimum setting, but…

Now in both speakers when I turn the mid-range attenuator down to the lowest minimum setting the music plays only through the woofer (at a reduced volume) while the mid-range and treble speakers stop playing music. As I turn the mid-range attenuator up in either speaker the music begins to play again through the mid-range and treble speakers with the volume increasing in both speakers up to the maximum setting for the mid-range attenuator. Turning the treble attenuator in either speaker makes no change to the volume of sound coming through the treble/mid-range speakers??? I wonder if replacing the capacitors will change this and allow the treble attenuator to alter the volume of sound through the mid-range and treble speaker, or, if both treble attenuators no longer work, or, if there is some combination of attenuator/treble capacitor problem causing this to happen? :scratch2: Your thoughts are welcome.

As to the attenuators themselves I can report that all attenuators in these W60D speakers have the same markings “AW 1601 50 [ohm symbol] 137 6805”.

The square drive screws are a great replacement, no slippage and no give, unlike the slot headed screws they replace. So now we wait for the new capacitors to arrive. And in the meantime leave both sets of attenuators at their maximum setting and enjoy the music.:music:
 
I wish I could help here. Were the crossovers totally-befuddled when you got them?

I love the '57 Chevy vasepipe... (Because of the top, it has kind of a hot rod vibe, you know?).
 
When the caps get here they will be heading over to my local tech, along with all I have learned in this post from others to be re-caped and then see if we can figure out what is happening in the cross over with the attenuators. I will post what I find out.
 
Ishmael, so how did those GE 26F6871FC 12uF 500V DC High Voltage Oil Capacitor American Made work out? I see they are also selling the 360V versions as well. Do you know if these are audio grade? I want to recap my w60b's and was either going to get these or the cheaper Russian caps K75-10 250V 6.8uf PIO capacitor
 
Picking them up from the stereo shop today, new caps in the cross over, will post pictures and impressions later today.
 
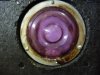
Interesting day, it turned out not only did the crossover need new caps, and the attenuators cleaned, but both tweeters were dead! They are no longer dead, the service tech at our long time stereo shop re-animated them (have an email to find out how he did this, visions of Dr. Frankenstein’s dungeon come to mind). The pink/purple picture is of one of the newly animated tweeters.

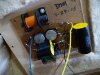
Here are the Dayton poly caps, 25uf 250v and two 4uf 250v in parallel to replace the original 8uf cap, all +/-5%. Nice touch a craftsman initials and dates his work.

P1040531.jpg

P1040538.jpg

Listening to the Beatles #1 CD they just sound so right, voices soaring, in fact now that the attenuators work I backed both the treble and mid-range attenuator off a couple marks from Max, the earlier CD of the Beach Boys was just a little too hot in the Falsetto, whereas backed off Paul and John are again just right. Almost makes you want to get up and twist/swing dance to the music.
 
Back
Top Bottom