• Please note that Audiokarma will be offline briefly for updates early on Monday morning, September 28th.

Who here on AK is using 3D printed parts?

dlucy

dlucy67 (Doug)
Staff member
Moderator
Subscriber
I've bought 3D printed replacement cogs for my Onkyo turntables in the past. Now I'm contemplating how to 3D print some backgrounds for signal strength meters. I'm curious what the rest of you are doing.

Are you using 3D parts of any kind?
If so, did you buy the parts pre-printed from someone? Did you design your own and have a service print them for you? Or did you print them yourself?

If you printed them yourself, what printer did you or are you using?

What kind of 3D print did you use? Resin or FDM? If filament, what material (e.g. PLA, ABS, PET-G, etc.)?
 
Register to hide this ad
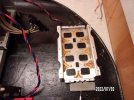
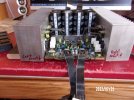
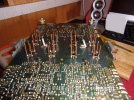
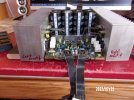
I have a 3D printed capacitor block in my old Onkyo M-508 (pretty sure it is PET-G, I bought it from BK Precision Audio). In stock form the main filter caps sit on an aluminum tray that is screwed onto the heat sinks- they are jammed very close together and run hot. Almost every M-508 that is still working has had its main caps replaced at least once. The printed block lifts them up off the tray and helps keep them cooler and also holds them in place as you have to use long wire leads to solder them back onto the circuit board.


109_2650.JPG2. new cap block 2.jpg22.  ready to install.jpg8. new CDM caps installation.jpg
 
Last edited:
I've 3D printed a lot of things for equipment. Capacitor adapters for original clamps, spacers, washers, a replacement base for old h/k red power buttons (working on full replacement version), LED mounting blocks, a guide lever/ball for a JVC turntable weight, and more. It's been a phenomenal time saver as well as a money saver from anyone who has priced out things at a hardware store lately, and a lot of gas.
 
Last edited:
I have a 3D printed capacitor block in my old Onkyo M-508 (pretty sure it is PET-G, I bought it from BK Precision Audio). In stock form the main filter caps sit on an aluminum tray that is screwed onto the heat sinks- they are jammed very close together and run hot. Almost every M-508 that is still working has had its main caps replaced at least once. The printed block lifts them up off the tray and helps keep them cooler and also holds them in place as you have to use long wire leads to solder them back onto the circuit board.


View attachment 3467304View attachment 3467305View attachment 3467307View attachment 3467310
Nicely done.
 
I design and print whatever I need, as long as printed plastic is a adequate material for the purpose.
I have a printer with a large build volume and a 1 mm extruder nozzle. If I need to do fine detail printing of small parts I do it on one of the many printers at the Milwaukee Makerspace. I'm thinking about making a new printer for smaller parts.
 
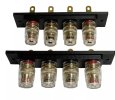
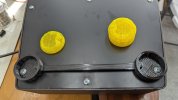
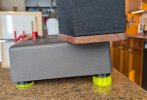
I have somewhat gone off on 3d printing. I've made useful things like banana friendly speaker terminals for some vintage Pioneer, Marantz and Kenwood gear. Some new feet for a Technics SL-110A turntable and so on...

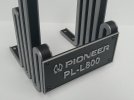
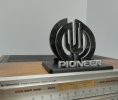
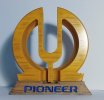
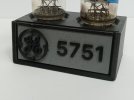
But lately I have been having an absolute BLAST designing audio related stuff that is more cosmetic than useful or stuff that is a bit of both. I have a nice Bambu Labs printer that does multicolor prints and that really opens up some options not available otherwise. I've also taken the time to play with some post-production work on my prints using paints, stains, veneer and the like to create some really nice stuff. Wood filament, a couple colors of stain and a bit of blending via whatever makes some pretty convincing wood prints.

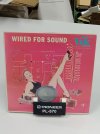
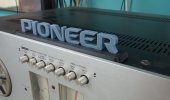
a couple of these pics show the Pioneer logo in a curved design I really like, their logo just naturally lends itself to this. I don't have a design background but I've gotten pretty decent at working in Onshape for my designs.

I've played with a number of PLA filaments and you can do some cool stuff with all the options out there. I've used wood, transparent and marble filaments in interesting ways with some of this. And not shown much in the pics attached (yet) I've also found rub-n-buff a pretty amazing product for post production when I want a more authentic silver or gold look to something.
 

Attachments

  • 20250411_174415[1].jpg
    20250411_174415[1].jpg
    82.8 KB · Views: 49
  • 20250324_063045.jpg
    20250324_063045.jpg
    65.7 KB · Views: 45
  • 20250325_182134.jpg
    20250325_182134.jpg
    92.6 KB · Views: 46
  • 20250409_071713.jpg
    20250409_071713.jpg
    55 KB · Views: 45
  • 20250325_101651.jpg
    20250325_101651.jpg
    76.7 KB · Views: 44
  • 20250325_101730.jpg
    20250325_101730.jpg
    148.5 KB · Views: 41
  • 20250408_072025.jpg
    20250408_072025.jpg
    73.8 KB · Views: 47
  • 20250115_054119.jpg
    20250115_054119.jpg
    87.3 KB · Views: 47
  • 20250121_100123.jpg
    20250121_100123.jpg
    69.7 KB · Views: 44
  • 20250227_094051.jpg
    20250227_094051.jpg
    76.7 KB · Views: 50
Last edited:
Some more stuff
 

Attachments

  • 20250409_191529.1.jpg
    20250409_191529.1.jpg
    96.2 KB · Views: 23
  • 20250329_211004.jpg
    20250329_211004.jpg
    59.2 KB · Views: 26
  • X80 terminal.jpg
    X80 terminal.jpg
    88.5 KB · Views: 22
  • 20250325_095559.jpg
    20250325_095559.jpg
    67.9 KB · Views: 26
  • 20250325_102714.jpg
    20250325_102714.jpg
    64.8 KB · Views: 22
  • 20241219_085008.jpg
    20241219_085008.jpg
    38.5 KB · Views: 24
  • 20250226_052258.jpg
    20250226_052258.jpg
    69.6 KB · Views: 24
I just made a set of feet for the ESL-63s I just finished restoring. The feet were missing when I bought the speakers, so I decided to improve on the factory design. I printed parts that run from the front to the back of the speaker to hold the actual feet. The holders have index ridges in them so that the feet can only fit in one specific orientation. That lets me do things like make 5 degree tilt feet that all sit flat on the floor:

ESL-63 5 degree feet and holder.jpg

ESL-63 5 degree feet on counter top.jpg

The black foot holders are PETG and the feet are TPU. I'll reprint the feet when I get some black TPU...
 
Last edited:
I've made parts and purchased some. A few threads with examples:

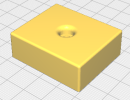
Capacitor Shims

Test Lead Body

Tek Probe 10X Adapter

Leader SG Feet

McIntosh Speaker Terminal Cap:

1744466251238.png 1744466305465.png

Pioneer SX-535 Speaker Fuse Cover:

1744466423012.png

Sony TC-765 Trident Reel Hold-Down Clamp:

1744466578352.png

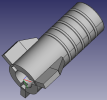
I've learned to use both FreeCAD and TinkerCAD so I now design my own parts almost exclusively. Most are printed in PLA but for parts that need more strength or heat resistance I use PETG.
 
I bought a couple of 3D printed blocks to hold the new capacitors in my old Onkyo M-508... work great and lowered the temperature from 165F to 120F since they are not sitting on the metal tray that is screws to the heat sinks.
1. new cap block 1.jpg2. new cap block 2.jpg22.  ready to install.jpg
 
I bought a couple of 3D printed blocks to hold the new capacitors in my old Onkyo M-508... work great and lowered the temperature from 165F to 120F since they are not sitting on the metal tray that is screws to the heat sinks.
View attachment 3479383View attachment 3479384View attachment 3479385
I hope they didn't print them with PLA!

PLA is really awful stuff. A lot of amateurs use it because it's easy to use and produces nice prints without too much effort, but that stuff will soften just leaving it in a car parked in the sun. In the 8 or 9 years I've been 3D printing stuff, I have probably used a total of 2 kg of PLA- that was before I understood how awful it is. I used to print a lot of ABS, but in the last couple years I tend to use more PETG. It gets stringy, but doesn't smell like ABS when it's printing. I also use a lot of TPU to print things that need to be flexible.
 
Last edited:
Some more stuff
Quick question - what are you using to capture the precise fonts and design that gets 3d printing (e.g. a logo, like Pioneer)? I have a Dynaco ST-150 that I would love to replace the front panel (which has a couple of dents in the aluminum) with a plastic insert showing the same logo. Any ideas?
 
Quick question - what are you using to capture the precise fonts and design that gets 3d printing (e.g. a logo, like Pioneer)? I have a Dynaco ST-150 that I would love to replace the front panel (which has a couple of dents in the aluminum) with a plastic insert showing the same logo. Any ideas?
It's a bit involved but the trick is to get a clean image (jpg,png, whatever) of it and then I use a program called Inkscape to plot out the points of the font or whatever and save that as a dxf file that Onshape (or most any CAD program) can import as a sketch that can than be extruded or whatever like anything else.

Even a picture from your phone/camera if VERY straight would do the trick.

Looking at that unit, it shouldn't be too hard for all that but a challenge you may have is that that piece is bigger than most printer beds so you'd have to deal with blending two pieces of plastic at the seam.

If you decide you want to give it a go, you can message me for help with getting the image manipulated for CAD software or whatnot. I've done it enough it's pretty easy to me now.
 
Last edited:
I hope they didn't print them with PLA!

PLA is really awful stuff. A lot of amateurs use it because it's easy to use and produces nice prints without too much effort, but that stuff will soften just leaving it in a car parked in the sun. In the 8 or 9 years I've been 3D printing stuff, I have probably used a total of 2 kg of PLA- that was before I understood how awful it is. I used to print a lot of ABS, but in the last couple years I tend to use more PETG. It gets stringy, but doesn't smell like ABS when it's printing. I also use a lot of TPU to print things that need to be flexible.
they are PETG
 
I hope they didn't print them with PLA!

PLA is really awful stuff. A lot of amateurs use it because it's easy to use and produces nice prints without too much effort, but that stuff will soften just leaving it in a car parked in the sun. In the 8 or 9 years I've been 3D printing stuff, I have probably used a total of 2 kg of PLA- that was before I understood how awful it is. I used to print a lot of ABS, but in the last couple years I tend to use more PETG. It gets stringy, but doesn't smell like ABS when it's printing. I also use a lot of TPU to print things that need to be flexible.
I use other materials as needed but for the cosmetic stuff (indoors anyways) I find nothing wrong with PLA, and like everything in 3d printing it's gotten better over time.
 
May want to look in to Polymakers HT-PLA. Pretty Amazing stuff.

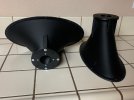
Printing horns with Elegoo PLA+ and tested is by leaving it in my car for a couple days this summer. So far have had no issues melting, but the horns are a half inch thick, so they hold their shape pretty well.
 

Attachments

  • IMG_1753.jpg
    IMG_1753.jpg
    58.2 KB · Views: 39
  • IMG_1604.jpg
    IMG_1604.jpg
    55.6 KB · Views: 38
Back
Top Bottom