


You are using an out of date browser. It may not display this or other websites correctly.
You should upgrade or use an alternative browser.
You should upgrade or use an alternative browser.
Who here on AK is using 3D printed parts?
- Thread starter dlucy
- Start date
I've printed gears for my lathe:


Been running that way for several years now. No signs of wearing and it took the "ringing" noise out of the gear train. ABS print.
Assorted bits for building slot car tracks:

That's pretty much all PLA printed. Mostly because that;s what I started learning with.
RC cars/trucks:

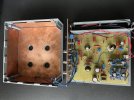
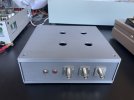
Bits for audio:
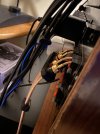
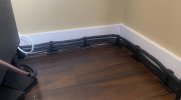

And all kinds of other stuff. One of the other places I use it is restoring vintage sewing machines. They started using a lot of nylon gearing in teh 80's+ and once they crack, you have to make new ones. 3D printer is perfect for that.
I primarily print in ABS. Gave up PLA years ago. Abs is a little trickier to print with, but it has advantages over PLA.
3d printing is great for those little bits and pieces that tie all your other things together.
Places like thingiverse is a free to download repository where you can find lots of objects. Chances are if you need it, someone else does too and they may have already made it. TinkerCad is a good free site for beginners to play around building stuff without having to know CAD. Other than that, you pretty much need to learn CAD.
3D prited pars are not for everything, but there are places where it's just right.
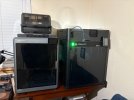
My printer started out as a Creality CR10 V2. First add was a BLTouch sensor. Then an E3D Titan direct extruder made it a V3. An E3D Volcano hot end followed to keep up with larger diameter nozzles, then a stainless print bed and finally a custom firmware version of Marlin made it what it is today. Also has an enclosure to make for stable temps when printing ABS.
Been running that way for several years now. No signs of wearing and it took the "ringing" noise out of the gear train. ABS print.
Assorted bits for building slot car tracks:
That's pretty much all PLA printed. Mostly because that;s what I started learning with.
RC cars/trucks:
Bits for audio:
And all kinds of other stuff. One of the other places I use it is restoring vintage sewing machines. They started using a lot of nylon gearing in teh 80's+ and once they crack, you have to make new ones. 3D printer is perfect for that.
I primarily print in ABS. Gave up PLA years ago. Abs is a little trickier to print with, but it has advantages over PLA.
3d printing is great for those little bits and pieces that tie all your other things together.
Places like thingiverse is a free to download repository where you can find lots of objects. Chances are if you need it, someone else does too and they may have already made it. TinkerCad is a good free site for beginners to play around building stuff without having to know CAD. Other than that, you pretty much need to learn CAD.
3D prited pars are not for everything, but there are places where it's just right.
My printer started out as a Creality CR10 V2. First add was a BLTouch sensor. Then an E3D Titan direct extruder made it a V3. An E3D Volcano hot end followed to keep up with larger diameter nozzles, then a stainless print bed and finally a custom firmware version of Marlin made it what it is today. Also has an enclosure to make for stable temps when printing ABS.
Last edited:

Blue Shadow
Waiting for Vintage Gear from this century
Had the file since 2022 but got the Kenwood KD-600 dust cover hinge printed today at my brother’s. My hinges have been reinforced before they broke but I have another set that are broken. If I can reassemble the hinge,, I’ll get another piece printed and have some working hinges. Good visit with my brother today as he talked about the metrology gear he bought a week or so ago at an auction. Measuring to .0001 in. Don’t know if I have to have that but pretty cool.

mrehorst
Super Member
My printer has a 300x300x695 mm build envelope, enclosed, and heated. I sometimes print lamps:
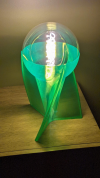
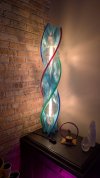
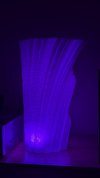
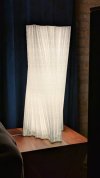
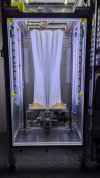
Here's one on the printer:
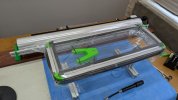
And I print a lot of other stuff, as needed, such as parts for this diaphragm film dispenser and stretcher for Quad ESL-63 electrostatic drivers:
Toys for Ms. Kitty: https://photos.app.goo.gl/bQgrLhTrsug1RbCdA
Replacement switch caps:
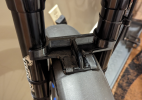
A fender mount for my bike:
And thousands of other things over the last 12 years or so that I've been building printers and printing with them.
Here's one on the printer:
And I print a lot of other stuff, as needed, such as parts for this diaphragm film dispenser and stretcher for Quad ESL-63 electrostatic drivers:
Toys for Ms. Kitty: https://photos.app.goo.gl/bQgrLhTrsug1RbCdA
Replacement switch caps:
A fender mount for my bike:
And thousands of other things over the last 12 years or so that I've been building printers and printing with them.

mrehorst
Super Member
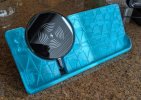
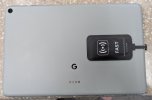
The latest: I printed a wireless charging dock for the Pixel tablet I use to select music on Tidal and LMS.
kgetchmaine
Active Member
Only one thing so far. I found a file online for the tone arm holder for my Thorens TD145. My cousin has a 3d printer and he printed it for me. Sorry dont know what filament was used.
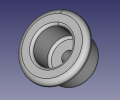
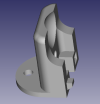
Fresh off the fdm printer:
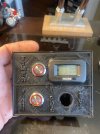
needed a bracket for a stylus timer and some lighting.
Intended location:
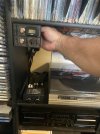
still needs post print processing. Probably got a little too fancy with the details for a .4 nozzle and could have chosen better print plate positioning to deal with some of the abs shrinkage.
I might do another with a cleaner, simpler design.
needed a bracket for a stylus timer and some lighting.
Intended location:
still needs post print processing. Probably got a little too fancy with the details for a .4 nozzle and could have chosen better print plate positioning to deal with some of the abs shrinkage.
I might do another with a cleaner, simpler design.
Decided to just toss the first attempt.
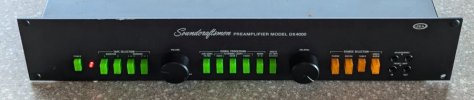
now going for a mounting box behind the preamp:

Thrown together quickly on tinkercad. Tinkercad is just easier for simple things like this.
open space below is for the cables for the preamp to pass through so the box can sit close to the pre.
20 hr print underway….
now going for a mounting box behind the preamp:
Thrown together quickly on tinkercad. Tinkercad is just easier for simple things like this.
open space below is for the cables for the preamp to pass through so the box can sit close to the pre.
20 hr print underway….

I used the printer at work to make record clamps:
3D Printer Fun: Record Clamp
Thought some might find this interesting... melding of my two favorite hobbies Audio & 3D Printing. Been short on audio related funds, yet been jonesing to try out a "record clamp" on my setup... thanks to recent AK thread(s). So thought I'd 3D print one to "trial." After searching the web for a...
audiokarma.org
mrehorst
Super Member
I'd probably design for and print with TPU, using a slightly oversized hole with a few crush ribs to grab the spindle. All one piece!I used the printer at work to make record clamps:
3D Printer Fun: Record Clamp
Thought some might find this interesting... melding of my two favorite hobbies Audio & 3D Printing. Been short on audio related funds, yet been jonesing to try out a "record clamp" on my setup... thanks to recent AK thread(s). So thought I'd 3D print one to "trial." After searching the web for a...audiokarma.org


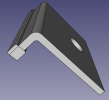
Another 3D project today. The Sansui 5500 I'm working on had a broken face plate mounting tab. Pretty quick to draw one up on FreeCAD and I printed it with PETG. Drops right in . . . not as refined as the original, but nobody will see it anyway.




I recently started playing with TPU, and have printed out replacement pads for some Dytex vises I have (old ones were likely from the 70s or 80s and were quite dried out/hardened/beaten up). I've since gotten some gray filament and printed them again, but haven't taken any photos of the gray ones. I'm impressed with the material's toughness, but it remains to be seen how they'll hold up.
I printed them face down figuring that would give stronger fronts resulting in the support matrix at bottom left in the pic below (which was great fun to remove), but that was probably not necessary from a mechanical standpoint as the stuff seems to adhere to itself pretty tenaciously and doesn't seem particularly inclined to separate along layer lines. Regardless, I like that the build plate texture is present on the face, so if I make more I'll still print them face down.
Original pad at top right in photo:

Vise with pads installed:


-Pat
I printed them face down figuring that would give stronger fronts resulting in the support matrix at bottom left in the pic below (which was great fun to remove), but that was probably not necessary from a mechanical standpoint as the stuff seems to adhere to itself pretty tenaciously and doesn't seem particularly inclined to separate along layer lines. Regardless, I like that the build plate texture is present on the face, so if I make more I'll still print them face down.
Original pad at top right in photo:
Vise with pads installed:
-Pat
I like it too, looks great. Have much issues with the tpu?I like that the build plate texture is present on the face, so if I make more I'll still print them face down.