• The move to the new server is done. There are some software and database maintenance updates in process. This has us passing the hat around to help out. We appreciate any donations. Seriously, even a dollar helps. The payment page may be found here - https://www.audiokarma.org/support.html

Yamaha C-80 lost sound switching inputs

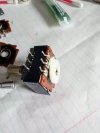
Well here they are after cleaning don't see anything suspect
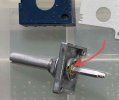
Make sure you clean the shaft at where it connects to the housing. There’s a metal contact ring of sorts (see below) that provides grounding/support(?) at that junction and if dirty/damaged, you get potential malfunction in terms of sound balance (L/R), audio cut-off, audio quality, etc.

Also make sure turning the shaft has absolutely no rotational as well as non-rotational play. Mine did and caused audio disconnects, volume reduction, and cracking noise. I had to finally change the housing.

F35F4878-6BA2-4EDA-8D82-83E7271905F0.jpeg
 
Make sure you clean the shaft at where it connects to the housing. There’s a metal contact ring of sorts (see below) that provides grounding/support(?) at that junction and if dirty/damaged, you get potential malfunction in terms of sound balance (L/R), audio cut-off, audio quality, etc.

Also make sure turning the shaft has absolutely no rotational as well as non-rotational play. Mine did and caused audio disconnects, volume reduction, and cracking noise. I had to finally change the housing.

View attachment 3317757
Ok will do. Getting it back together with no play seems daunting
 
Ok will do. Getting it back together with no play seems daunting
Putting it back together will not cause any free play, I was referring to any possible damages up until now. If there’s no free play, it means the shaft is healthy and just needs cleaning. Also don’t forget to use fader lube on the wafers (lightly) after cleaning or you’ll get noise and cracks when you turn the volume because of the little combs scratching along the resistive surface.
 
Putting it back together will not cause any free play, I was referring to any possible damages up until now. If there’s no free play, it means the shaft is healthy and just needs cleaning. Also don’t forget to use fader lube on the wafers (lightly) after cleaning or you’ll get noise and cracks when you turn the volume because of the little combs scratching along the resistive surface.
Thanks I have some deoxit f100 and the wafers will get a single drop and spread out with a q tip . Should I lubricate the shaft? Seems like I should
 
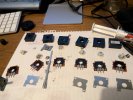
Reassembly begins...

Before this step I forgot to take pictures... Whoops

Not sure which piece is next will have to experiment
 

Attachments

  • PXL_20241013_195847145.jpg
    PXL_20241013_195847145.jpg
    92 KB · Views: 4
Did your shaft get the ultra sonic bath too? Since I don't have an ultrasonic cleaner jones I use PB blaster between the outer & inner shafts. The only liquid I prefer more than beer.

Esoteric Redneckisms
 
Did your shaft get the ultra sonic bath too? Since I don't have an ultrasonic cleaner jones I use PB blaster between the outer & inner shafts. The only liquid I prefer more than beer.

Esoteric Redneckisms
It did go in the utrasonic bath but when it was all together I've cleaned it off with rubbing alcohol and applied a fresh application of fader grease
 
Nah a better tech would have this working right now. Detailed potentiometer restoration is new to me.

I've recreated the scene of the crime
 

Attachments

  • upload_2021-5-28_22-11-56.png
    upload_2021-5-28_22-11-56.png
    697.1 KB · Views: 8
  • PXL_20241015_004659142.jpg
    PXL_20241015_004659142.jpg
    98.7 KB · Views: 8
Ok putting it partially back together I'm not getting good readings from the loudness part of the pot which if i understand correctly is closest to the loudness knob. I think I see why. In the image the 2nd wafer for the loudness part of the pot is just worn and the contact with the legs is just gone. The first wafer looks ok and is the last one in the pot.

I think I could order this pot and pull the wafers out of it as long as it's the same size.
 

Attachments

  • PXL_20241016_022254535.MP.jpg
    PXL_20241016_022254535.MP.jpg
    104 KB · Views: 13
Ok putting it partially back together I'm not getting good readings from the loudness part of the pot which if i understand correctly is closest to the loudness knob. I think I see why. In the image the 2nd wafer for the loudness part of the pot is just worn and the contact with the legs is just gone. The first wafer looks ok and is the last one in the pot.

I think I could order this pot and pull the wafers out of it as long as it's the same size.
That’s just a guess, may or may not be the problem. Ordering Alps pots from Mouser, others, is possible but make sure you get the same audio taper B, A, etc. which is usually specified in the schematic.

The pot in the link above is A-curve, and so is the one in the loudness pot in C-80. However, the two in the picture above look somewhat physically different, don’t know if that’ll be an issue.

Edit: One of the wafers in the posted photo (Left) doesn’t seem to have the ‘Y‘ shaped connector/sweeper.
 
Last edited:
That’s just a guess, may or may not be the problem. Ordering Alps pots from Mouser, others, is possible but make sure you get the same audio taper B, A, etc. which is usually specified in the schematic.

The pot in the link above is A-curve, and so is the one in the loudness pot in C-80. However, the two in the picture above look somewhat physically different, don’t know if that’ll be an issue.

Edit: One of the wafers in the posted photo (Left) doesn’t seem to have the ‘Y‘ shaped connector/sweeper.
They are from different parts of the pot. The one on the left is from the last gang 53k and the right is for loudness 50ka . Looking at the one on the right I have put my ohm meter on it and I can't get good readings.
 
They are from different parts of the pot. The one on the left is from the last gang 53k and the right is for loudness 50ka . Looking at the one on the right I have put my ohm meter on it and I can't get good readings.
I’d assemble everything and try it once before any further drastic measures. Also, you should measure any resistance through the connected leads only and not directly from the resistive pads themselves … I think you know that already.
 
Back
Top Bottom