• The move to the new server is done. There are some software and database maintenance updates in process. This has us passing the hat around to help out. We appreciate any donations. Seriously, even a dollar helps. The payment page may be found here - https://www.audiokarma.org/support.html

Yamaha PX-2 - Starting My Journey

lJelal

Member
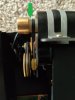
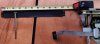
I have acquired a PX-2 which is in very good shape except the arm left / right movement was, of course, stalling. I flipped & reversed the arm belts. I also tried to add a bit more tension & grip by placing a rubber piece (see Motor Belts image) on the motor. The previous owner apparently tried to fix the problem by adding another belt.

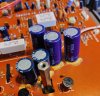
After putting everything back together, the arm moves up & down with buttons, but neither auto nor manual left / right movement of the arm works. Manually turning the motor wheel moves the arm fine. Please advise on best approach for troubleshooting. Also, please check the purple pointers. The yellow stuff looks out of place to me.
 

Attachments

  • Serial Number.jpg
    Serial Number.jpg
    51.4 KB · Views: 97
  • Purple.jpg
    Purple.jpg
    131.9 KB · Views: 100
  • Motor Belts.jpg
    Motor Belts.jpg
    55.3 KB · Views: 99
Last edited:
Register to hide this ad
That yellow stuff is probably glue to keep the capacitors in place. So nothing to worry about. Or what do you other members think?

Unfortunately I cannot advice on your other questions but other members surely will.

Good luck!
 
Yellow is glue. There are lamps and sensors that drive movement as well as the motor and belts. If the motor and belts are ruled out you should be looking at the lamps and sensors. There are some great threads on this forum for he proper repair of these arms and tables.
 
Something looks seriously out of whack with the drive motor belts.....the service manual, which you can get at vinylengine, shows only one (square) belt. You should be able to source one of those and like MRL pointed out, there are some other threads here that will be useful to you for your repairs that you might read before you get too far into this project. I have a PX-3 and it has three square belts so may be very different from the PX-2.
 
Last edited:
Thanks. I have reviewed those previous posts & will continue to reference them.

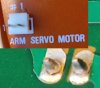
I found one problem for sure - this solder is cracked and the post is loose.

Resoldered but still no L/R arm movement whatsoever
 

Attachments

  • Motor 2 Pin Post.jpg
    Motor 2 Pin Post.jpg
    84.2 KB · Views: 39
Last edited:
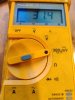
TP1 & TP2 @ power on ~27-31 (I am not a multimeter expert. I hope someone can confirm I am setting it correctly).
 

Attachments

  • multi-300mv.jpg
    multi-300mv.jpg
    87.6 KB · Views: 29
So the motor is confirmed to be good by separate 5 volt power supply with no belts connected. Multimeter shows 2.85 & -2.85 @ ASM #1 for slow movement which is slightly out of range according to manual (says should be 1.8 +/- 1 - should that be adjusted?)

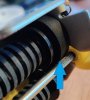
I turned my attention back to the belts (as Fishead mentioned) as reconnecting in the configuration as I received - caused the arm to stop moving. So I reconfigured belts according to manual. The belts & arm L/R movement are working. Now the remaining issue - slippage between the grooved small belted metal wheel & the wheel that turns the large arm belt.

I read someone used a RC wheel? Does anyone know the part number to order?
 

Attachments

  • slippage.jpg
    slippage.jpg
    92 KB · Views: 39
Last edited:
I cleaned the rubber wheel with a q-tip and removed a lot of black gunk that was making the rubber wheel slippery. I also adjust the tension on the crossbar. The metal grove is now turning the rubber wheel. Unfortunately there is slippage between the large plastic wheel and the big belt now. I thought about using grip tape around the plastic wheel to help it grip the large belt better. Any other ideas? Is there any place that should be lubricated which would help?
 
Last edited:
Go to Vinyl Engine and pull up the PX-3. There is a procedure that someone made up on how to service the belt. It works. Involves removing it, cleaning it well and swapping it end to end while also flipping it over. I don't recommend shortening the springs.

BillWojo
 
Why? Because if everything is working correctly there is no need to and your putting extra stress on the drive mechanism. Your also increasing friction on the drum axle's from the additional tension making it more likely to slip elsewhere.
Yamaha engineers were pretty smart, bring it back to original spec and it will work fine.

BillWojo
 
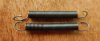
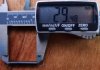
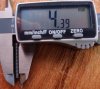
Looking at the springs - one is longer than the other... I think the 29.5mm is stretched as it compresses when putting force on the calipers.

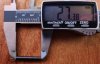
That would make the original (coil to coil AKA not including hooks) ~ length 1 1/16 (1.11) in. & width 7/32 (0.19) in. Hook to hook is ~ 1 5/8 (1.64) in. / 41.6 mm.

Wire diameter is 0.027 in. (0.67 mm).

Any thoughts on a kit like this? Like if those would be strong enough?

https://www.amazon.com/XLX-200PCS-Extension-Compression-Assortment/dp/B07HMRVZF3
 

Attachments

  • springs.jpg
    springs.jpg
    72.7 KB · Views: 31
  • 29.5mm.jpg
    29.5mm.jpg
    82.9 KB · Views: 29
  • 27.4mm.jpg
    27.4mm.jpg
    90.6 KB · Views: 27
  • 4.4mm.jpg
    4.4mm.jpg
    119.4 KB · Views: 28
Last edited:
Why? Because if everything is working correctly there is no need to and your putting extra stress on the drive mechanism. Your also increasing friction on the drum axle's from the additional tension making it more likely to slip elsewhere.
Yamaha engineers were pretty smart, bring it back to original spec and it will work fine.
The belt will not be working correctly. After 3 decades both the drive belt and the springs have lost their tension and are significantly lengthened. Don't worry about the drum axle if you restore the tension as it was when it was new. I have restored 5 PX TT's and they are all working perfectly since up to seven years after cleaning and mounting new springs.
Sorry, this is simply nonsense.
 
My large belts measure very close to what has previously been discussed:

Can you please share what new springs you used?

Measure the belts from the holes in the middle (not the spring eyelets because you need to measure them to 1/32") The center of the middle holes is 10 1/4", end to end. Add the 2 lengths and subtract this from 21 1/2". The difference is the amount you'll need to tighten the springs to restore as new geometry
 

Attachments

  • big.belt.jpg
    big.belt.jpg
    88.9 KB · Views: 25
Last edited:
I suspect that your springs have already been shortened, if factory they wouldn't be different lengths.
My belt didn't show any stretch either. I suspect it's a rubberized cloth.

BillWojo
 
Looking at the springs - one is longer than the other... I think the 29.5mm is stretched as it compresses when putting force on the calipers.

That would make the original (coil to coil AKA not including hooks) ~ length 1 1/16 (1.11) in. & width 7/32 (0.19) in. Hook to hook is ~ 1 5/8 (1.64) in. / 41.6 mm.
Wire diameter is 0.027 in. (0.67 mm).
Any thoughts on a kit like this? Like if those would be strong enough?
https://www.amazon.com/XLX-200PCS-Extension-Compression-Assortment/dp/B07HMRVZF3

The hook ends of both springs are not original; they have been played with, perhaps bent to make them shorter and then un-bent some.
The lower spring has been stretched (the left end coils are opened a bit. The springs are coil bound in compression/relaxed if original)
Believe me, it didn't stretch from service. These are forever springs until met with moderate to extreme bozoism!) However, mild stretching will have negligible affect on the spring rate other than you need to match the relaxed length of both and return them to the original un-loaded length (by bending the hooks). If I had a deck apart, I would measure them for you.
Since the bottom spring is already knackered, (you can't take out the stretch and restore it) you could fairly well match it to the other by shortening the hooks to duplicate the top spring. Before you do that, somebody should measure an original un-altered spring when it is closed, and use that as the dimension to match at the hooks of both springs. Practically speaking, it's a lot closer to original than searching for an identical spring, there's too many variables to deal with!
 
I've tried adjusting it endlessly but can't seem to get the belt not to slip. I am considering painting the plastic belt turning wheel with liquid rubber to give it better traction on the big belt. How do I detach it from the metal guides that hold it in place?
 
Last edited:
Back
Top Bottom