

You are using an out of date browser. It may not display this or other websites correctly.
You should upgrade or use an alternative browser.
You should upgrade or use an alternative browser.
Yet another Heath W5M rebuild
- Thread starter ab0ez
- Start date


Pio1980
AK Member
Here's the first filter section. Since the original can caps are just for appearance, the first filter section (before the choke) is a 4uF 600VDC oil filled cap with a 1M bleeder and a .01Uf 1kv bypass cap.
Why a 4uF cap? Two reasons: 1) Heath ran the daylights out of the output tubes and today's higher line voltages are a sure-fire recipe for shortened output tube life. The 4uF input cap to the choke will knock a few volts off of the B+ and get it down to about where it should be. 2) The power transformers on the W5Ms have a reputation of being somewhat fragile on the high voltage windings. Couple that with the quick warm-up characteristic of the 5R4 rectifier trying to feed a large capacitor load at start up, and you get the idea.
Of course, surgistors will also be added in series with the AC input on the primary side of the power transformer.
Well, there's the undersized 6V6-sized OPTs in some versions---.

ab0ez
AB0EZ
Well, there's the undersized 6V6-sized OPTs in some versions---.
Yeah, not something you want to slam repeatedly with a high B+.

Yeah, you could call it that or you could call it "tuning" the Pi filter section for the output wanted.
I like "tuning" much better! Does this compromise regulation in any way?
ab0ez
AB0EZ
I like "tuning" much better! Does this compromise regulation in any way?
Nope, not at all, especially when you see what's gonna be right after the choke!
ab0ez
AB0EZ
I'm following this with great interest. Would I be advised to let the thread play out before buying parts? It seems you have this pretty well dialed in as far as improvements and component value changes are concerned. I can do the cosmetics in the meantime.
I'd say get your chassis cleaned up and ready for stuffing. Also, make sure and use new tube sockets. The sockets in the W5M, especially the rectifier sockets, are notorious for being leaky and giving all sorts of whacky problems. It's not worth the time, trouble and potential headache to even keep them.
If you like, I can put together a parts list and post it so you can see what parts you'll need.
Br1ck, you don't have to powder coat it. I have had good luck painting Dynaco chassis with Rust Oleum Hammertone.
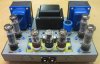
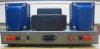
Another thing to think about...I'm not familiar with these amps but on a Dynaco ST70, I like to make the power cord hole bigger for a IEC receptacle, drill holes for bias test jacks and holes for neutrik connectors on the front prior to painting.
Another thing to think about...I'm not familiar with these amps but on a Dynaco ST70, I like to make the power cord hole bigger for a IEC receptacle, drill holes for bias test jacks and holes for neutrik connectors on the front prior to painting.
Attachments
ab0ez
AB0EZ
Br1ck, you don't have to powder coat it. I have had good luck painting Dynaco chassis with Rust Oleum Hammertone.
Another thing to think about...I'm not familiar with these amps but on a Dynaco ST70, I like to make the power cord hole bigger for a IEC receptacle, drill holes for bias test jacks and holes for neutrik connectors on the front prior to painting.
The W5M already has bias test points on it, so that's covered. I wouldn't recommend drilling or altering the chassis unless they're a rusty basket case. The original finish on these amps was shot and the owner wanted them powder coated, so that's why the decision was made.
I got the first coat of satin black paint down on the chokes. That color is gonna be the bomb for these amps! Ugh, now to sand down the power transformers.
I know I don't HAVE to powder coat the chassis. I just like the durability of a powder coat. I powder coated my Empire 208 that was really rough in a slightly textured charcoal grey and never regretted it. My chassis will have to be bead blasted anyway, along with the tranny covers, so may as well try to find a shop that will do both. I saw an ST 70 that was done in fire engine red that looked really sharp. Chassis and trannys both were given the red treatment. We'll see what the pocketbook looks like when the time comes.
ab0ez
AB0EZ
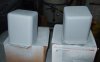
I just got done sanding down and priming the power transformers and likewise there was rust underneath the paint. As I suspected, these are very early production W5Ms. There is no surgistor, or any of the other later changes Heath made during the production run. In fact, both power transformers are date coded for the 34th week of 1954. Since Heath introduced the amp in 1955, it makes sense.
Attachments
I just got done sanding down and priming the power transformers and likewise there was rust underneath the paint. As I suspected, these are very early production W5Ms. There is no surgistor, or any of the other later changes Heath made during the production run. In fact, both power transformers are date coded for the 34th week of 1954. Since Heath introduced the amp in 1955, it makes sense.
So ... what were the updates and why? Does it matter?
-SD:

Fran604g
Love at first sound...
One of these days I'm gonna do an amp in John Deere colors.....just because!
You just HAD to put that idea in my head, didn't you. :thmbsp:
