• The move to the new server is done. There are some software and database maintenance updates in process. This has us passing the hat around to help out. We appreciate any donations. Seriously, even a dollar helps. The payment page may be found here - https://www.audiokarma.org/support.html

Zilch's AK Design Collaborative - Econowave Speaker

Looks like you're trying to cut the hard way.

Think "parting tool." You're going to need a sharp point to slice the fibers cleanly across the grain; grind a rake on it.... :yes:

That was a first attempt and not too bad. I purposely left plenty of material to allow me to modify the point. It will have to be much narrower. It worked much better than I expected, though. Ideally the groove should be just wide enough to contain the blade of a saw and keep it from wandering.
I dragged out Machinery's Handbook and had a look at some cutting points. I think I have a better idea now of what shape to go for.

All this trouble to avoid using a router, but it's for a good reason.
 
Last edited:
Truthfully, I have the formulas... but I find myself just using BassBox to do the passive radiator calculations. Just a really useful program for such...

And yes... there definitely COULD be an advantage using a PR in an E-wave system. The woofer is playing up to 1KHz... that's a lot of midrange "bouncing around" inside the cabinet... which might "escape" through a port, but will definitely be stopped by a PR (no direct "hole" to the outside)...

Regards,
Gordon.

Gordon, I sent you a PM about some surrounds. Did you get it, if not let me know.
 
thanks Zilch, Iooks like will have to try a different woofer from the Kappa 12a, kinda too much work to get it right. what specs in a woofer should I look for , if I wanted it to mate well with the D210 ti econowave. any tips? ( fs, qts, xmax, qes, gms, freq range response values etc....)
As I suggested, use D220Ti. I'd like to see the Kappa 12 be made to work, because like yourself, many builders apparently want a high-efficiency design. Somebody's got to bite the bullet and make it happen, is all; E'Wave itself is certainly up to the challenge.... :yes:

All this trouble to avoid using a router, but it's for a good reason.
Frankly, Oldskl's sheetrock screw (alt deckscrew, which is hardened and mighty sharp, some of them, BTW,) would be better than a custom-ground cutting bit for that. I believe you're over-thinking and over-doing this....
 
Last edited:
...I dragged out Machinery's Handbook and had a look at some cutting points. I think I have a better idea now of what shape to go for.

All this trouble to avoid using a router, but it's for a good reason.

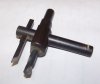
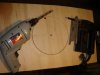
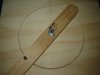
Here's a couple pictures of the cutting point on my smaller fly cutter. It seems pretty simple, and doesn't grab at changes in the grain. Note how the outside edge of the cutter blade is angled inward, so it doesn't drag on the work.

I am anxious to hear the reason you don't want to use a router, but I will be patient. :lurk:
 

Attachments

  • circlecutter1.jpg
    circlecutter1.jpg
    58.6 KB · Views: 18
  • circlecutter2.jpg
    circlecutter2.jpg
    53.5 KB · Views: 21
Last edited:
Here's a couple pictures of the cutting point on my smaller fly cutter. It seems pretty simple, and doesn't grab at changes in the grain. Note how the outside edge of the cutter blade is angled inward, so it doesn't drag on the work.

I am anxious to hear the reason you don't want to use a router, but I will be patient. :lurk:

I just opened the mail and I have one of that exact Craftsman cutter now. *edit* similar but not exact */edit* I was just about to post a pic. I got the jig with lots of extra cutters, drills, set screws and a hex wrench for $20 so why not experiment? I'll try it out just to be thorough. Then I'll try the deck screw option. My OLDSKL Cesar jig has a fat shoulder bolt as a pivot. I like that option because it will hold position better than a deck screw as a pivot. I'll probably retain that feature with whatever cutter I use because it's a stock piece of cheap hardware and works well.

*EDIT*

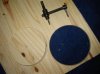
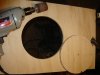
This is a PERFECT hole. It's just a soft wood board but the same results should be attainable on plywood if the cutter is sharp and the feed is slow enough.
Lessons learned:
* at large diameters the rotation must be much slower. My DP's min speed is 650 RPM. I'd have liked to use half of that.
* the off center mass of the cutter makes the drill press wobble.
* it takes a DP with a deep reach to use the full length of the cutter or the shaft hits the column. Duh.
* clamp the work piece.
* throws an enormous amount of wood dust around.

I think the thing to do is cut from the back and leave an edge on the front to avoid tearing the surface when teh cutter goes through. Knock the plug through and sand back the rim.

This cutter's max hole size is too small for this project but it should work great for smaller drivers.

attachment.php


attachment.php
 

Attachments

  • Dsc04634.jpg
    Dsc04634.jpg
    34.5 KB · Views: 214
  • Dsc04635.jpg
    Dsc04635.jpg
    109.2 KB · Views: 219
Last edited:
OLDSLK Cesar Jig hole results

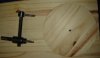
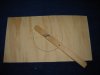
Here are the results of cutting a hole using the scoring jig suggested by OLDSKL and a jigsaw.
I scored the groove about 3/16 deep. I drilled a large start hole near the groove. The jigsaw blade was a 1/4" wide fine tooth. Going very slowly I kept slightly to the inside edge of the rather wide groove. It took 20 minutes to score the groove with the jig and 10 minutes to cut the circle with the saw. There were irregularities but I sanded them out easily by hand with coarse sandpaper.
Scoring the groove takes a lot of time and muscle. The threads of the deck screw are scraping the edges of the groove and gouging out a lot of material the hard way. I used a coarse thread screw and had to advance it 1/8 turn at a time. You have to constantly clear the groove of sawdust or the point hangs up. It works great but there's just no way to do this fast.
I might try this with a fine thread screw if I can find one with an appropriate point. The less aggressive threads might reduce the force necessary.
The outer edge of the scored groove makes a very nice finished edge when lightly sanded.

attachment.php


attachment.php


attachment.php


attachment.php


attachment.php
 

Attachments

  • AKDsc04643.jpg
    AKDsc04643.jpg
    124.8 KB · Views: 312
  • AKDsc04642.jpg
    AKDsc04642.jpg
    134.2 KB · Views: 319
  • AKDsc04640.jpg
    AKDsc04640.jpg
    140.5 KB · Views: 320
  • AKDsc04637.jpg
    AKDsc04637.jpg
    136.4 KB · Views: 324
  • AKDsc04636.jpg
    AKDsc04636.jpg
    112.2 KB · Views: 321
Zilch, I have a couple eminence asd1001s hf driver, any idea if these can be use in some sort of econowave xover at what frequency , maybe not the same horn but any other suggestions?
 
Zilch, I have a couple eminence asd1001s hf driver, any idea if these can be use in some sort of econowave xover at what frequency , maybe not the same horn but any other suggestions?
No clue, but there's no harm in trying them, I shouldn't think.... :dunno:
 
Been up all night working on these speakers and I can't sleep

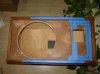
It's 7:20 AM and I need to sleep, but here's a look at an OLA speaker stripped down and ready to be cut up to take the waveguide and relocated woofer. I took pix of the whole process, so this took a long time. Getting the crossover off of the cabinet took a certain number of Sailor Exclamations and other strong language.

attachment.php
 

Attachments

  • AK Dsc04662.jpg
    AK Dsc04662.jpg
    46.2 KB · Views: 204
Here are the results of cutting a hole using the scoring jig suggested by OLDSKL and a jigsaw.
I scored the groove about 3/16 deep. I drilled a large start hole near the groove. The jigsaw blade was a 1/4" wide fine tooth. Going very slowly I kept slightly to the inside edge of the rather wide groove. It took 20 minutes to score the groove with the jig and 10 minutes to cut the circle with the saw. There were irregularities but I sanded them out easily by hand with coarse sandpaper.
Scoring the groove takes a lot of time and muscle. The threads of the deck screw are scraping the edges of the groove and gouging out a lot of material the hard way. I used a coarse thread screw and had to advance it 1/8 turn at a time. You have to constantly clear the groove of sawdust or the point hangs up. It works great but there's just no way to do this fast.
I might try this with a fine thread screw if I can find one with an appropriate point. The less aggressive threads might reduce the force necessary.
The outer edge of the scored groove makes a very nice finished edge when lightly sanded.

attachment.php


attachment.php


attachment.php


attachment.php


attachment.php

That looks great. Did you find that the blade wanted to ride in the groove. This method may take longer and may not leave as perfect of a circle as a router, but it also doesn't leave the mess that a router would leave.
 
That looks great. Did you find that the blade wanted to ride in the groove. This method may take longer and may not leave as perfect of a circle as a router, but it also doesn't leave the mess that a router would leave.

It was definitely easier to follow the groove than to follow a line. The groove was wider than the blade so I hung to the inside of the groove. This allowed me to sand the hole out to a finished diameter with a nice edge.
It takes some concentration to do correctly but then anything does. Routers don't run themselves. I've had a router for 10 years and I'm still not perfect with it despite having worked in a machine shop. Either way there's a learning curve (NPI) and some skill. Given that I'll take the stick and screw solution.

That said, having demonstrated a cheap workable solution for woofer holes I may cheat. Having a Bridgeport mill and a flycutter available is too much temptation. Instead of sleeping last night I worked out a tricky method for installing grillecloth from the inside up underneath the edge of the veneer to hide the woofer. If this works it will look really cool but it requires a tricky profile on the hole.

If I think of any more ways to complicate this simple project I'll definitely report them here.

*EDIT*

Here's the grille cloth solution. Polyester Jersey fabric stretched over a piece of semi rigid pneumatic plastic tubing. Tubing cut to exact diameter and spliced together with a piece of thick arbor wire inside. Tubing is held in place at 4 positions 90 degrees apart with a small brad nail through a hole drilled in the tubing to keep it from being pushed into the hole. Voila, perfect internally mounted grilles out of 25 cents worth of materials. No tricky profile on the hole needed.
*EDIT AGAIN*

That worked so well I want to work out a way to put grille cloth over the waveguide as well. This will actually be much easier to do.

*/EDIT AGAIN*

attachment.php


attachment.php
 

Attachments

  • AK Dsc04664.jpg
    AK Dsc04664.jpg
    139.8 KB · Views: 183
  • AK Dsc04666.jpg
    AK Dsc04666.jpg
    71.6 KB · Views: 177
Last edited:
That's very clever Bauhausler, I've filed it away, along with the pic that Zilch posted, as inspiration for the look of my econowave project. If my finished project is going to get to live in the lounge room it is going to have to look good.
 
That's very clever Bauhausler, I've filed it away, along with the pic that Zilch posted, as inspiration for the look of my econowave project. If my finished project is going to get to live in the lounge room it is going to have to look good.

Thanks. I was lying there thinking about grille cloth internally mounted for about an hour (too much coffee) and when this idea hit me I thought "It can't possibly be that easy" but it worked exactly as planned.
 
Newest Econowaves

Here's my latest: Econowaved Altec 891A's. Standard crossover, JBL 123A-1 woofers, sealed enclosures, Selenium D220Ti drivers, Pyle 612 WGs.

Altec 891 crossovers 001.jpg

Altec 891 Econowaves 001.jpg

Altec 891 Econowaves 002.jpg
 
Rosso,
Love the Altec-looking attenuator panels.:thmbsp:
So those are around 2.2 Cu ft....
Got a lot of fill in there?
How do u like the sound?
I will be getting my 123A-1s back here soon and will make a new sealed box.
 
Back
Top Bottom