

You are using an out of date browser. It may not display this or other websites correctly.
You should upgrade or use an alternative browser.
You should upgrade or use an alternative browser.
AU-317 running warm?
- Thread starter h3ll0
- Start date

Karl vd Berg
Super Member
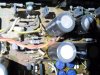
Looking at the 3rd photo we can see a couple of transistors without heatsinks. If they are the source of intense heat, than we are there. Also the rectifiers could be in the line...
Last edited:

h3ll0
Active Member
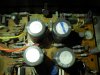
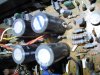
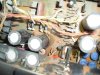
Ok well you have the sansui "GLUE" issue..the bottom of the caps are glued to the board , so don't confuse that for " leaking"…. Check and see ( tomorrow ) well later today what's getting hot and what's not… Do you have access to a IR/laser thermometer?
I don't have one but I can get something to insulated my hand and test the "5 second" method. To be honest I don't think there is anything wrong with the caps, but I'll check it out.
Karl vd Berg
Super Member
Karl, that's " normal " Sansui construction for that model…
H warm is OK… HOT is bad if you can't keep you finger on it for 5 seconds… BAD
Yeah, I'm guessing of a higher current flowing through those Transistos making them hotter...
Last edited:

AUD101
Parsley The Lion!
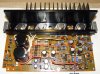
There are several heat source's in this area of the AU-317 - See pic-1
At idle with speaker load connected to both channels - The blue arrows indicate hot heat sources and the black arrows indicate warm heat sources.
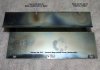
Pic-2 shows the heat marks on the underside of the Control Amp shield cover which are due to R608, R609 & R617 & R618 (located near the right bottom edge of Power amp PCB F2754) - and also Transistor reg's TR601 & T602 - These devices run very hot by default!
The effect of this, is that the shield acts as a form of heatsink with heat radiating outwards.
The combination of the above contribute to heat produced on the right side of the AU-317 between the heatsink & control amp shield
At idle with speaker load connected to both channels - The blue arrows indicate hot heat sources and the black arrows indicate warm heat sources.
Pic-2 shows the heat marks on the underside of the Control Amp shield cover which are due to R608, R609 & R617 & R618 (located near the right bottom edge of Power amp PCB F2754) - and also Transistor reg's TR601 & T602 - These devices run very hot by default!
The effect of this, is that the shield acts as a form of heatsink with heat radiating outwards.
The combination of the above contribute to heat produced on the right side of the AU-317 between the heatsink & control amp shield
Attachments
Last edited:
h3ll0
Active Member
Explains the radiation of heat.There are several heat source's in this area of the AU-317 - See pic-1
At idle with speaker load connected to both channels - The blue arrows indicate hot heat sources and the black arrows indicate warm heat sources.
Pic-2 shows the heat marks on the underside of the Control Amp shield cover which are due to R608, R609 & R617 & R618 (located near the right bottom edge of Power amp PCB F2754) - and also Transistor reg's TR601 & T602 - These devices run very hot by default!
The effect of this, is that the shield acts as a form of heatsink with heat radiating outwards.
The combination of the above contribute to heat produced on the right side of the AU-317 between the heatsink & control amp shield
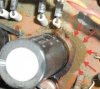
Below are a pic of the amp shield and a capacitor or something I think is leaking. Or it might just be burnt as its black.
Attachments
![20140521_153838[1].jpg](/forums/data/attachments/402/402531-874250d759ecb5e52299beb6ece9a731.jpg?hash=h0JQ11nste)
![20140521_153922[1].jpg](/forums/data/attachments/402/402532-7cd1d7c036a6100dbcf3bdb098b72948.jpg?hash=fNHXwDamEA)
Karl vd Berg
Super Member
That's a 2.7k 2W resistor
http://audiokarma.org/forums/attachment.php?attachmentid=401069&d=1357658830
http://audiokarma.org/forums/attachment.php?attachmentid=401069&d=1357658830

pete_mac
Super Member
Below are a pic of the amp shield and a capacitor or something I think is leaking. Or it might just be burnt as its black.
The capacitor isn't leaking - what you see is the original nasty corrosive glue which holds the capacitor in place (but also eats into any metal that it touches).
This glue should be removed as part of any refurbishment.
h3ll0
Active Member
The capacitor isn't leaking - what you see is the original nasty corrosive glue which holds the capacitor in place (but also eats into any metal that it touches).
This glue should be removed as part of any refurbishment.
What do I use to remove it?
pete_mac
Super Member
What do I use to remove it?
With the cap removed in the course of a resto, the glue can easily and safely be scraped off using either a small screwdriver or some other implement. My father (slippy124) uses a long strip of PCB substrate which has been sharpened to a chisel-like tip on one end. This is perfect for he job. There's no need for hash solvents IMHO.
pete_mac
Super Member
You can see the boundry between the glue and this stain.. which COULD be a leaky cap...
Theoretically yes... But that's not what the OP was asking about above.

vigman
SUBSCRIBER
Pete, if you read earlier in the chain. We were discussing old caps, glue & caps leaking.. I think I see a leak... just saying.. BTW acetone is not made outta hemp LOL ( hash solvents ) .. acetone is fine if you have good ventilation and don't use 5 gallons for 1 little area.. I'm not crazy about the dry scrape method.. but to each their own...
Similar threads

- Replies
- 3
- Views
- 3K

- Replies
- 6
- Views
- 2K

- Replies
- 0
- Views
- 1K

