• The move to the new server is done. There are some software and database maintenance updates in process. This has us passing the hat around to help out. We appreciate any donations. Seriously, even a dollar helps. The payment page may be found here - https://www.audiokarma.org/support.html

Brainstorming a push-pull 6L6GC stereo amp

Is it a typo on your schematic that the grid of the second triode in your phase inverter is not properly biased? (no high impedance resistor from grid 1 to grid 2).

That may be just a quirk of how I drew it... If you look directly under the "6SN7" label, there is a 1M resistor there that, in physical reality, connects the two 6SN7 grids together. One grid is then connected to the place of the 6N2P, and the other grid is AC-grounded via the .22uF cap.

See photo:
IMG_3514.JPG

Connections:
  1. Grid 2 -- .22uF cap to ground
  2. Plate 2 -- to 27K load resistor and .22uF coupling cap for "bottom" output tube of the pair. (Non-inverting output.)
  3. Cathode 2 -- to CCS
  4. Grid 1 -- to plate of 6N2P + 1M pull-up resistor tied to pin 1 (Grid 1)
  5. Plate 1 -- to 27K load resistor and .22uF coupling cap for "top" output tube of the pair. (Inverting output.)
  6. Cathode 1 -- tied to pin 3 (Cathode 2)
  7. Heater
  8. Heater
I think I got it right...
 
Yeah, that looks right.

Well, then it's just a matter of systematically breaking down the debugging into stages to see where the hum is introduced. Here's what I'd do to get started:
1. With all tubes in and the amp idling, measure the ripple at each stage of the power supply. Make sure you're getting the ripple rejection at each stage that you expect.
2. Take out both frontend tubes but leave the power tubes installed. Power it up and see what hum you are measuring on the speaker terminals with a proper dummy load installed. Should be nearly unmeasurable if output stage is working as it should.
3. Put the frontend tubes in. Because of the direct coupling between gain stage and inverter, if you put in the inverter tube, you must also put in the first stage gain tube.
4. Start from the input of the power stage and measure ripple/hum on the line feeding each of the power tube's control grids. Then move backward, i.e, if that looks noisy, move your scope probe to the output of the inverter and remeasure, if that looks noisy, move your scope probe to the input of the inverter, etc.
5. At some point along that chain you will see where the hum/noise is introduced. That tells you where to focus to eliminate it.

A couple of obvious things:
  1. Based on whether you measure 120 cycle hum or 60 cycle hum will give you clues where to focus.
  2. Make sure filament circuits have proper ground reference.
  3. Double check all solder joints by taking a pair of needle nose pliers and gently tug on each wire on each connection point. If you suspect any marginal joints, resolder them.
  4. Measure all resistors to ensure they are indeed the correct value for the location.
  5. Make sure the chassis is grounded to the audio circuit ground--at one point only.
  6. Probably easier to bypass the input jack and volume control, and jumper the 12AX7 grid right to ground for these kinds of tests. You may also want to temporarily eliminate the CCS in the inverter and jumper in an appropriate sized fixed resistor. In other words, look for ways to simply the debugging and eliminate anything you can that adds complexity.
  7. Do all these tests totally open loop--no feedback or HF tuning.
  8. If your scope does not have an AC setting on it (not sure if digital storage scopes do or not), you can "simulate" one by hooking a 0.47 uF or 1 uF 1000V film cap in line between the measure point and the positive hook of your scope probe. Make sure the negative side of the probe is hooked securely to the audio circuit ground. That way you can continue to use your 1x probe for max resolution.
  9. For this debugging, try both disconnecting and connecting the third prong power cord ground from the chassis.
Somewhere along that process of debugging you will see where the hum is introduced. In 90% of the cases where I've done this, it's either a missing ground connection, a faulty solder joint, a ground reference not provided or faulty, or noise being picked up from test leads/jumper cables or amp wiring. The other cases were bad tubes.

 
Last edited:
If your scope does not have an AC setting on it (not sure if digital storage scopes do or not), you can "simulate" one by hooking a 0.47 uF or 1 uF 1000V film cap in line between the measure point and the positive hook of your scope probe. Make sure the negative side of the probe is hooked securely to the audio circuit ground. That way you can continue to use your 1x probe for max resolution.

Hm, I think my scope has an AC setting -- I'll check. I assume such a setting floats the probe ground (which is usually tied to the earth ground of the scope)? Any particular reason that using a cap instead would require using a 1000V cap? I have a bunch of 630V 1uF polyester film caps handy, but nothing rated higher than that.
 
Not sure. I know that my scope (Tektronics analog) does not float the ground, it's just that some amps in the debugging/partially built stage don't have the grounds all connected up so that the scope can't use the house wiring 3rd prong ground power cord to get the common ground to the amp.

No reason for the cap voltage requirement, only that it seemed "high enough" for any tube circuit you might want to measure.
 
Make sure filament circuits have proper ground reference.

I'm beginning to wonder if this is my problem. I always have the habit of elevating my heater circuit. But this is a fixed-bias amp, so I don't have an output tube cathode to tie them to. So, instead, they're referenced to a voltage divider at the end of the power rail that also acts as a bleeder for the filter caps. I'm wondering if I'm getting ripple from the heater supply introduced to the 6N2P's plate supply (I looked with my scope, but of course at 10X, so maybe it wasn't so visible).

I double-checked the 6SN7 data sheet, and the heater-negative-with-respect-to-cathode rating is 200V, so since those cathodes are only at 140V, I should be OK (at least, once NFB is connected... I might want to be careful open-loop in case the voltage swing from the 6N2P is really large). Certainly, the Eico HF-89 got away with roughly this configuration.

Anyway, this is just a hypothesis... I'm on the bus now and will be home shortly so I can poke around at it.
 
BINGO. I put a 1uF film cap between from the heater "virtual center tap" to ground and the noise basically went away. There is still some residual hum and noise, but the big nasty stuff went away.
 
Ok, so that was fruitful. But I'm still getting noise / hum on the R channel. The L channel is now TOTALLY quiet if I unplug the R channel speaker.

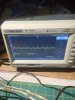
Here's the sh*t that was present at the voltage divider that elevated the filaments:
IMG_3515.JPG

A 1uF cap cleaned it up a lot, and I tried a 10uF cap to see if it made it any better.. smoothed out the ripple more, but the frequency was already below audible range. Next up is to try disconnecting that elevation lead entirely and referencing it to ground instead.

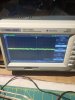
Anyway, here's what is present on the output of the 6N2P... L (pretty clean):
IMG_3516.JPG

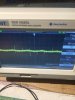
and R (still a little messy):
IMG_3517.JPG
 
Ok, the amp is dead silent with the 6SN7s pulled. I still see noise coming out of the 6N2P (more on the R channel than the L, but this is consistent across multiple tubes, and these tubes sound fine in my daughter's amp which also uses 6N2Ps). I need to take another break, but I'll be back at it later this evening. I have another hunch, perhaps...
 
Ok, I completely disconnected the extension of the power rail that comes after the 6N2P .. it is no longer needed. For a bleeder, I'll install a 1M resistor across the reservoir cap.

As far as noise goes, it's still audible. It's still most prevalent on the R channel. I swapped 6SN7s, and it stayed with the R channel. Scope says it's coming from the 6N2Ps. So, for giggles, I pulled the 6N2P for a few seconds and listened carefully before shutting the amp down. Silence. At this point, the noise is down to 60Hz hum (heater) and a bit of white noise hiss. Considering the amp is silent without the 6N2P installed, I am beginning to suspect I have a duff tube. So I roll through a few 6N2Ps I have in my stash. Things change... mostly for the worse. So I have some crappy tubes, I guess.

Tomorrow evening, I'll adjust the socket to take a garden-variety 12AX7. I have some JJ ECC83s and a couple of EH 12AX7s. Maybe that will take care of what remains.
 
Ok, more data. I have a couple of 12AX7-6N2P adapters, so I was able to put a new production 12AX7 in there without having to change the socket, and that made another drastic improvement. However, still a problem lurking.

Again, the R channel still has significantly more noise than the L channel. With the 12AX7 swap, there is NO hum noise coming from the first stage, verified with scope.

The noise is, however, present on the grids of the R channel's output tubes, so that tells me it's coming from that channel's 6SN7. So I'm poking around with the scope and when I put the scope probe on G2 (the one that's connected to ground via the .22uF cap), the noise stops. "Hmm." Bad cap? So I jumper in a 1uF film cap across the .22uF cap that's already there... NOISE GOES AWAY... but then the noise comes back?

This seems rather odd... It's like the cap charged up.

Then I noticed another peculiar thing... the both grids of the 6SN7 are supposed to be at the same potential. That's that the 1M pull-up resistor is for, and the cap is supposed to ground all of the of-interest AC signals. But when I measure the voltage at G2, its 111V vs 130V for G1. Oh, and putting my meter on G2 makes the noise stop, too. I guess the impedance of the test instrument is shunting whatever to ground? Same voltage drop occurs on the other channel that isn't making the noise.

FWIW, I've eliminated the CCS as being the problem. On the noisy channel, I disconnected the CCS and jumpered in a 13K 10W resistor (only >= 2W resistor in the ballpark I had on hand), which should be good for 10mA through the pair of triodes. No change.
 
Maybe bad cap or even bad resistor, maybe bad ground connection at that point, or even noise from the rectifiers seeping into the ground circuit at that point. On that noisy channel, what does the grounding look like? On the amp I'm currently building which uses the same style direct coupled frontend as you're using, I've got the tail of the inverter, the grid #2 AC bypass cap, the bottom side of the cathode resistor of the first gain stage, the grid leak resistor of the first gain stage, the outer housing of the RCA input jack, and the shield for the input cable (from the RCA jack to the grid of the input tube) all connected to the same star ground point.

Also, those spikes in the last pic of post #147 look like diode transients, possibly creeping in through the ground circuit, but from your writeup not sure if that's still an issue or not.

Also, did you nix the elevated heaters and is the fan connected or not?
 
The spikes are still present, but they've been reduced a bit because I used to be getting them out of the first stage output on that channel as well (so they would get amplified), but that's not the case anymore now that I changed the first tube to a EH 12AX7 I had in my stash (connected by a socket adapter -- I'll rewire the heater connections on the socket later).

Grounding looks like this (all of these ground points are isolated tag strip lugs, except as noted):
  • Each half of the 12AX7 has it's own ground point for the 1M grid leak and cathode resistors. Those two ground points are tied together by a jumper wire.
  • Each 6SN7 has a single ground point for the .22uF grid cap. The 6SN7 that is exhibiting noise problems is also located physically next to the CCS board, and so it's ground point also connects to the CCS board ground. The 2 6SN7 ground points are connected to one of the 12AX7 ground points by jumper wires.
  • The 10uF filter cap and the 2 100uF filter caps all share the same ground point (the negative lug of the 2x100uF cap can). This lug is connected to the ground point of the noisy 6SN7.
  • The DC negative side of the rectifier bridge is connected directly to the negative lug of the 500uF filter cap, as is the ground reference for the bias transformer and large filter cap. A jumper wire connects the negative lug of the 500uF filter cap to the negative lug of the 2x100uF cap can.
  • The virtual center tap for the heater supply is connected to the grounded end of the bias transformer because it was a physically convenient location after removing the heater elevation.
  • The Pin 1 of each output tube socket is connected together in a string. This is used as the ground point for each tube's 10 ohm current sensing cathode resistor. Two of these sockets also are used as the ground point for the bias pots (one for each pair of outputs).
  • Each output pair's bias RC network is built on a tag strip. The ground points of these two tag strips are connected together by a jumper wire. One of these ground points is also connected to Pin 1 of one of the output tubes (the inner-most tube) by a jumper wire.
  • The inner-most output tube Pin 1 is connected to the negative lug of the 500uF filter cap by a jumper wire.
  • There is a single chassis connection -- a tag strip mounted near the input jacks, soldered to a spot that I used a grinder to get very bright. This is connected by a jumper wire to the 12AX7 ground point. This same tag strip also has the ground reference for the OT secondaries, as well as the connection for the input cable shield. The '0' end of the input pot is also connected to this tag strip lug, as are the negative connections of the input jacks.
  • Safety ground and PT shield wire a connected to a screw that mounts the power relay socket.
I don't see any loops with this scheme, and I tried to keep the larger currents (e.g. the rectifier bursts) localized.

Interesting comment about rectifier noise seeping in to the ground circuit. My schematic shows my usual favorite Vishay bridge rectifier package, but that's not what I'm actually using... For the previous version of the power supply, I had built 10A07s onto tag strips for the voltage quadrupler, and when I moved away from that design, I simply reconfigured a couple of wires on the tag strips to make a bridge. Also perhaps worth noting, the rectifier assembly is located next to the CCS board (it's where I had room).

Oh, and almost forgot to mention: Yes, nixed the heater elevation, and the DC fan supply is present (a pre-packaged bridge rectifier and a 4700uF cap, rectifier fed by the heater supply), but the fan is not connected to it at the moment.
 
Last edited:
Played around with this some more, trying to eliminate variables.
  1. Built a bridge out of 1N4007s, disconnected my 10A07 bridge and jumpered in the 1N4007 bridge, which was located outside the chassis. No change.
  2. Disconnected .22uF cap from noisy channel and jumpered in a .22uF cap and a 1uF cap, so same ground point and to alternate ground point. No change.
  3. Removed the 1M pull-up resistor and jumpered in a new one. No change.
  4. Really really really eliminated the CCS as the problem by disconnecting from both channels and using a 13K 10W resistor for each instead.
Hm, one thing I forgot to do was to disconnect the fan supply circuit from the heater winding. I may or may not get to that tonight.
 
So I'm poking around with the scope and when I put the scope probe on G2 (the one that's connected to ground via the .22uF cap), the noise stops.

Then I noticed another peculiar thing... the both grids of the 6SN7 are supposed to be at the same potential. That's that the 1M pull-up resistor is for, and the cap is supposed to ground all of the of-interest AC signals. But when I measure the voltage at G2, its 111V vs 130V for G1. Oh, and putting my meter on G2 makes the noise stop, too. I guess the impedance of the test instrument is shunting whatever to ground? Same voltage drop occurs on the other channel that isn't making the noise.

That's a pretty sure sign of spurious oscillation. It's hard to confirm if the scope probe snuffs it, but you might see some RF downstream if scope bandwidth is adequate. Try a grid stopper or ferrite bead at G2, or possibly at the cathode. The DC voltage difference that you're measuring is due to voltmeter loading.
 
@BinaryMike, thanks for chiming in. G2 is connected to G1 via a 1M resistor, so I'm not sure where I'd put a grid stopper in that case. Perhaps you mean G1 (which is direct-coupled from the previous stage)?

FWIW, I hypothesized that perhaps the choke was picking up noise. Removing it from the circuit and replacing it with a 100 ohm 10W resistor resulted in no change.
 
Grid stoppers always connect with minimum lead length directly to the grid pin. Everything else stands aside. However, in this particular case, you might succeed by adding resistance anywhere in series with the cap that AC-grounds G2. G1 already sees significant resistance in every direction except for stray C to the chassis, etc., which is usually minimal.
 
Grid stoppers always connect with minimum lead length directly to the grid pin. Everything else stands aside. However, in this particular case, you might succeed by adding resistance anywhere in series with the cap that AC-grounds G2. G1 already sees significant resistance in every direction except for stray C to the chassis, etc., which is usually minimal.

Oh, I see what you're saying. It also occurred to me that perhaps I'm not using a large enough grid stopper on the first stage. But I'll do a quick test with what you suggest.
 
Back
Top Bottom