• The move to the new server is done. There are some software and database maintenance updates in process. This has us passing the hat around to help out. We appreciate any donations. Seriously, even a dollar helps. The payment page may be found here - https://www.audiokarma.org/support.html

Denon POA 6600 Thread

does aluminum dissipate heat better than copper?
No.
But copper is a lot more expensive and a lot heavier.

Copper spreads heat faster. One of the reason that fireproof safes are lined with copper and not aluminum.
Think about how much harder it is to de-solder something that is on a major ground plane than a stink normal plus line.

Cheers,
James
 
does aluminum dissipate heat better than copper?
There is an interface loss between the 3 transfer areas of transistor to copper heat spreaders to aluminum heat sink.

But that loss is less than the overall gain of the heat transfer of the large surface area and mass that the copper gathers and transfers to the aluminum compared to the heat transfer without the copper heat spreader.

edit: I had to rewrite that 3 times and I am sure that saying "because beer" still makes more sense.
 
Considering the fault that it had before I wanted to recommend something if I may. Check the XLR input pins & it's ckt. Might need a cleaning too.
Just to prevent future headaches is my thinking here. Sometimes unused inputs create issues. Maybe the last guy used them and dicked up the connectors?
 
Considering the fault that it had before I wanted to recommend something if I may. Check the XLR input pins & it's ckt. Might need a cleaning too.
Just to prevent future headaches is my thinking here. Sometimes unused inputs create issues. Maybe the last guy used them and dicked up the connectors?
Good idea, I will do that.

The balanced input won't be used to begin with but I bought a Kenwood L-1000C pre-amp a few months ago and after it gets worked over it will get a chance to make me happy. And it has balanced outputs and one balanced input. And the Yamaha CD-S2000 has an unused set of balanced outputs.

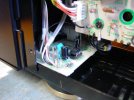
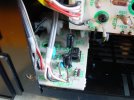
With that in mind yesterday I made a mod to the input board while I had the amps bottom bare.

If you look at my earlier photo of the input board you will see that I had replaced the 2x 10µF elcos with some nice Wima's. These are de-coupling caps on the */- supply voltage to the op-amp. I removed them and replaced them with Panasonic FR 47µF/50v with a TDK MLCC C0G (NPO) 0.1µF/50v piggybacked to it. (sorry analogwisdom, but it had to be done).

Then I removed the op-amp, installed a socket, and re-installed the original 2068DD.

Tomorrow when this thing finally gets a test run all 3 original op-amps will be installed. I wanted to make provision for replacing them with something better but will not do so before being able to put my scope on the amp and check for oscillation.

DSC02498.JPGDSC02499.JPG

Btw, all of the carbon film resistors on that board have previously been replaced with 1% metal film.

Cheers,
James
 
One other Jamesmod that I did while I had the bottom of the amp bare assed naked.

If you look at the first photo in the last post you can see the PTC thermal switch that snaked down under the heat sink, where it is supposed to be attached with a screw. If you want to remove the main board you have to remove the bottom panel and to remove that screw.
If you want to remove the heat sink you have to remove the bottom panel to get to the 2 screws in the bottom of the heat sink.

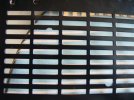
While I had the panel off yesterday I took a round file and filed 3 reliefs in the panel grill that allow a nice JIS screwdriver to slip up in the bottom and remove those screws without having to remove the amps pants and shoes.

DSC02493.JPGDSC02494.JPGDSC02495.JPG

Before re-installing the panel I touched up the filed areas with some black paint.

Cheers,
James
 
Warning to anyone that wants or needs to remove the front panel of the amp!!!

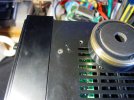
The service manual lies. It states that there are 3 screws in the top and 2 screws in the bottom holding the faceplate to the amp. That is a frustrating lie, and when you have those 5 screws removed you will still not be able to remove the amps pretty face.

Because there is a 6th, stealth screw in the bottom of the amp, hidden under the right front foot. You have to remove that foot to find the 6th flat head countersunk screw.

DSC02497.JPGDSC02496.JPG

Cheers,
James
 
Great work as always James!
The new rack is looking sweet too.

How are you liking the sound compared to your Yamaha gear?

Thanks zaibatsu! Glad that you stopped by. Pull up a stool and open a cold one. :beerchug:

So far the Denon's haven't made a single tone. Tomorrow will be test day for this one. Then I can get started on number 2.

But the little Marantz MA500's are sweet! I never expected some little "budget" amps to sound so good. They sounded pretty good before restomodding them and even better after. I thought that I was happy with the MX-1 but now I would be sad to have to go back to it.

Cheers,
James
 
The new trimpots that I bought were chosen mainly because of wanting side-adjust that would orient to the top of the amp board. They are 4 turn Bourns 3339S-1-103LF.
They are not as touchy as the original potis but not as nice as a 20 or 25 turn poti.
In reality there is no real need for a side adjust, using a top adjust that will be accessed from the side when installed will be just fine.

When I get back from vacation I'm going to order some 25 turn 3296Y-1-103LF parts and swap them out. I am spoiled by the very fine adjustment that one gets with a 20+ turn poti.
https://www.mouser.de/ProductDetail/Bourns/3296Y-1-103LF?qs=V3Em1enZyNPGF2%2BnCaKTKw==

Cheers,
James
 
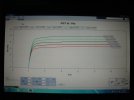
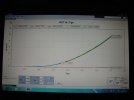
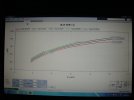
OK, so earlier I promised you fellows some transistor porn.
Just don't tell your wives and girlfriends that you are looking at all of these curves on the internet. They might get jealous.

First up is TR500 and TR501, a pair of 2SK184's.
TR500-0.JPGTR500-1.JPGTR500-2.JPGTR501-0.JPGTR501-1.JPGTR501-2.JPG

Cheers,
James
 
Back
Top Bottom