• Please note that Audiokarma will be offline briefly for updates early on Monday morning, September 28th.

How are KLF-10's and what are similar Klipsch to these?

Will open it up sometimes.

I didn't hear it until yesterday even on loud volumes.
I popped in Star Wars VI DVD last night and in some scenes, I heard rumble and rattle.
Then I used some bass test tracks and it did that but only on very low bass recoils.
Sounds like a train track. :eek:

Yeah, I had the same deal, at one point Klipsch replaced the speakers if you had this issue. But that was long ago.
 
remove one of the woofers and get inside with a rubber mallet then whack hard all the way around each of the baffles front and back, you will hear it vig=brate if it is loose anywhere. The problem is only with the adhesive used on the baffles not the rest of the cabinet (different glue used there). The best way to repair is to remove the baffles and scrape off all the defective glue which is a hot melt type and then re install the baffles using white or yellow wood glue. This is also a great time to install braces. Best regards Moray James.
 
If it turns out to be the issue, I would rough up the slick surface with a file or something just to give it better grip, not much grabs that shiny surface well.
 
That was the issue on one of my CF-3's...the "whacking" sound on certain low notes. On mine, it was more of bad location of the glue as there was a ton in one area and next to nothing in another. So, both backs came off and I used 1x1's and framed it inside the cabinet then screwed the rear panel on from the front openings. I used liquid nails along with wood glue and screws. Problem solved.
 
remove the Melamine veneer...

If it turns out to be the issue, I would rough up the slick surface with a file or something just to give it better grip, not much grabs that shiny surface well.

the black veneer is Melamine and it is almost a non stick surface but it wears well and it looks good. A 3/4' wide Dremel drum sanding attachment will sand it off in a couple of minutes. Easy fast 100% effective. As I said scrape off all the hot melt and then re assemble with wood glue white or yellow. Steonger than they were new with good adhesive. Remember if you have found one bad baffle joint both cabinets were made with the same defective adhesive so do them both now. Best regards Moray James.
 
Hmm... it's not big enough to get inside with a rubber mallet... :lmao:

Will think about braces but then I have to do both.
We'll see.

If you get inside, take a putty knife to the glue in one area and see if it just pops off like hot glue from a glue gun. If it does then it most cetainly needs fixed. Don't let it get you down though, not too hard to fix, and they are worth the trouble.
 
I have gone through the baffle issue as well. I actually now feel it is a blessing in disguise. The addition of the bracing that can be applied during repair really helps with the quality of the bass. I am currently bracing two sets of 10's. I do mine a little different than most as I don't brace to the opposite wall, I brace to the adjacent wall. I cut pieces of 3/4 ply 2.5" wide and 6.25" long with 45 degree cuts on the ends and liquid nails them in. The scuffing of the front and back panels is certainly recommended. A little work for a lot of reward!
 
I forgot to add, I have had 8 sets of 10's if memory serves me right(1 set on 20's and 1 set of 30's also). I currently have 6 sets including a homemade center. All but one l pair have been braced. The set that did not get braced were purchased as the series was being discontinued, maybe Klipsch had solved the problem by then?
 
Good news...

Good news! Well at least for now.
I took the horn out and blasted them, no rattle but that's not a good test since there is a huge hole that doesn't keep the same pressure.
So I put the horn back in one screw at a time and tested.
No rattle after it's back in even at higher levels than before.
Looks like the horn plastic was not flush in at some screw points and causing the rattle.
Few screws are just spinning and spinning, no tread left on the baffle. Need to fix that with some wood glue.

Also, I see there is no gasket between the horn and baffle.
I'll get a thin weather strip or something and put it there.
That should help.

What say you?

I forgot to add, I have had 8 sets of 10's if memory serves me right(1 set on 20's and 1 set of 30's also). I currently have 6 sets including a homemade center. All but one l pair have been braced. The set that did not get braced were purchased as the series was being discontinued, maybe Klipsch had solved the problem by then?

Dang, you are are a KLF hoarder. ;)
 
Bad news...it is the baffle

Okay looks like it is the front baffle.
Pressing on the horn removed the rattle because it was also pressing on the front baffle.
So to reglue, I have to remove the drivers and put a bead of liquid nail along the corners right?
I don't have clamps so hope it works just by it's own weight.
It has sponges inside packed like an Indian train.
It'll be quite a feat to put them back exactly like they were. :scratch2:
Thanks
 
Okay looks like it is the front baffle.
Pressing on the horn removed the rattle because it was also pressing on the front baffle.
So to reglue, I have to remove the drivers and put a bead of liquid nail along the corners right?
I don't have clamps so hope it works just by it's own weight.
It has sponges inside packed like an Indian train.
It'll be quite a feat to put them back exactly like they were. :scratch2:
Thanks

This is the thread about my pair.

http://www.audiokarma.org/forums/showthread.php?t=451590
 
you can use a sharp putty knife to cut the hot melt adhesive (that shows) away from the panel edges. Then you need a hardwood block about six inched long and a couple of inches thick. Place the long side of the block along the edge of the baffle. Use a hammer and hit the block not the baffle. Took me about 10 -15 min per baffle to remove. I took them all out front and back.

RS Steve used some strapping inside the cabinet as a stop for the baffle when re installed. This also has the benefit of providing a larger surface area when you glue the baffles back in place. Lay the strapping on the flat with the 3/4" edge facing the baffles. I would place the strapping all the way around the cabinet. Hope this helps. Perhaps you have a friend who has experience with cabinet work to lend you a hand. Remember to scrape off all the old adhesive down to bare wood. Remember also to sand off the black melamine anywhere you want to make a glue joint, Hope this helps. Best regards Moray James.
 
you can use a sharp putty knife to cut the hot melt adhesive (that shows) away from the panel edges. Then you need a hardwood block about six inched long and a couple of inches thick. Place the long side of the block along the edge of the baffle. Use a hammer and hit the block not the baffle. Took me about 10 -15 min per baffle to remove. I took them all out front and back.

RS Steve used some strapping inside the cabinet as a stop for the baffle when re installed. This also has the benefit of providing a larger surface area when you glue the baffles back in place. Lay the strapping on the flat with the 3/4" edge facing the baffles. I would place the strapping all the way around the cabinet. Hope this helps. Perhaps you have a friend who has experience with cabinet work to lend you a hand. Remember to scrape off all the old adhesive down to bare wood. Remember also to sand off the black melamine anywhere you want to make a glue joint, Hope this helps. Best regards Moray James.

Thanks
Little more going through the thick skull. :D
Now need to check pictures on what kinds of braces can be used in there.
 
Thanks
Little more going through the thick skull. :D
Now need to check pictures on what kinds of braces can be used in there.

I thought I took pictures of what I did, I might of deleted them to make more space. But from the factory, I think they used a small piece of wood at the center point of the cabinet in each corner (strapping). I just removed those, and the glue, then scuffed up the area to receive the glue. I then took and used long strips of the plywood to reinforce the corners. I used an air powered trim gun to shoot some staples into it also. It might of been over kill, but it worked great. I did not have to remove the baffle or rear panel.
 
I thought I took pictures of what I did, I might of deleted them to make more space. But from the factory, I think they used a small piece of wood at the center point of the cabinet in each corner (strapping). I just removed those, and the glue, then scuffed up the area to receive the glue. I then took and used long strips of the plywood to reinforce the corners. I used an air powered trim gun to shoot some staples into it also. It might of been over kill, but it worked great. I did not have to remove the baffle or rear panel.

Okay go that strip part.
It's just to sit/glue the baffle on more securely.
I do have an air compressor and a nail/staple gun but the staples I have may be too long. They are 7/8 inch long and have over 4000 left. Bought 5000 for a small project. :sigh:

Any pictures of the braces?
Thanks
 
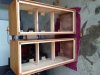
I'm going to try and attach some pictures of the re-attaching of the back panels on my CF-3's I did recently. After scraping off the sporadic laid down hot melt, I reattached with liquid nails and screws. May have to attach one at a time since I'm on my iPhone. I hate that they get turned sideways. Sorry about that.
 

Attachments

  • image.jpg
    image.jpg
    55.3 KB · Views: 82
Back
Top Bottom