


You are using an out of date browser. It may not display this or other websites correctly.
You should upgrade or use an alternative browser.
You should upgrade or use an alternative browser.
Infinity RSb reincarnated
- Thread starter jefferylhenr
- Start date
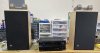

I had a set of RSA’s that I bought new and that is my only reference
I’ve been following the thread so I’ve seen all the time and effort put into the project. I guess my real question is, without a direct standard to compare to along the way, how do you know which modifications made improvements and to what degree? Others following the build might be interested in executing some of your mods with their speakers and it would be helpful to know which mods made which improvements/changes to overall sound.

chef free
Super Member
Wow! What a journey. Those things look pretty sweet, the grills look totally factory fresh stock! I love that you mirrored them, but Infinity usually has their tweeters inboard, try them like that...
Well, its really a developmental platform as I see it. I tried to do all the basic things right and since the cabinets were being built from scratch, there was tons of latitude within the displacement I could determine from the original RSb design which I expanded to offset the larger bracing, dampening and mid enclosures>
All materials need to be inexpensive and readily available locally. Everything came from Homedepot, Hobby Lobby, Lowes or Ace Hardware. Most were scraps or remnants. I studied religiously the BBC British designs, LS3, BC1, etc.. The available data on capacitors and reviews was mind numbing with terms like "fruit forward" and what knot. These were references: http://www.humblehomemadehifi.com/Cap.html and http://zerocapcable.com/?page_id=224 The drivers and parts were purchased off Ebay for less than $100.00 including shipping. And finally, there is probably more than 2.5 months of almost everyday work in my shop on making it all come together and figuring out things on the fly...
Just think of it the ultimate paper in oil capacitor.... Connect an aquarium pump to a hydraulic foot switch, and have several tubes running to various dielectric solutions. Want a more organic musical sound? Pump in some all natural mineral oil. Playing a synth heavy dance tune from the 1980’s? Open the synthetic motor oil valve for that plastic sound. And for the Birkenstock and sprouts crowd, you would of course have a tank of happy sunflower oil in reserve.
1) Cabinet materials - 3/4 inch white birch. This was the best article I could find https://www.tnt-audio.com/clinica/cabinet_walls_e.html All seams were secured with square stock and Elmers wood glue and then caulked with silicon latex - Dap ALEX PLUS® all-purpose acrylic latex caulk plus silicone and less than $3.00 per tube. The foam was a 4x8 scrap of "Future Safe" plastic backed dense carpet pad which I bought at home depot for $2.78.. The black closed cell foam which was used to cover the bracing was water pipe insulation around $5.00. The tacky glue was Elmers spray on adhesive. I also used Aleene's Ultimate Glue and Grill fabric from JOANN fabric $9.99 for a square yard. The interior of the cabinets were sprayed with Clear Liquid Rubber Sealant Coating https://www.homedepot.com/p/FLEX-SE...iquid-Rubber-Sealant-Coating-FSCL20/300808900 which provides great dampening as well as a surface for tacking down the Future Safe foam padding. I am still working on the stuffing and since there are local sheep ranchers, I can get raw wool for $10.00 per animal. Research dampening was a mind numbing as the capacitors.... But sheeps wool rates very well. Right now there is a small piece of R-19 fiberglass insulation between thin fiberfill batting that was purchased at hobby lobby - Queen Size Poly-Down Batting $14.99 https://www.hobbylobby.com/Fabric-S.../Batting/Queen-Size-Poly-Down-Batting/p/36750
2) Midrange enclosures - going with highly dampened 6 inch thick wall pvc with the zero to 6 inch mache cone and reverse filled with dense foam and then sandwiched end to end between the rear and front baffles which was secured on the back with liquid nails (construction adhesive offers a durable, flexible bond). This was key, as I wanted the front baffles to be removable and somewhat isolated like the LS3, BC1, etc.. This design also creates a huge central brace between the front and back baffles further reducing resonance. I personally believe that midrange is the most noticeably and emotional part of a speakers and I spent most of my time figuring this part out. When I played IZ (over the rainbow)
the sound is so pure and sweet I almost teared up and that is totally out of character for me.
3) Crossovers - this was another major piece of the project wading through all the fluff and "fruit forward" reviews of do and don'ts. Really??? The sound of an acoustic upright bass is a complex mixture of a spruce and maple body resonating, of stainless steel strings vibrating on an ebony fingerboard, of callus covered fingertips plucking or resin covered horse tail's hair bowing the strings. With the oil filled Tinned Copper bypass this complex interaction of timbres comes across in an extremely natural manner, so it just lets me get deeper into the music. Only $498.00 each and you need 12... BTW, I measured the yellow 3.5 uf tweeter caps and they matched to within 1 - 100ths of each other @ 3.51 and 3.52 which was pretty amazing. My parts list not including the 16 gauge silicon oxygen free stranded hook up wire.
Dayton Audio DMPC-2.0 2.0uF 250V Polypropylene Capacitor
Part # 027-414 - Tweeters
Jantzen Audio 1.5uF 800V Z-Superior Capacitor
Part # 027-478 - Tweeters
Dayton Audio DMPC-25 25uF 250V Polypropylene Capacitor
Part # 027-438 - Mids
50uF 100V Electrolytic Non-Polarized Crossover Capacitor
Part # 027-354 - Mids
80uF 100V Electrolytic Non-Polarized Crossover Capacitor
Part # 027-358 - Bass
Dayton Audio DMPC-20 20uF 250V Polypropylene Capacitor
Part # 027-436 - Bass
10 Pack .01uf 200v Soviet Military Paper In Oil Guitar Tone Upgrade Capacitors K40Y - for in signal bypass... since i couldn't help myself after reading about all the fruit forwardness from paper in oil capacitors!
Oiyagai 4Pcs 4mm Banana Plug,Pure Copper Binding Post for Amplifier Speaker Terminal Connector w Transparent Plastic Cover.
So right now, its potentially adding some veneers? Tweaking the dampening with sheep wool? And other suggestions that might appear from this forum... Oh, and to not forget, these fasteners for the front Baffles - https://www.homedepot.com/p/Everbil...Narrow-Brass-Connecting-Bolt-817938/204281651
- https://www.homedepot.com/p/Everbilt-1-4-in-x-12-mm-Nut-Brass-Connecting-Cap-818008/204281655
All materials need to be inexpensive and readily available locally. Everything came from Homedepot, Hobby Lobby, Lowes or Ace Hardware. Most were scraps or remnants. I studied religiously the BBC British designs, LS3, BC1, etc.. The available data on capacitors and reviews was mind numbing with terms like "fruit forward" and what knot. These were references: http://www.humblehomemadehifi.com/Cap.html and http://zerocapcable.com/?page_id=224 The drivers and parts were purchased off Ebay for less than $100.00 including shipping. And finally, there is probably more than 2.5 months of almost everyday work in my shop on making it all come together and figuring out things on the fly...
Just think of it the ultimate paper in oil capacitor.... Connect an aquarium pump to a hydraulic foot switch, and have several tubes running to various dielectric solutions. Want a more organic musical sound? Pump in some all natural mineral oil. Playing a synth heavy dance tune from the 1980’s? Open the synthetic motor oil valve for that plastic sound. And for the Birkenstock and sprouts crowd, you would of course have a tank of happy sunflower oil in reserve.
1) Cabinet materials - 3/4 inch white birch. This was the best article I could find https://www.tnt-audio.com/clinica/cabinet_walls_e.html All seams were secured with square stock and Elmers wood glue and then caulked with silicon latex - Dap ALEX PLUS® all-purpose acrylic latex caulk plus silicone and less than $3.00 per tube. The foam was a 4x8 scrap of "Future Safe" plastic backed dense carpet pad which I bought at home depot for $2.78.. The black closed cell foam which was used to cover the bracing was water pipe insulation around $5.00. The tacky glue was Elmers spray on adhesive. I also used Aleene's Ultimate Glue and Grill fabric from JOANN fabric $9.99 for a square yard. The interior of the cabinets were sprayed with Clear Liquid Rubber Sealant Coating https://www.homedepot.com/p/FLEX-SE...iquid-Rubber-Sealant-Coating-FSCL20/300808900 which provides great dampening as well as a surface for tacking down the Future Safe foam padding. I am still working on the stuffing and since there are local sheep ranchers, I can get raw wool for $10.00 per animal. Research dampening was a mind numbing as the capacitors.... But sheeps wool rates very well. Right now there is a small piece of R-19 fiberglass insulation between thin fiberfill batting that was purchased at hobby lobby - Queen Size Poly-Down Batting $14.99 https://www.hobbylobby.com/Fabric-S.../Batting/Queen-Size-Poly-Down-Batting/p/36750
2) Midrange enclosures - going with highly dampened 6 inch thick wall pvc with the zero to 6 inch mache cone and reverse filled with dense foam and then sandwiched end to end between the rear and front baffles which was secured on the back with liquid nails (construction adhesive offers a durable, flexible bond). This was key, as I wanted the front baffles to be removable and somewhat isolated like the LS3, BC1, etc.. This design also creates a huge central brace between the front and back baffles further reducing resonance. I personally believe that midrange is the most noticeably and emotional part of a speakers and I spent most of my time figuring this part out. When I played IZ (over the rainbow)
3) Crossovers - this was another major piece of the project wading through all the fluff and "fruit forward" reviews of do and don'ts. Really??? The sound of an acoustic upright bass is a complex mixture of a spruce and maple body resonating, of stainless steel strings vibrating on an ebony fingerboard, of callus covered fingertips plucking or resin covered horse tail's hair bowing the strings. With the oil filled Tinned Copper bypass this complex interaction of timbres comes across in an extremely natural manner, so it just lets me get deeper into the music. Only $498.00 each and you need 12... BTW, I measured the yellow 3.5 uf tweeter caps and they matched to within 1 - 100ths of each other @ 3.51 and 3.52 which was pretty amazing. My parts list not including the 16 gauge silicon oxygen free stranded hook up wire.
Dayton Audio DMPC-2.0 2.0uF 250V Polypropylene Capacitor
Part # 027-414 - Tweeters
Jantzen Audio 1.5uF 800V Z-Superior Capacitor
Part # 027-478 - Tweeters
Dayton Audio DMPC-25 25uF 250V Polypropylene Capacitor
Part # 027-438 - Mids
50uF 100V Electrolytic Non-Polarized Crossover Capacitor
Part # 027-354 - Mids
80uF 100V Electrolytic Non-Polarized Crossover Capacitor
Part # 027-358 - Bass
Dayton Audio DMPC-20 20uF 250V Polypropylene Capacitor
Part # 027-436 - Bass
10 Pack .01uf 200v Soviet Military Paper In Oil Guitar Tone Upgrade Capacitors K40Y - for in signal bypass... since i couldn't help myself after reading about all the fruit forwardness from paper in oil capacitors!
Oiyagai 4Pcs 4mm Banana Plug,Pure Copper Binding Post for Amplifier Speaker Terminal Connector w Transparent Plastic Cover.
So right now, its potentially adding some veneers? Tweaking the dampening with sheep wool? And other suggestions that might appear from this forum... Oh, and to not forget, these fasteners for the front Baffles - https://www.homedepot.com/p/Everbil...Narrow-Brass-Connecting-Bolt-817938/204281651
- https://www.homedepot.com/p/Everbilt-1-4-in-x-12-mm-Nut-Brass-Connecting-Cap-818008/204281655
Yep, they are mirrored. Just setting on the workbench in the picture ... would switch places for actual setup.Wow! What a journey. Those things look pretty sweet, the grills look totally factory fresh stock! I love that you mirrored them, but Infinity usually has their tweeters inboard, try them like that...
The future safe foam is supposed to have a 10,000 year half life. I probably won’t be able to hear much by then...they look great,Nice job! I wouldn't veneer them, I like the look of the wood. It'll be interesting to see how they look internally in a few years, when that carpet padding has broken down, as it will.

jazzmans
Super Member
I mean the carpet padding you used as insulation. It definitely breaks down, and when under a carpet, pretty quickly. dunno how long it'll take inside the enclosure, but If you really wanted to be cool, you'd open them back up every year or so, and photograph the condition of the insulation.The future safe foam is supposed to have a 10,000 year half life. I probably won’t be able to hear much by then...
Yea, for sure I will add that to my todo list? That would be exciting stuff to know. Will you be upset if I get preoccupied and forget?I mean the carpet padding you used as insulation. It definitely breaks down, and when under a carpet, pretty quickly. dunno how long it'll take inside the enclosure, but If you really wanted to be cool, you'd open them back up every year or so, and photograph the condition of the insulation.
jazzmans
Super Member
I'm not mocking you, I'm serious. My experience with that carpet padding has been less then stellar, but, if you like the way it sounds, and it lasts, it could be a cheap way for the diy crowd.Yea, for sure I will add that to my todo list? That would be exciting stuff to know. Will you be upset if I get preoccupied and forget?
The only way we'll know is time. It'd be cool if you opened them up and checked. But no, I won't lose any sleep over it if you don't.
Okay, here is a question for the group. Should I add a back firing emit and what should the crossover values be for this second rear mounted emit? After reviewing some other infinity’s with rear mounted emits, the rears appear to be crossed higher than the fronts. And which model would make the best reference to use for this mod?
btw, I restuffed the cabinets with 1 lb each of acoustic fill and removed the R19 and the bass appeared to open up a good bit.
btw, I restuffed the cabinets with 1 lb each of acoustic fill and removed the R19 and the bass appeared to open up a good bit.
Third coat of wipe on satin minwax poly

Temporarily mounted emits on the back of these RSb’s. Driving them with rs5000 crossovers which cross @ 5000 vs 4000 for the fronts. They are also wired 180 out of phase. The listening test feels much more open @ the high range. Some more experience would be appreciated.

I suspect it’s the adhesives you have used. With enclosed cabinets and aggressive solvents with nowhere to go but into the internals I would expect bad things to happen. I left mine open for 10 days for the adhesive solvents to dissipate prior to closing things up.I'm not mocking you, I'm serious. My experience with that carpet padding has been less then stellar, but, if you like the way it sounds, and it lasts, it could be a cheap way for the diy crowd.
The only way we'll know is time. It'd be cool if you opened them up and checked. But no, I won't lose any sleep over it if you don't.
Goodness, these rear driving emits opened up the soundstage enormously. If only you could hear what I am experiencing. Incredible experience.
They are also wired 180 out of phase.
Of the Infinitys that I am familiar with that have rear tweeters(Kappa 8 and Kappa 9), they are wired in-phase with the front tweeters.

pauljh
Active Member
The rear facing tweeters on my RS1b towers are wired out of phase. Arnie Nudell would have tried it both ways and selected the one that sounded best.Of the Infinitys that I am familiar with that have rear tweeters(Kappa 8 and Kappa 9), they are wired in-phase with the front tweeters.
Thank you Scott and Paul. Do I assume you both believe rear firing emits are a good and desirable addition? I am currently using the tweeter section of some RS 5000 crossovers in the mock-ups and the emits mounted with double sided tape. I will review the crossovers for the speakers mentioned for more ideas as to what frequency they should start and levels. The RS 5000 Lpad is 5 ohm 5W and the cap value is 3.0uf and inductor @ 0.1mH and 1.0 ohm 5W shunt resistor. Seems to work/sound pretty well at these values. I have it turned down about 65%Of the Infinity's that I am familiar with that have rear tweeters(Kappa 8 and Kappa 9), they are wired in-phase with the front tweeters.

Do I assume you both believe rear firing emits are a good and desirable addition?
Personally, I would have to say a lot depends on how the speaker was originally designed. My Kappa 8s and 9s certainly benefit as they were designed to work that way. On the other hand my Kappa 6s weren't. I think the rear firing tweeter would have some influence on speaker placement. The Kappa 6s can be much closer to the back wall than the K8 or K9s which need a healthy 3 feet or so.
Have you experimented with room placement as well as phase to see how the sound is? Do they have to be further into the room for the rear to have the desired effect. I also noticed that you have the rear tweeter offset, I assume to mirror the location of the front tweeter. Does the sound/effect change if the tweeter is moved to the center?
jazzmans
Super Member
My best guess is the lower model infintys didn't have rear firing emits purely due to cost.
ALL the top end infinitys had rear firing emits, except the renassaince, and even they had the emim still firing out the rear through a damped port,.
My RS IIb have the emims front and rear firing, with no baffles or filters, as well as having a rear firing emit.
OP, you should consider instead of terminating the midrange, rear-porting it. The RS II (they had cone instead of emim midranges) were open on the rear as well. Hell, You've done this much, why not try it? maybe make a new rear panel with a cutout for the midrange, and see how it sounds? You'd have to seal it from the woofer, which I think means making a new midrange port tube, or maybe modify the existing.
Maybe damp around the rear emit with foam like the last generation totl infintys did.
Worst case it'll suck and you go back to the original closed back.