• The move to the new server is done. There are some software and database maintenance updates in process. This has us passing the hat around to help out. We appreciate any donations. Seriously, even a dollar helps. The payment page may be found here - https://www.audiokarma.org/support.html

JBL 4311's = system complete... for now.

The 3112 is the actual crossover network itself. It goes in the 4311's. I'll go back and re-edit to save other people the confusion to!
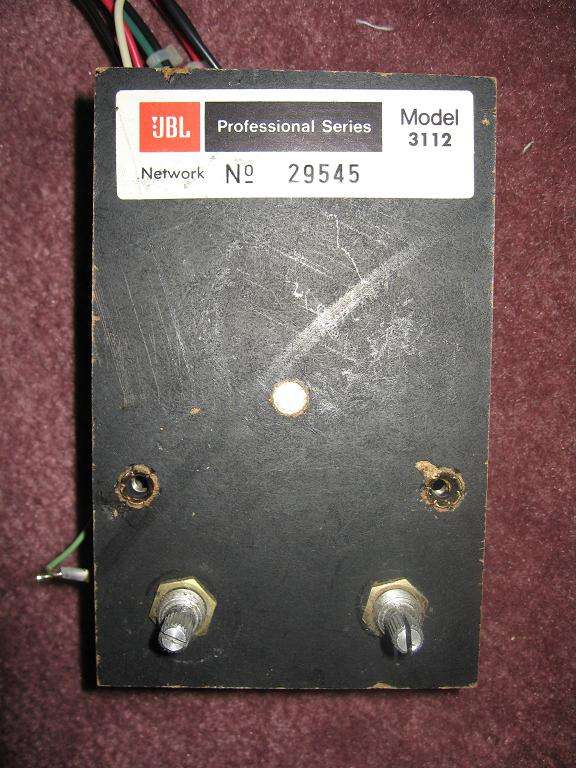

3112ju3.jpg
 
I just recieved a GREAT e-mail from gonzomeep about how to refinish the JBL's back to original quality. Once I get to it, I'll be back with pics.
 
I've been procrastanating(sp?). Well, at least making a bunch of earth-moving decisions before I tackle the job of recapping.

In reality, I'm waiting for June because I'm a teacher and I'll be off for a couple of months and will have plenty of time to work on the 4311's and other audio gear projects.

Brain: you've been an inspiration! Gonzo and Zilch are mentors.

Rick
 
Brainwashed said:
I just recieved a GREAT e-mail from gonzomeep about how to refinish the JBL's back to original quality. Once I get to it, I'll be back with pics.
Ditto. I'm anxious to give his method a try. Now if it'd only stop snowing and warm up so I could get some work done out in the garage... :pity:
 
Ok folks, I know it's been a while since I posted last, but it took a while for me to round up all of the refinishing supplies that were recommended by Gonzomeep.

Once that was done, it was time to test everything out. I only did one speaker so as to see if I knew what I was doing. I'll probably take more pics during the second one.

 
Now I'm Brainwashed

Superb! You see, that wasn't so bad huh? I can tell that you used a lot of patience, care, and common sense ( you won't find those materials at Home Depot). I can't wait to see the rest. Well Done.
 
The veneer still has some dings, I mean, they're 30 years old, and the original owner said they went with him on 3-4 cross country moves.

Also, I got sloppy and burned through it in a couple of places! Once on a front edge, and once on a corner. SLIGHTLY though. I'll get some pics of that upclose, because I think my 'repair' to it worked out decently.

The one I'm working on now is in a bit worse shape, with bigger dings, scratches, and stains. We'll see if gonzo's magic by proxy works again.

Oh, and that Watco Danish Oil has GOT to be the easiest finish EVER. Looks wonderful too.

I'll be back again with pics!
 
Sorry for the double post, but I wanted to let all of you who've subscribed to this thread that I have uploaded some more pics!

One of the images in one of my previous posts showed a re-finished cab, next to an un-restored cab. Here's the top of that unfinished cab...

Then, During taping off for the spraypaint...


And back to back with the first one.


Then a pic of my famowood patch job, before being sanded/worked...


Then, some of the famowood patch job after being sanded/worked and wiping the cab down with mineral spirits to remove all the dust that I couldn't blow out of the grain...


Then, a few pics after a coat of the danish oil has been applied, and before I wiped it down...


And a pic of the two cabs back to back...

 
Nice work brainwashed!

I have a set of these that I picked up for $50. I'd love to upgrade mine in similar fashion, but I don't feel too good about taking on a similar refurb, also don't have time. But it was cool to see your pics.

By any chance does anyone monitoring this thread know of a person in Oregon who does this type of work?
 
Nice work on the 4311's. Gives me some inspiration for redoing my 4313's. I may just reveneer them, though, as a couple of sides are severely gouged and I don't think sandpaper is going to make the grade. Did you have to rework the grills and cloth? I have one cracked cover frame and am missing covers for a pair of 4312a's. I am going to make some new frames. If they are similar to the frames on the 4311's and you need any, give me a shout. Making more than four is not a problem.
 
Yeah, I guess it never made it into the thread, but I had a buddy of who owed me a favor. He cut me a pair of frames out of some cabinet grade plywood. It was a real step up from the stock chip-core things. After I spray painted them, I used the original grill cloth, and applied it using some 3M spray adhesive. It worked rather well.

Thanks for the offer though!
 
Somebody from AK was selling a set of these on DFW CL. My wife is expecting or I would be interested.

The reason I bring this up is it would be cool to chat with some other AKers from N. TX.
 
In the last week I picked up two pairs of 4311's. One has the 'A' designation on the rear label while the other does not. All the drivers appear identical, and the only physical difference I can tell other than the label itself is that the L-Pads on one pair have a detented feel when turning them, and the other pair are completely smooth when turning them.

My question: is there a reason to recap these speakers beyond trying to change the sound from spec? As in, are the capacitors used in the original crossovers electrolytic and drying out as they age?

I am hesitant to pull off the metal plates to get to the x-overs because I do not want to accidentally damage these speakers. If the stock caps are not the kind that wear with age, I see no need to dig in and change them out.

However, one pair of these (the non-'A' pair) seem to have more midrange than the other pair at a flat EQ curve on both the amp and the speaker L-Pads themselves.

I am trying to get a feel for how deep into the restoration I should go.

I also have a darn tweeter nipple that needs sucked back out.
 
Good looking restore, brain! You'll have the best looking/sounding 4311's for sure. I really admire your patience and diligence!

I just couldn't face the task of restoring my 4311's.
 
Back
Top Bottom