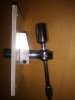
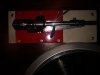
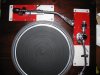
I just veneered my QL-50
Started of course by stripping it down to the plinth - removing the turntable assembly, the tone-arm (separate mounting on the Ql-50) hinges and badges
The turntable is really easy to remove, about 9 screws around the perimeter
After removing the badges and hinges, I 'mapped' out the hole and screw locations so I could find the same spots after covering with veneer. Important step if you go this route yourself!
Then onto removing the vinyl (which was already coming away at the corners and my reason for a new veneer) - this was just a case of heat and peel - I actually used an iron over an old pillow case to heat the vinyl without melting to the iron (Mrs would NOT be happy!) - once heated, you just pull and peel - it comes away quite easily with the glue softened by heat,
In retrospect I think may have been easier with a heat gun - which I have, just was already thinking ahead to the new veneer and had iron in my head.
Here is the naked plinth

It was then rough sanded (100 grit) to remove the old adhesive and give the surface a 'key' - you do not want ultra-smooth here, better to be coarse.
Then onto veneering ......
I got all the material from veneersupplies.com - the proprietor there Joe Woodworker is very helpful and responded to a host of questions I had
I purchased raw veneer, a veneer saw and some Heat-Lock Veneer Glue
The veneer I chose was Macassar (Ebony)
As a newbie veneer-er (is that a word?) I would have preferred something backed - maybe even with pre-applied peel and stick! But could find nothing that would be wide enough to create at best only one seam on the top.
So I went with the Iron activated heat glue.
Joe offered lots of both advice and cautions - the paramount one with the iron method being shrinkage. He suggested pre-shrinking with iron before any glue application
So the first thing I discovered was that just applying the glue must have created expansion and a major compressive stress causing one of my pieces to roll - I realized the difference in that piece versus the first one was because I had applied masking tape on the top surface - the piece was taped to a board while applying the glue but as soon as I released that tape, it curled like an olympic half-pipe! The other piece stayed flat and that is when I realized the tape on the non-glue side was pulling it like that - So I believe the pre-iron indeed possibly shrunk the piece, while applying the adhesive re-hydrated it and the tape applying the compressive force that pulled the ends up.
The next unexpected part of the process - after allowing adhesive on both substrate and veneer to dry, I began to apply - the first thing I luckily noticed quite quickly is that even without heating, it grabbed like contact cement - I was absolutely not expecting that! Fortunately not too much area contact and was able to peel it off and made a more accurate placement before setting it down.
One part of the design/layout process to note here ..... I wanted to waterfall the front face and sides so cut the piece large enough to accommodate the top area and those other faces. To that end I drew a layout line on the substrate where the seam would be and laid up to that line. Then got the iron and pressed it on. This process does work well, it gives a good bond all the way to the edges.
Now to cut the veneer around the top - as mentioned I wanted waterfall edges with continuous grain pattern so wanted minimal kerfs. I recognized before installing that the ideal process is sides first, then the top. My 'plan' had been that I hoped to be able to use piece of the excess veneer as a spacer between the side and the veneer saw, to create the necessary overhang to achieve the same result. Well the theory and the plan did not come to positive result. Even at this stage what I should have done is put a sacrificial strop on the sides and face, cut to that face and then remove the temporary strips and replace with the final pieces once cut from the top. But it's not too bad.
The other tricky part is seaming the top face pieces - again the shrinking factor comes into play here which just makes it hard to get a really tight seam by this method of hot-melt glue - with the turntable and tone-arm mount it means that the seam joints are quite small and in the end I was happy enough with the result
I have a full size router but actually bought a small 1/8" shank 3/16" trim bit with bearing for my Dremel - that was excellent for trimming around the cut-outs on the top and trimming the bottoms and corner edges.
This is it essentially veneered and trimmed
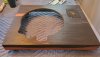
I gave it a sanding - again, not too fine because the finishing oil I used - Rubio Monocoat recommends not to go too smooth or it will not bond properly
And another lesson learned - if doing again I would first sand to a smooth finish then go back again to 120
But it feels quite good after the Rubio cured.
One thing about the Macassaar - even with a 'neutral' oil, it darkens a LOT - but I like the resultant colour - the sap wood was very pale in raw state but turned lovely orange with the oil.
I actually wish I had included more at the seam - I may even go back and put an inlay section on either side of the tone-arm board similar to the left side of the turntable aperture.
The final step is re-assembly including re-application of the hinges and badges
Note the tone-arm board is temporary - I knocked out a quick copy with the router and will use the original as a pattern once again for an Aluminum one
Here's the finished article
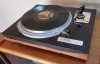


Read about the replacement cover from jnbaudio here -
https://audiokarma.org/forums/index.php?threads/replacement-dust-cover-jnbaudio-review.925727/
I may do it all over again! I'm reasonable pleased with the result and it's 'not bad' for a first attempt at this process. But learned a lot in the process and am bit of perfectionist, so might like to go for that!
I think next time around I will lay up the veneer on some thin plywood (maybe 1/8 or 1/4") and make a false box 'skin' with proper mitred corners - that involves different technique and adds some expense of a vacuum bag system; and I mentioned the sap-wood actually looked a lot better than I had imagined and would probably incorporate more of a band of that at the seam next time around,
But I might look to that later in the fall and enjoy what I have for a while!