• The move to the new server is done. There are some software and database maintenance updates in process. This has us passing the hat around to help out. We appreciate any donations. Seriously, even a dollar helps. The payment page may be found here - https://www.audiokarma.org/support.html

JVC QL-?? owners thread

Actually, they used the Super A till the 2000s and it is still patented.

Super A first version was up till 81, second gen was till the 90s then the final version of the Super A using the AX-M9000, the last high end amp they'll ever make.

https://www.hifiengine.com/manual_library/jvc/ax-m9000.shtml

https://audio-database.com/VICTOR/amp/ax-m9000.html

The Super A chip was used for all their amplifiers all along this time, making the cost of the chip less expensive, designed by Victor, but made by Sanyo if I remember well or Hitachi.

It doesn't mean the first Super A chip was bad, it was more like a refinement due to their OCD and details obsession, as well as the need for the market to release something new.

I recall the all in one chip design coming out and I think, if I remember correctly, Super A was done originally w/o the chip design for the first two, years (which I purchased actually in May 1981). I bought the amp , tuner, and turntable all back then as I lost my fisher 500c in theft.

They started the mass produced chip design later and I know it was one of their best designs. I really like it. Especially with the early A X2- A- X9 designs.

For what it’s worth, seems they were always underrated. I think the original 1979-1980/81 super A was all a board designed and not a simple mass produced chip? I don’t remember it was over 41 years ago. Chip design was to reduce costs? I ran mine for over 20 years (full tilt a lot of the time in my college days) before I ran into a problem.

I don’t know if I have the original USA brochures anymore but will look for them. I will post up the English version of those A X integrated models if I can find them.

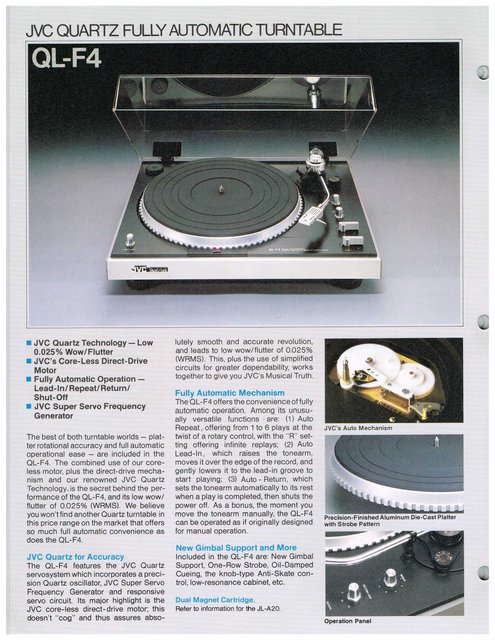
The stereo shop was reluctant to give me them even though I purchased the A X2, the matching tuner (TX-1 I think) , and the L- F 41. Still have the L F41 and original AT cart it came with. Working wonderfully after bypassing a micro switch for power. Actually well built for the mass produced era of tables.

I have a JVC A X500 also superA but it is the chip design from the 90s era and I just don’t appreciate it as much as those old A X models from 1980. Very clean sounding but has issues with the board and needs work.

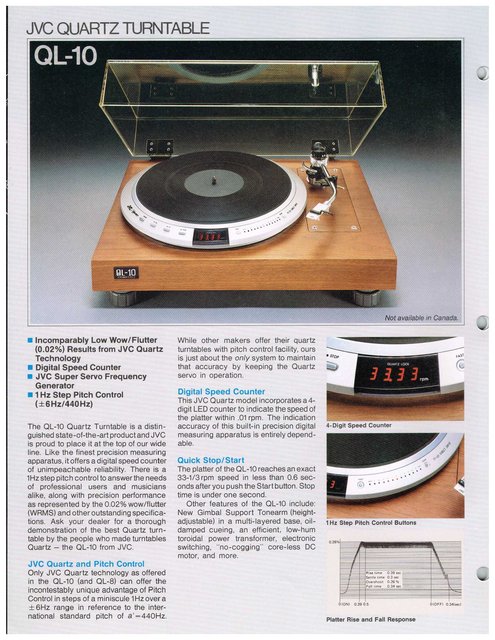
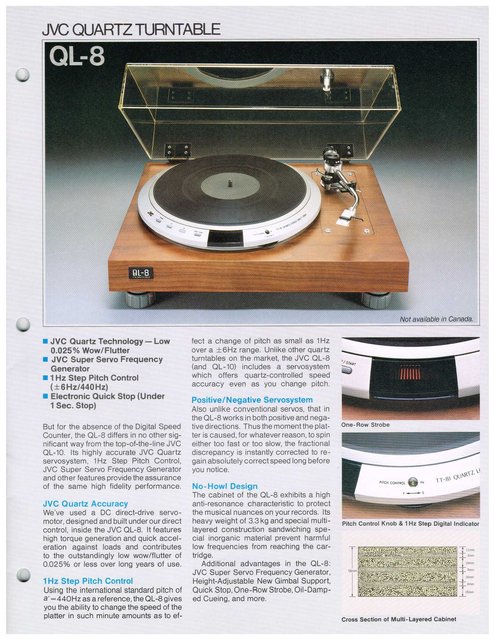
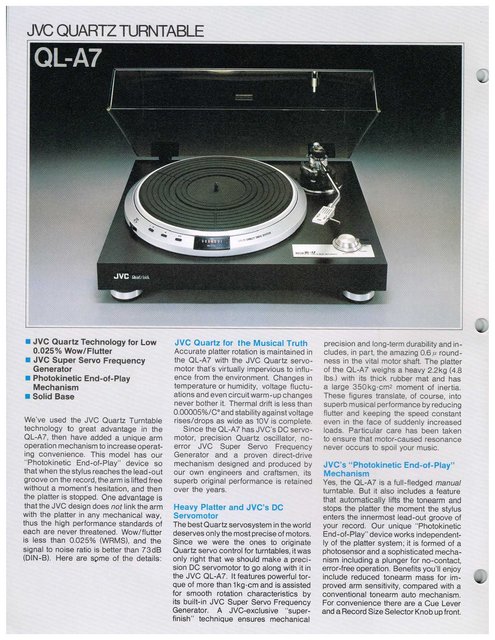
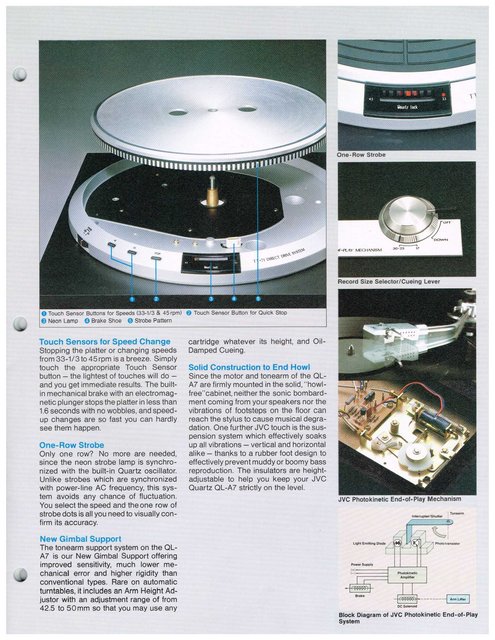
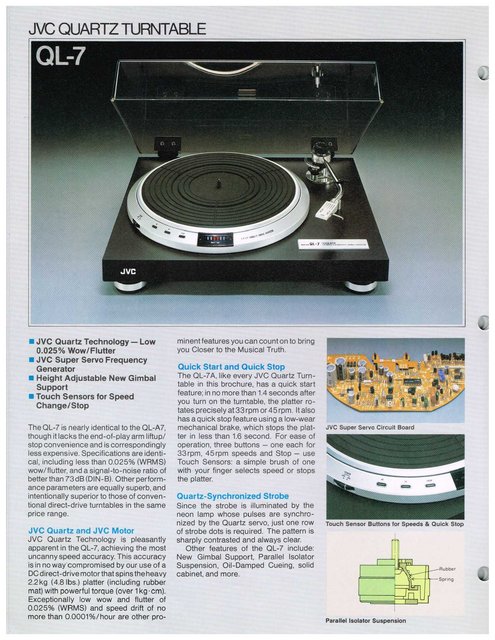
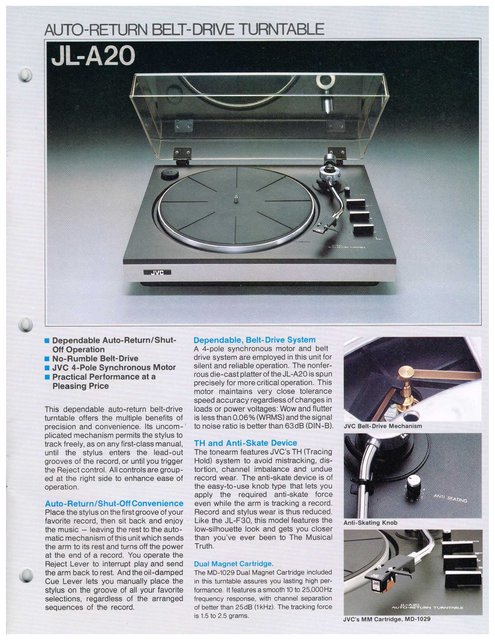
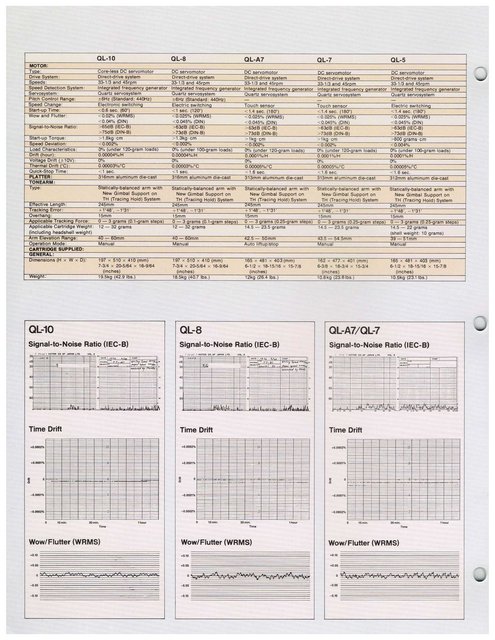
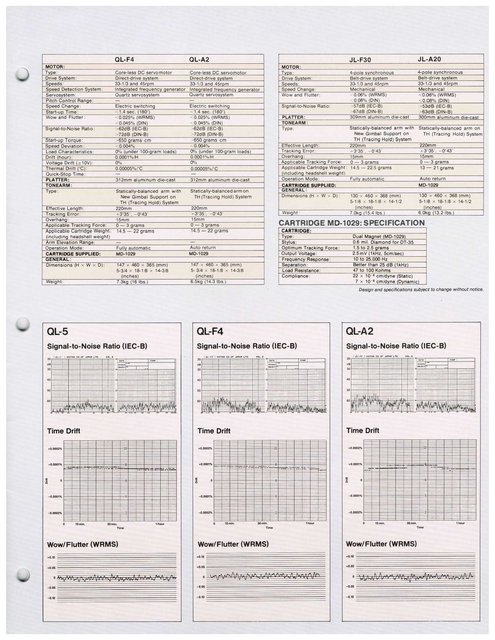
Still have the JVC QL A7 six years now and and I still enjoy it. I posted up its brochure earlier in this thread.

It really produces some of the nicest and detailed sound of the 12 tables I have managed to acquire.

Also have a R X40 Super A receiver. Goes in grandsons room. It must be from the mid 80s idk. Not as nice as the old A X2 integrated amp but just my opinion. I’m just partial to the late 70s and early 1980s when it comes to the Japanese market. JVC was often overlooked but that’s okay with me.

I really wish they still produced some of the old JVC designs. I ll have to suffer with 2nd hand and learning how to repair. Starting to get the hang of it.
 
Super A first version was up till 81, second gen was till the 90s then the final version of the Super A using the AX-M9000, the last high end amp they'll ever make.

Could it be compared to Technics' "class AA or new class A" or other brands that advertised surrogate class A operation on the front of their integrated amplifiers?
 
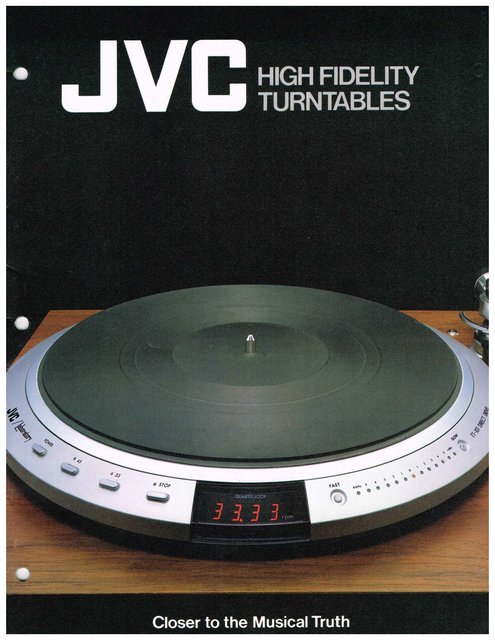
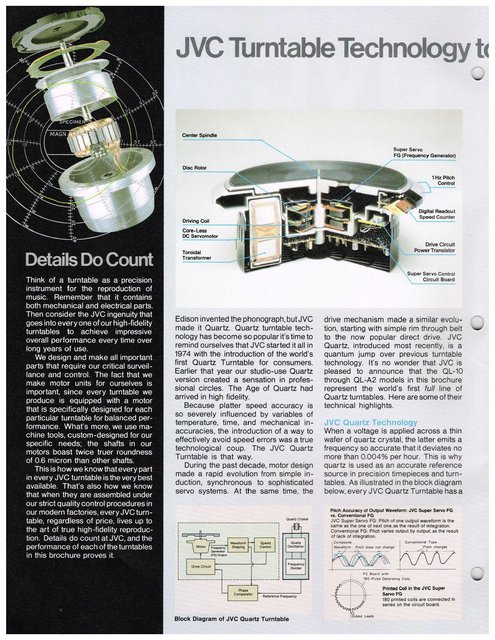
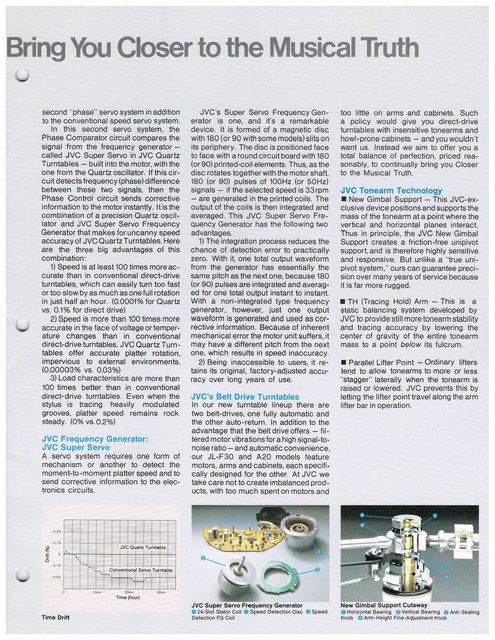
some Jvc / Victor brochures not in Japanese language

1.jpg
 
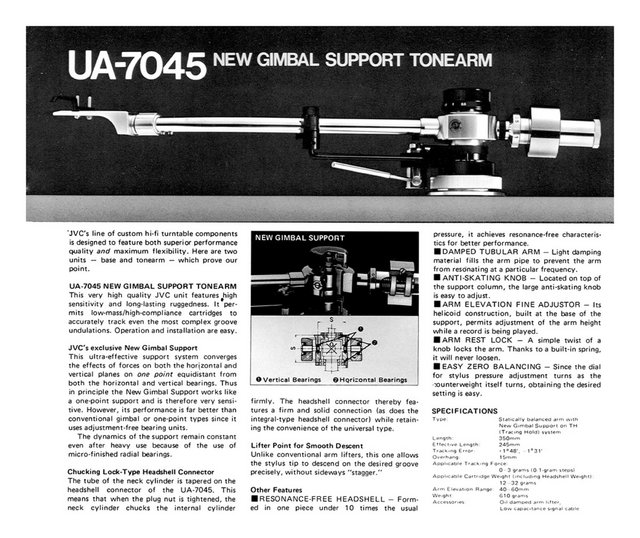
Thank you both Snuck and best-groove for posting those brochures. Love the cut away view of the tonearm, it shows just how much engineering went into it. To build that tonearm today would cost thousands, it's very complex and precise, yet to operate and adjust it, very easy! A simple calibrated knurled ring allows VTA to be adjusted on the fly and the top knurled ring can be adjusted on the fly for anti-skating. The adjusting mechanisms "feel" like turning the focus ring on a fine camera lens. Just very well done.
I'd love to get my hands on some of those horn based speakers to try, I'm sure with their engineering department working on them they must sound quite special.

BillWojo
 
4E2A2DBF-17FA-4C61-AA91-64813C323C56.jpeg

Finally just bit the bullet and decided to fix the droopy rubber damping bushing.
on the JVC QL A7. In my brochure it says that it has the same new gimbal tonearm setup as the 8 and 10 for the pivot and damping, it definitely has a different rest but the counterweight shaft is still the same design. I was unable to loosen the set screw underneath the counterweight shaft.

Tried several times but it seems to be tightened down more than I am willing to torque on it. One slip is all that it would take to damage it so I just removed the counterweight by unscrewing it until it backed off all the way.

Before all of this I removed dust lid, removed platter and the cartridge. Also removed the motor cover as it has a poor solder joint on a capacitor and I think I will try to tackle that problem after this one.

Table has nice flat sides and balanced up nicely on the work bench. The old rubber was so deteriorated that I didn’t have to do much to remove it. It was strangely soft on the outside but brittle and dry underneath. Used some need nosed pliers to get a hold of the rubber (hemostats were my second choice) and it was easy to pull out as it split. Gently pulling so I didn’t hit anything and I only moved it up off the shaft about 5 mm then let go with the pliers. (They are very small hobby type and not your average sized ones for normal electrical work).

Used small dental tools for the rest of the removal. The rubber sets inside the pivot housing and around the brass shaft. The brass is gear cut to hold the rubber in place to prevent rotation. It’s really in there tight and the brass rod is free floating on a pivot point inside the arm pivot housing. Hence, the entire tailpiece with counterweight can act as a harmonic damping unit.

Now I have to find a suitable replacement rubber o ring to use as a replacement. I am contemplating either using several rubber o rings that can stretch over the stainless tailpiece but snap back around the thinner diameter cut brass floating rod. Or I could find something that I could cut a parallel slice and wrap around the small brass rod, super glue to hold it in place and maybe some silicone to make a stronger bond.

What are your thoughts? What has anyone tried? I don’t think there’s a replacement rubber gasket available. Also I left the rubber that is still inside the pivot housing as it separates the brass rod from the housing.

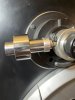
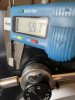
I almost think it will be easier now w/o removal of the counterweight shaft. The cut will have to be aligned on the top side facing upwards as the constant weight pushed the old rubber out of the bottom. Picture the rod horizontal and the pinched rubber squeezing out from the bottom. A few pics for others in case they need. D79A3893-518C-4EAC-815D-7853AE2EDA0E.jpegCCCC6C86-1C70-4AAA-B0CF-998A899630C5.jpeg 1CDCB67C-0B02-4B43-A317-A4056FCF10F9.jpeg C4C0A227-D481-440C-BE27-9B07D142EA1D.jpeg 6CD23730-09B1-4E76-B333-37E4894A6332.jpeg
 
Last edited:
So for the first Super A, it was actually encased in kind of green plastic but the mass production was already started since the release : the whole range in which they appeared dated from 1979. It may have come later in USA however, but the whole procedural was extremly industrial and required a big company to make it and release a full Super A line. And sorry for the theft. :( Fisher did good things too ! the whole AX-1 to AX-9 and M-7050 was made altogether.

That helped to reduce the cost, enhanced the advertising, and allowed mass production. It was already a chip but Super A is actually a whole, it's a small circuit being part of the big circuit with a chip as its base. On some designs such as the most expensive ones, it was indeed separated. The whole AX original line is underrated and was just liked by its look, otherwhise most people would have never cared about it (better for us!).

If you can find the original advert for USA? that would be perfect! :D

It was well built but it's because we have a wrong view of mass production, the same goes for their instruments. We think mass production = garbage and craftworker made = luxuous while it all depends on the standards. In their mind, mass production means reduced cost for both production, maintenance and easier quality checks and a fast response to market demand. That's why we have so many TT still working today : quality and number. The prices of such items were low compare to the quality thanks to the quantities.

The JVC version of the 90s shared the same philosophy of before, only with way less R&D and cheaper productions, yet qualities were still there, it was mostly because of cost rises from economical crisis and rise of salaries.

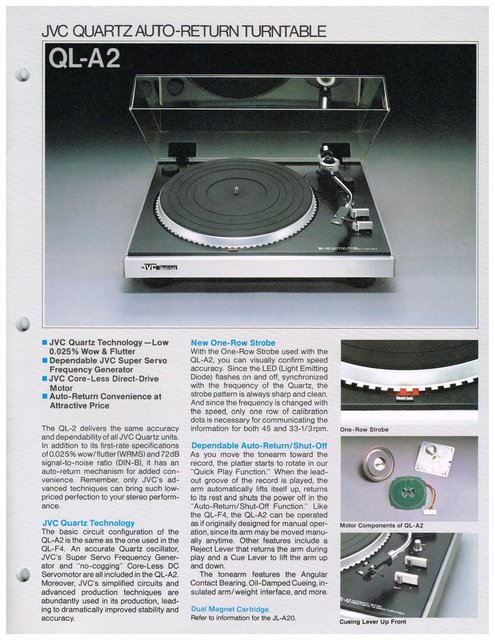
The QL-A7 was really really good because it is a kick off of the TT-81. The TT-71 which is used was released later but should have never seen the light. The main issues were that TT-61 was good despite being low end, and TT-81 was too good for its price, killing the market for TT-101. They needed to make the TT-81 rarer so they made the TT-71 which is an amazing base as well.

"Although it is a popular type with the cost reduction of TT101, there is no noticeable difference in basic performance as a quartz lock DD turntable. This uses a 12-pole DC servomotor, and although the weight is about 2kg lighter, the SN ratio is about 2dB lower on the data. Practically speaking, it's performance is such that you don't need anything more than this." Okihiko Kanno, japanese tester of the days.

Keep the JVC gear, they are good but yes, they need care. :(

Honnestly, if they rerelease their direct drives TT now, they could have a big market even if made in another country : all the circuits are from them, it's all mastered, only the tonearms would be the problems because they require special skills despite the R&D is already done. The issue is that their name does not carry enough weight, that Kenwood merging is blocking them as well, and the market in hifi is quite whimpsical. They did very good DAC as well.

As for Super A, so far I gather, it's a little bit cleverer and is a reason they never dropped it (1979 to 2000s, and stopped only because of the death of the company and of the market).

Thanks for the brochures, and yes, direct drive in Japan still have a huge following, especially the Yamaha GT-2000 (who are sold for Micro Seiki BL series prices in the upper region) made by Victor too. I wish they could use their real names and logo now worldwide. It costed them tons of money to make advertising for JVC, NIVICO and such!

The tonearm was very special and first made with a camera (optical if I remember) to make it the way it is with such quality of making, it's making me think to a nice Zeiss microscope. The adjusment is smooth despite all the years, it's really pretty, I didn't like to let mine go.

For the horns, they made them for the pros for a very long time ( I saw once a huge speaker with 2 (yes, two!) 38cm of their special calibers, with one huge mid range and one huge tweeter per cabinet).

Congratulations for the repair of the tonearm!! Ans thanks for the tutorial about it. For replacement, some people used wood, some rubbers from hardware stores, I think it's best to keep it with rubber.

Here is a tutorial too :

https://www.audiovintage.fr/leforum/viewtopic.php?t=55306
 
What are your thoughts? What has anyone tried? I don’t think there’s a replacement rubber gasket available. Also I left the rubber that is still inside the pivot housing as it separates the brass rod from the housing.

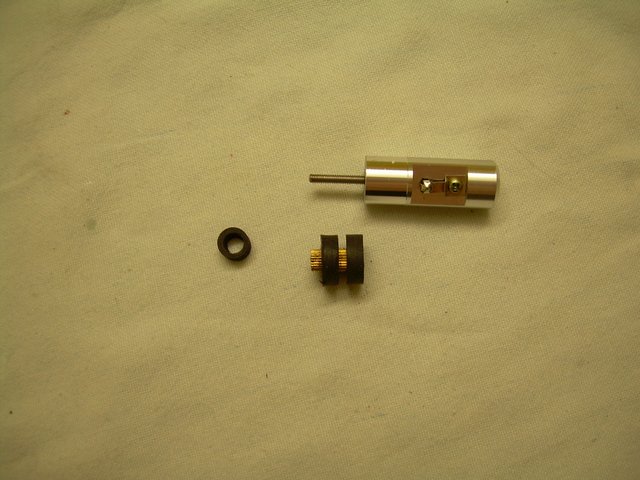
I used the gasket of the taps, it was necessary to remove some material on the outside of the gasket as it is slightly wider

DSCN5960.jpg
 
I used the gasket of the taps, it was necessary to remove some material on the outside of the gasket as it is slightly wider

DSCN5960.jpg

Question. Is that set screw underneath a Phillips head screw or is it a 1.5 mm Allen key?

Also, how did you get it apart to the point in your photo? Does it simply unscrew out? Does that set screw underneath have to be loosened first?
 
It is a cross Philips head screw
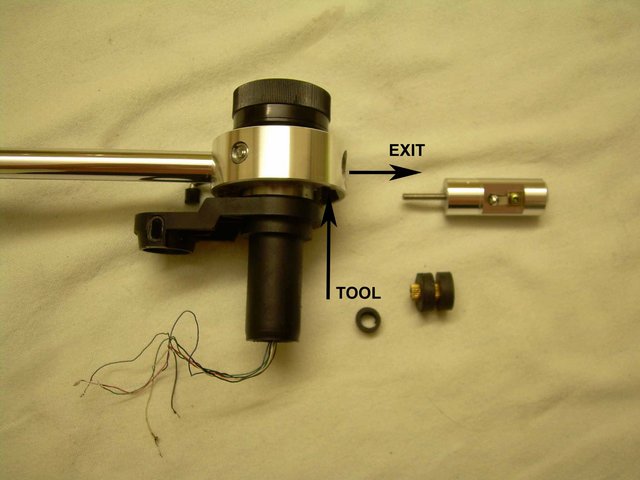
I didn't want to disassemble all the articulation so I entered from inside the castle with a small and very thin open-end wrench but it was very difficult because the room for maneuver is small.
Later I thought that a complete overhaul of the arm and a rewiring was the best thing to do and I entrusted it to a repair lab.
This told me that it uses softer rubber than rubber tap seals more similar to the original but I kept the one I had used myself.

DSCN5962.jpg

Best-Groove you are my hero! I am so happy as I now understand! Absolutely helped me with my understanding and methods to attack this problem.

I have a temporary repair job on it using some compressed “impact” foam rubber material used to protect objects from hard sudden impact. I used it as a testing material since it is easy to shape and I wanted to see how hard it would be to fit it in a tight area. I used dental tools for fitting.

But, the results were spectacular and now I don’t want to undo my “temporary” repair. (Edit: the results from my temporary repair material and actually playing a few records. Sound is truly improved with the removal of the old drooping material and the new temporary material) I can’t believe how much it impacted the overall sound and eliminating background noise.

I’m going to see how long it will last. Thinking about using sorbane material for a permanent solution. It’s used in recoil pads for trap shooting and I think it has a similar hardness to the original damping rubber. I really don’t want to remove it all the way though to repair it as it is a lot of work and the wires are old and delicate.

Thank you again! Made my day.

DR
 
Last edited:
ADD51FFF-3882-4FC0-AACC-7459AD3128C5.jpeg
@desertrat748 Very well indeed very very well, but show some photos for the benefit of all.

Unfortunately I didn’t think I would be using it as a permanent solution and didn’t take any pictures as I repaired. I took several pics of the last state of repair where the old rubber was removed. They are posted above.

After the old was removed, i cut a square of the very dense/stiff foam rubber used in packaging to protect expensive products. I think it was from some speakers or headphones I had purchased. Cut it into a round shape. about 1 inch long and 1 inch diameter. All by hand with a sharp knife.

Drilled a 1/4 “ hole through the center, cut a slit on the top to slip it over the 6mm brass splined shaft.

It was trimmed down and cut a little longer than the removed rubber. 1-2 mm or so and larger in diameter of the12 mm stainless tailpipe in order to have some compression and hold up the counterweight once installed. The foam rubber would compress more than a solid piece of rubber.

Since it was cut with a slit to slide over the brass shaft, I turned it so the cut was facing up on the top and the solid bottom would see the compression due to gravity and the counterweight.

Then wrapped around with very fine black polyester thread much like tying a fly for fly fishing multiple times to secure it and keep it from losing the position and add to the firmness.

Finally decided to cut a piece of electrical tape about as wide as the new rubber and wrap it as a top layer over the thread. Maybe I should have just left it with the thread?

It was just a test run to see how large of a piece to make and how that foam rubber performed. I just happened to run across it as I was looking for a suitable replacement.

Thought I would purchase some actual rubber after I figured out how to repair it without removing the whole tonearm from the plinth and having to un-solder the wires.

Luckily for me it looked so good I decided to try it out. Results were unbelievably positive and now I don’t want to mess with it. Definitely a huge improvement over the old worn droopy counterweight. Separation and detail is now outstanding. Never knew what I was missing when I had it shimmed.

If I decide to redo it with some solid rubber, I will take some step by step pics. Posted up a pic of the temporary test repair. Definitely need to trim the electrical tape back or just redo it. Again, I didn’t think it would be so functional nor used for more than a few minutes. Now that it sounds so good, I don’t want to touch it! OCD about the look of it though. I’m going to wait until I obtain some sorbothane (sp?). Used for recoil pads and absorbing shock is what it was designed for.

DR.
 
Last edited:
Later I thought that a complete overhaul of the arm and a rewiring was the best thing to do and I entrusted it to a repair lab.
This told me that it uses softer rubber than rubber tap seals more similar to the original but I kept the one I had used myself.

DSCN5962.jpg

What repair lab did the work? Where are they located? I’m trying to find one.
 
That's very nice to detail the procedure, even without pictures, it is kind to take time and to give your experience.

That's quite a dark horse.

It’s indeed nice to be able to help others. Perhaps some others might benefit from the methods.

I don’t like to tackle such delicate repairs with something that would be hard to get replacement parts but I hated the final droopy state it was in more.

It wasn’t a pretty repair but it is a great functional repair. My ocd will have to live with it until I obtain some suitable replacement material (I want sorbothane with a 6mm hole or 1/4 in center hole and not the 1/2” I commonly find.
 
Back
Top Bottom