• The move to the new server is done. There are some software and database maintenance updates in process. This has us passing the hat around to help out. We appreciate any donations. Seriously, even a dollar helps. The payment page may be found here - https://www.audiokarma.org/support.html

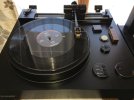
Pioneer PL-L1000A Thread

Talk with @jhaan92, he's repaired a few of these tables with assistance from AK members such as pio1980, EdinTX, markthefixer, and one other I can't recall at the moment. I believe he also gave gary7 some help on an issue he had with a PL 8000 table he was working on.
Thanks, I will contact jhaan92.

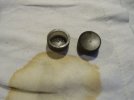
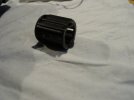
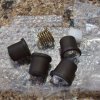
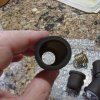
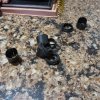
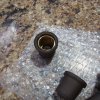
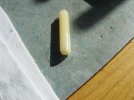
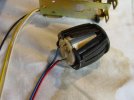
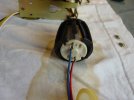
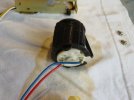
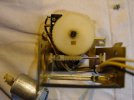
In the meantime the new rubber parts arrived. lumicrro shipped them express and they look very nice. I ordered one of the roller end caps and he sent 2. The motor sleeve looks very interesting, I like it. I think that we can consider lumicrro a reliable source now.

DSC03170.JPGDSC03172.JPGDSC03173.JPGDSC03175.JPG

:beerchug:,
James
 
I don't think that you can "touch up" any of these joints. A large portion of them boiled and spit out old flux and if I tried to just add a little solder and reflow the joint many of them went "cold solder".
I had to de-solder, clean and freshly re-solder each and every connection. I would not trust the connection with a reflow.
A few of the pads for the IC's have extremely little surface area to solder the pin to. I had to be really careful to make sure that I got a good connection and used a magnifying glass to check them afterwards.
Those vintage boards are thick and dissipate heat from the iron on their own. My 1st thought was to wait for other members to chime in since I've only worked on two 70's pieces. I used more iron heat temp on the older pieces.. I also double checked my iron's shaft holder nut Jones cuz it comes loose after a few hours of cooking.

:beerchug:
 
After getting the thing on my bench removing the top cover was relatively easy.

Place the turntable on a box.
Remove the dustcover, headshell, counterweight and platter.
Remove the steel cover on the top cover.
Reach in and unplug the 4 plugs connecting the top cover to the base.
Remove the feet and support posts, the mounting screws can be removed with an 8mm socket.
Slide the tonearm sled to the full left (center) position.
Lift off the top cover.

View attachment 3309277View attachment 3309278View attachment 3309279View attachment 3309280View attachment 3309281View attachment 3309282

:beerchug:,
James
I bought the damper pads for mine from here. https://www.ebay.com/itm/225597422209 they were a perfect fit and solved the dragging platter issue on my Phase Linear PL8000 series II. I just had mine returned to service after almost 30 years in storage. Sounds like it did when I bought it new.
 

Attachments

  • RIMG0003r.jpg
    RIMG0003r.jpg
    99.9 KB · Views: 11
  • RIMG0004r.jpg
    RIMG0004r.jpg
    96.6 KB · Views: 11
I bought the damper pads for mine from here. https://www.ebay.com/itm/225597422209 they were a perfect fit and solved the dragging platter issue on my Phase Linear PL8000 series II. I just had mine returned to service after almost 30 years in storage. Sounds like it did when I bought it new.
Found more pics of the new and old dampers.
 

Attachments

  • RIMG0013.JPG
    RIMG0013.JPG
    176.1 KB · Views: 13
  • RIMG0014.JPG
    RIMG0014.JPG
    151.2 KB · Views: 13
  • RIMG0018.JPG
    RIMG0018.JPG
    217.4 KB · Views: 13
  • RIMG0015.JPG
    RIMG0015.JPG
    170.7 KB · Views: 13
  • RIMG0002.JPG
    RIMG0002.JPG
    200.3 KB · Views: 13
Well, I was summoned by a_retent, so I’ll chime in with some advice from my experience with these turntables.

The tonearm is not particularly difficult to remove, but does require some patience. That being said, there is really no reason to remove the tonearm - nothing is either easily serviceable nor well explained in the service manual.

The only item that should be addressed due to it’s age is the rear roller (which is brass and has a rubber cap on it - the other two rollers are plastic), which can be removed without removing the tonearm. All you have to do is lift up on the carriage assembly and unscrew it from the base - it should have enough room to come out. If not, then remove the rear guide bar and you’ll have all the room in the world.

They used some form of dampening fluid for that roller, which gives the tonearm it’s smooth movement on the rails. I used 4-6 drops of 10K cSt differential fluid, which is used in RC cars and can be obtained either online or at a hobby retailer. That being said, you’ll need to spin the dampened roller by hand PRIOR to removal so that you get a general idea for how much resistance the roller has before you clean it. Each roller is slightly different, with some requiring more fluid, and others requiring less.

I originally tried silicone grease, but after several years the roller was too dampened to efficiently move the tonearm on the rails as the silicone grease got too “gummed up”.

After you get the rear roller reinstalled, you may need to adjust the lead in/lead out speeds as your roller dampening may have changed, but you won’t know that until you get it (the tone arm) back together.

The front two rollers use air bearings, which require no attention (so, don’t try to lubricate them with anything). The CDS light sensor should not require any attention either, unless the tone arm leads (angled toward center of platter) or trails (angled toward the outside edge of the platter) - then this is a whole different issue, which is NOT in the service manual, and requires a whole lot more patience to correct (as well as a tonearm disassembly).

Hopefully you don’t have that issue when it’s all done. I’ve only had one out of all of the 1000/1000A turntables I’ve serviced over the years that had this issue.

These are fine tables, and tend to be extremely reliable with marginal servicing. The only reason I sold my 1000A is because I bought the no holds barred linear tracker - the Pioneer PL-L1. However, I still service the other 1000s and my “frankentable”, which is a 1000A with a 1000 tone arm.

Here is a picture of my PL-L1

DF3E8C2E-22EB-4F08-A551-C61FF59661CF.jpeg


Feel free to reach out to me via PM if you have any specific questions! Also, I do still have a few spare tonearm parts if you need something.


- Jason

 
Well, I was summoned by a_retent, so I’ll chime in with some advice from my experience with these turntables.

The tonearm is not particularly difficult to remove, but does require some patience. That being said, there is really no reason to remove the tonearm - nothing is either easily serviceable nor well explained in the service manual.

The only item that should be addressed due to it’s age is the rear roller (which is brass and has a rubber cap on it - the other two rollers are plastic), which can be removed without removing the tonearm. All you have to do is lift up on the carriage assembly and unscrew it from the base - it should have enough room to come out. If not, then remove the rear guide bar and you’ll have all the room in the world.

They used some form of dampening fluid for that roller, which gives the tonearm it’s smooth movement on the rails. I used 4-6 drops of 10K cSt differential fluid, which is used in RC cars and can be obtained either online or at a hobby retailer. That being said, you’ll need to spin the dampened roller by hand PRIOR to removal so that you get a general idea for how much resistance the roller has before you clean it. Each roller is slightly different, with some requiring more fluid, and others requiring less.

I originally tried silicone grease, but after several years the roller was too dampened to efficiently move the tonearm on the rails as the silicone grease got too “gummed up”.

After you get the rear roller reinstalled, you may need to adjust the lead in/lead out speeds as your roller dampening may have changed, but you won’t know that until you get it (the tone arm) back together.

The front two rollers use air bearings, which require no attention (so, don’t try to lubricate them with anything). The CDS light sensor should not require any attention either, unless the tone arm leads (angled toward center of platter) or trails (angled toward the outside edge of the platter) - then this is a whole different issue, which is NOT in the service manual, and requires a whole lot more patience to correct (as well as a tonearm disassembly).

Hopefully you don’t have that issue when it’s all done. I’ve only had one out of all of the 1000/1000A turntables I’ve serviced over the years that had this issue.

These are fine tables, and tend to be extremely reliable with marginal servicing. The only reason I sold my 1000A is because I bought the no holds barred linear tracker - the Pioneer PL-L1. However, I still service the other 1000s and my “frankentable”, which is a 1000A with a 1000 tone arm.

Here is a picture of my PL-L1

View attachment 3325262


Feel free to reach out to me via PM if you have any specific questions! Also, I do still have a few spare tonearm parts if you need something.


- Jason
Way cool Jason! Thanks for stopping by, that is all useful info.

Today I removed the EV Mechanism for servicing, photos to follow tomorrow.

I bought some 4k RC modeler silicone differential fluid based on what I read in other threads. If that is the wrong stuff I will order some 10k fluid.

:beerchug:,
James
 
Found more pics of the new and old dampers.
Thanks Greg! Useful info. :thumbsup:

I had the same experience with the disintegrating spring dampers and also bought some ebay 3D silicone rubber replacements, as well as some (used but good) suspension springs to replace my badly stretched suspension springs.
I will be addressing that later when I get to the point of putting things back together.

:beerchug:,
James
 
... If not, then remove the rear guide bar and you’ll have all the room in the world.

- Jason
Now that I have the EV Mech out I see that the rear guide bar/rail is easily removed by loosening the 2 Allen screws in the side frames and sliding the rail out to the left.

:beerchug:,
James
 
If all goes according to plan I will be going over to the building supply store this coming Friday and buying wood to build 2 LP cabinets.
 
I spent a pretty penny for the PL-L1, that’s for sure!

I loved my 1000A - I used it for many years before I decided I wanted to try a different table. I was close to pulling the trigger on a Pioneer PL-7L, which is an excellent table, and then I found the listing for the PL-L1. I knew it is a rare and sought after table, and I really liked it’s looks to boot. Don’t let it fool you though - it weighs almost 65 lbs!

The biggest tipping point was that the seller was local to me, so I didn’t have to worry about shipping damage. He had also completely recapped and recalibrated the table for many years of reliable service. Only when I was picking it up did I find out that he is an active AK member, which was pretty awesome!

As for the dampening fluid, I just used what I had on hand as I had bought a bottle to restore my Pioneer RT-909 tension rollers, which had become severely gummed up from sitting for 25 years. It got the job done well on the 1000 I worked on, so just thought I would pass that info on for whomever needs the advice.


- Jason
 
Just another "potential" suggestion. I spent more than 40 years working on photocopiers. (even back in the analog days when the scanner moved for every copy. The lubricant they always recommended for the scanner rails was called "launa oil" It was thin and did not accumulate dust. It was expensive. I remember a small half ounce bottle being "Holy crap priced"! https://japanhobbytool.com/products/launa-40-synthetic-lubricating-oil
 
Well, as the dampening fluid is kept inside of the roller assembly by a rubber cap, dust isn’t an issue in this application.

However, I can think of many other things this could come in handy with, so thanks for that suggestion!


- Jason
 
I spent a pretty penny for the PL-L1, that’s for sure!

I loved my 1000A - I used it for many years before I decided I wanted to try a different table. I was close to pulling the trigger on a Pioneer PL-7L, which is an excellent table, and then I found the listing for the PL-L1. I knew it is a rare and sought after table, and I really liked it’s looks to boot. Don’t let it fool you though - it weighs almost 65 lbs!

The biggest tipping point was that the seller was local to me, so I didn’t have to worry about shipping damage. He had also completely recapped and recalibrated the table for many years of reliable service. Only when I was picking it up did I find out that he is an active AK member, which was pretty awesome!

As for the dampening fluid, I just used what I had on hand as I had bought a bottle to restore my Pioneer RT-909 tension rollers, which had become severely gummed up from sitting for 25 years. It got the job done well on the 1000 I worked on, so just thought I would pass that info on for whomever needs the advice.


- Jason
Up until now I had never even heard of the PL-L1. It sure is a beautiful table!

The PL-L1000A is the only turntable that I have ever owned or used. Well, that is not quite true, I do also have a Dual CS 741 Q with Ortofon OM10 that a friend gave me a couple of years ago but I have never used it.

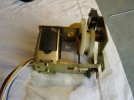
The plan for today was to refurb the EV Mech.
It is pretty easy to disassemble.
DSC03182.JPGDSC03200.JPGDSC03203.JPG
The motor sleeve is falling apart just like the suspension spring boots do.

:beerchug:,
James
 
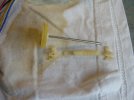
Normally I would not try to remove the work gear from the shaft out of fear of damaging it.
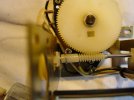
But in this case when I started to clean off the old grease I found that the worm gear moved easily on the shaft, unfortunately because it is split.

DSC03207.JPG
So, I have to dream up a repair. I am hoping that no grease got into the split because that would make it near impossible to glue, but am guessing that There is probably grease in there.

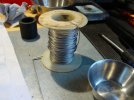
I am considering tightly wrapping the non-threaded part with some stainless steel safety wire. That also entails risk, too tight and the whole thing will probably break.
I will probably give this a day or 2 of thought before doing anything.

:beerchug:,
James
 
Of course that wasn't the only setback for the day.

After removing the old rubber motor sleeve I tried installing the new one. It immediately split apart on the open end. It appears that there is just not enough material there and what there is doesn't seem flexible enough.

DSC03204.JPGDSC03205.JPGDSC03206.JPG

I have already written the seller and lodged a complaint. We shall see what happens there.

All in all not the most successful day.

:beerchug:,
James
 
Pardon me for a suggestion that goes back to what I did for a living for so long but after retired, I threw away a bunch of old parts but this comes to mind when I see the lift motor casing that rots. This I think would be about the same size and stretch over the motor. It is similar in hardness to the original material. Anyway, if you have copier dealer near you, even a worn out tire would work. You don't need the tread that they get replaced for. https://www.precisionroller.com/paper-feed-components-for-konica-minolta-8050/details_19872.html
 
Pardon me for a suggestion that goes back to what I did for a living for so long but after retired, I threw away a bunch of old parts but this comes to mind when I see the lift motor casing that rots. This I think would be about the same size and stretch over the motor. It is similar in hardness to the original material. Anyway, if you have copier dealer near you, even a worn out tire would work. You don't need the tread that they get replaced for. https://www.precisionroller.com/paper-feed-components-for-konica-minolta-8050/details_19872.html
That actually looks pretty good! Thanks for the suggestion, I will keep it in mind.

I just measured the old sleeve. It is 29mm long with an OD of about 27mm. The motor measures about 26mm long with an OD of 22mm. The inside of the sleeve has a bunch of lengthwise flutes or strakes that hold the motor in position, so the motor casing is not in complete contact, making me think that this is a heat reduction solution. Although I would not think that the motor generates a lot of heat in the short cycle time that it is in use.

The seller did mention that he has also made a copy of the original form and I am hoping that he offers to replace this one with one of those. We shall see what he says when he replies to my note.

I also have a box with an assortment of rubber o-rings. I was thinking that properly sized and with a tight enough fit over the motor and squeezed in the mounting frame that a row of them might be a viable solution.
In a worst case situation I have some old bicycle inner tubes down in the cellar and I could cut a strip from one and roll it around the motor until I got the proper size.
:beerchug:,
James
 
lumicrro replied to me that he will send a new motor sleeve and that he would be test fitting it on a motor first. So, at least a quick and positive reply.

:beerchug:,
James
 
Miguel (lumicrro) just wrote that he sent a new motor sleeve with some more material added. He also said that If this one gives any problems to inform him and he will adjust the 3D printing again.

So he is being very responsive. I also get the feeling that I might be the first customer for this new design of sleeve and he is willing to use me as a feedback developer. I am ok with that. As long as he is willing to keep adjusting and sending new ones I am willing to try them out. I am retired now and have the time. And I do like the general design of what he is making.

I got the EV mech completely apart today and got all of the old dried up grease off. That probably played a role in the worm gear getting split, the old grease was sticky and hard and had to have been causing a high turning load.

I tried using some IPA at first but it didn't do much, in the end it was rags and work that worked. I tried a small amount of acetone on the barrel of the worm gear to check if it did any harm, it didn't. So i cleaned the barrel as well as I could with it and got some down into the crack.

The barrel part of the worm gear measures 4.65mm with my dial calipers. I took a 4.5mm drill bit and wrapped a turn of 0.032" stainless steel aircraft safety wire around it and tightened it until is was still a little loose on the bit, then tried it out on the worm gear. Did that a couple of times until I got a fairly tight fit on the barrel.
Slipped the worm gear into position on the shaft, squeezed a little super glue into the split and then worked my new collar onto the barrel of the worm gear.

Now the worm gear is tight on the drive shaft but I don't think that the wire collar is so tight that it will cause damage.

DSC03208.JPGDSC03210.JPG

The wire tail clears the drive gear during rotation. I would like to try to get the tail a little more flat but the darn wire is hard and I don't want to risk damage.
The only risk now is if the worm gear slips and moves to the right. Then I will have a problem.

:beerchug:,
James
 
Back
Top Bottom