• The move to the new server is done. There are some software and database maintenance updates in process. This has us passing the hat around to help out. We appreciate any donations. Seriously, even a dollar helps. The payment page may be found here - https://www.audiokarma.org/support.html

Rebuilding Electrolytic Capacitors

Thanks kvflyer! Your post + your messages really helped me out on my Scott!

As a matter of fact, I am currently enjoying some sweet music on it for the first time in a long time on my scott! This is my first restoration work and the bias can cap was the last step. Thank you a lot! +1 of Karma to you!
 

Attachments

  • IMG00311-20120610-1653.jpg
    IMG00311-20120610-1653.jpg
    70.9 KB · Views: 166
Thanks kvflyer - great thread!

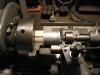
For those that possess the equipment (lathe), here is another method that involves cutting off the bottom. Glue or epoxy is then required to put everything back together but it leaves a very clean base that is pretty much invisible when remounted on the chassis. Note the homemade PCV pipe 'collet' that is used to hold the can in the lathe and vise. This is very useful for avoiding tool marks and dents and holding hot cans.

Just other ideas that you might be able to use.

attachment.php


attachment.php


attachment.php


attachment.php
 

Attachments

  • Can Cap 01.jpg
    Can Cap 01.jpg
    121.9 KB · Views: 271
  • Can Cap 02.jpg
    Can Cap 02.jpg
    108.8 KB · Views: 268
  • Can Cap 03.jpg
    Can Cap 03.jpg
    91.4 KB · Views: 263
  • Can Cap 04.jpg
    Can Cap 04.jpg
    81.3 KB · Views: 264
Thanks kvflyer - great thread!

For those that possess the equipment (lathe), here is another method that involves cutting off the bottom. Glue or epoxy is then required to put everything back together but it leaves a very clean base that is pretty much invisible when remounted on the chassis. Note the homemade PCV pipe 'collet' that is used to hold the can in the lathe and vise. This is very useful for avoiding tool marks and dents and holding hot cans.

Just other ideas that you might be able to use.


...


Excellent idea. Thanks for sharing. I don't own a lathe but I think it would be cool. Gee, how many things can you make with one ;)

Again, thanks for taking the time to post your ideas and pictures.
 
This is an excellent thread. The pictures really help someone like me understand the process involved. I may have to find an old metal cap to practice this on if/when I have some spare time.

For those of us who don't have a light weight tack hammer (e.g., me) do you have any other tools in mind that might work, or should I just suck it up and purchase one?

I wish I had a lathe. My dad gave away the one in his workshop because he wanted more space (Gahhh!).
 
Last edited:
Nice job- I've no doubt I'll need to do this at some point.

On lathes, how anybody manages to get through life without a small metal lathe is beyond my comprehension. The dozen repair parts you'll make for things over the years will pay for the machine several times over. Unfortunately, the accessories you'll buy and make for the lathe will cost more than anything you make might ever be worth!
 
...


For those of us who don't have a light weight tack hammer (e.g., me) do you have any other tools in mind that might work, or should I just suck it up and purchase one?

...

Thanks for the comments. As for the hammer, it is just something that I had and found to be helpful. As long as you are not trying to use a huge claw hammer, you will be just fine! ;)

For that matter you can use a piece of hard wood such as oak or maple and tap it with a hammer or even a punch. The key to a successful "crimp" is to not be in a hurry and slowly shrink the aluminum back around the steel mounting ring.
 
Nice job- I've no doubt I'll need to do this at some point.

On lathes, how anybody manages to get through life without a small metal lathe is beyond my comprehension. The dozen repair parts you'll make for things over the years will pay for the machine several times over. Unfortunately, the accessories you'll buy and make for the lathe will cost more than anything you make might ever be worth!

Ain't that the truth! Fortunately, I bought my lathe with a ton of accessories included. But I've got to admit that it, along with the drill press, welder, saws, grinders, compressor, several tack hammers :thmbsp:, and on and on, have forced the car out of the garage. Can't survive without good tools! :D
 
Last edited:
ain't that the truth! Fortunately, i bought my lathe with a ton of accessories included. But i've got to admit that it, along with the drill press, welder, saws, grinders, compressor, several tack hammers :thmbsp:, and on and on, have forced the car out of the garage. Can't survive with good tools! :d


;) ;)
 
I'll admit it...if I'm stripping something and I find a metal cap in nice shape, especially in a more unusual size (like the short ones used in a lot of Scott gear), I'll save it just to use as a restuff candidate down the road.
 
Excellent post and very well presented. Many thanks, kvflyer :thmbsp:

I've done quite a few restuffings but yet to try uncrimping - looks so much nicer and keeps its originality.
 
Great, I have been waiting for a post like this, got a few Heathkits on my shelf , it just looks way better with the original cap cans back in place again.

I don't have a lathe, but I was thinking of just using a die grinder and taking off the bottom lip.

I did try the other method of prying the lip up and over, but with the pictures, I'll practice and may get that much better then the first one.
 
I've cut and glued one. I much prefer the uncrimp/recrimp routine, though it is a bit slower.
 
I guess I need a longer handled screwdriver for the uncrimping. I was trying one last night and the jewler's screwdriver was killing my palm trying to get it under and around. Seems like much more effort than it's worth to me. I think I'll see what it looks like using my Dremel and cutting at the fold of the crimp, since I don't have a lathe. That would avoid the JB Weld seam and hopefully be much quicker (and with less pain) than uncrimping.
 
Yes, a large handle screwdriver is very important. A jeweler's screwdriver has a handle that is way too small. There are many ways to approach this subject and none of the ones suggested are wrong. Each one has its merits. Whatever works for you is the correct way to do it.

It does take patience working your way around the lugs of the capacitor so that you don't damage them. Bending them back an forth just a few times can often break them. I have taken a picture of the screwdriver that I use to work open the edge of the can. I sometimes will use one that is slightly larger if I feel it is appropriate. (The bill is a AU$10 that I have but is the about the same size as our money. I just wanted to show a little support to our members in Australia ;))

Dial_Screwdriver.jpg
 
I used to have one I think would fit the bill, but can't find it right now. If it turns up, I may give it another go, but for now, the hacksaw or Dremel is good enough for me. I'm not intending to sell the unit, which would be a reason NOT to cut the can, but for my own use...
 
Thanks for the ideas presented here.

But, I am having a bad time with my first attempt. I have three Sprague cans, 1-3/8" in diameter, each having four contact lugs and four twist lugs on the steel ring, similar to the caps in a couple of pictures posted in this thread. Together these eight lugs block any reasonable access to the swaged aluminum edge. I cannot seem to find the right angle with any tool. And, that swage seems extremely tight - no gap at all. I have not been able to slip the tip of an Xacto knife or a paring knife under it despite exerting extreme pressure (safely).

I don't know what to do next. So, help! Any ideas would be appreciated. Thanks,

I have experienced those lovely cans that are crimped to tight as well. What I was able to do was to just carefully start the un-crimp with something like a very thin blade, again pointing away from myself. Then, I had to use a very thin screwdriver, one that was not very sharp because it will catch on the soft aluminum.

Alternatively, if you don't have a lathe (I don't) you might try carefully filing the edge away similar to what the lathe does.

Please let us know...
 
Thanks for the encouragement. When I have some relaxed time I will try as you say. I feel like once I can get a bit of the crimp lifted I should be able to go around the circumference somewhat more easily. I do need to go buy a couple of duck bill pliers as you suggested.

I'll keep you posted.
 
You might also get some "El Cheapo" screwdrivers from the Dollar Store and reshape them with a file or grinding wheel. You can get away with using needle nose pliers if you don't have the duck bill pliers. Duck bills can be somewhat elusive. Mine belonged to Dad. He worked for the Glenn L. Martin Company in Baltimore, MD. He did work on the B-26 and Martin Four O Four airliner. So, he did safety wire and aluminum sheet metal work.

Patience and determination is a good strategy. I know some were crimped very, very tightly. Alternatively, do you have another can you could use? I know the values embossed on the can would most likely be wrong according to Mr. Murphy...
 
Back
Top Bottom