

You are using an out of date browser. It may not display this or other websites correctly.
You should upgrade or use an alternative browser.
You should upgrade or use an alternative browser.
Recapping and restoring and upgrading a Heathkit AR-1515 receiver
- Thread starter dlucy
- Start date


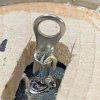
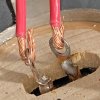


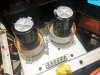

The first few power ups caused quick problems...
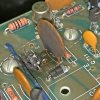
and I initially thought it was the wonky main rectifier bridge, so I replaced that with beefier a few times...

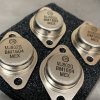
Turns out it was the classic shorted output transistor, so a brand new set was in order....
and I initially thought it was the wonky main rectifier bridge, so I replaced that with beefier a few times...
Turns out it was the classic shorted output transistor, so a brand new set was in order....
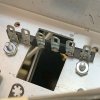
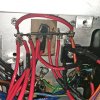
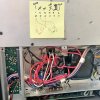

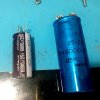


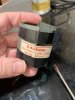
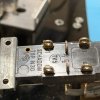
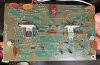

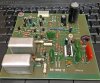

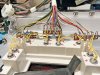

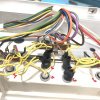

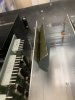
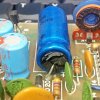


If you're doing a recap-only, these are the parts I used (with Mouser.com part numbers):
And a cut-and-paste BOM for use with mouser's BOM tool of the above is as follows:
Be sure to double-check these before you order! I'm doing my best to help save you hours going through the service manual, but that second-order-from-Mouser-shipping-fee is the risk you accept....
Component Qty Type Subtype Schematic Value Schematic Value Rep Subtype Rep Value 1 Rep Value 2 Replacement PN
AM FM IF C222 1 Capacitor Electrolytic 1000 uF 25 V Electrolytic 1000 uF 25 V 647-UKL1E102KHD
AM FM IF C229,C231,C234,C253,C258 5 Capacitor Electrolytic 100 uF 25 V Electrolytic 100 uF 25 V 647-UKL1E101MPDANA
AM FM IF C242,C264,C272 3 Capacitor Electrolytic 10 uF 50 V Electrolytic 10 uF 50 V 647-UKL1H100MDD1TA
AM FM IF C243 1 Capacitor tantalum 2.2 uF 20 V Electrolytic 2.2 uF 50 V 647-UKL1H2R2MDDANA
AM FM IF C246,C265 2 Capacitor tantalum 47 uF 15 V electrolytic 47 uF 25 V 647-UKL1V470KPDANATA
AM FM RF C105,C109,C159 3 Capacitor Electrolytic 100 uF 25 V Electrolytic 100 uF 25 V 647-UKL1E101MPDANA
AM FM RF C156 1 Capacitor Electrolytic 10 uF 50 V Electrolytic 10 uF 50 V 647-UKL1H100MDD1TA
Control C601,C602 2 Capacitor Electrolytic 100 uF 25 V Electrolytic 100 uF 25 V 647-UKL1E101MPDANA
Control C608,C617,C638,C647 4 Capacitor Electrolytic 5 uF 50 V Film 10 uF 50 V 505-MKS210/50/20
Control C614,C644 2 Capacitor Electrolytic 10 uF 50 V Film 10 uF 50 V 505-MKS210/50/20
Counter C409 1 Capacitor Electrolytic 100 uF 25 V Electrolytic 100 uF 25 V 647-UKL1E101MPDANA
FM-Dolby C1205,C1207,C1212 6 Capacitor Electrolytic 10 uF 35 V Electrolytic 10 uF 50 V 647-UKL1H100MDD1TA
FM-Dolby C1208 2 Capacitor Electrolytic 100 uF 35 V Electrolytic 100 uF 50 V 647-UKL1H101MPD
FM-Dolby C1215 2 Capacitor Electrolytic 2 uF 35 V Electrolytic 2.2 uF 50 V 647-UKL1H2R2MDDANA
Multiplex C301,C312,C313,C315 4 Capacitor Electrolytic 10 uF 50 V Electrolytic 10 uF 50 V 647-UKL1H100MDD1TA
Multiplex C314 1 Capacitor Electrolytic 2000 uF 15 V Electrolytic 2200 uF 16 V 647-UKL1C222MHD
Multiplex C316 1 Capacitor Electrolytic 100 uF 16 V Electrolytic 100 uF 25 V 647-UKL1E101MPDANA
Multiplex C317 1 Capacitor Electrolytic 10 uF 25 V Electrolytic 10 uF 50 V 647-UKL1H100MDD1TA
Muting C51 1 Capacitor Electrolytic 15 uF 50 V Electrolytic 15 uF 50 V 647-UKL1H150KEDANA
Power amp board X 1 C701 2 Capacitor Electrolytic 10 uF 100 V Electrolytic 10 uF 100 V 647-UVP2A100MPD1TD (non-polarized)
Power amp board X 1 C704,C722 4 Capacitor Electrolytic 100 uF 100 V Electrolytic 100 uF 100 V 647-UPW2A101MHD1TO
Power amp board X 1 C707 2 Capacitor Electrolytic 250 uF 4 V Electrolytic 250 uF 4 V 647-UVP1C331MPD(non-polarized)
Power amp board X 1 C715,C716 4 Capacitor Electrolytic 250 uF 15 V Electrolytic 330 uF 25 V 647-UPW1E331MPD6
Power amp board X 2 C701 2 Capacitor Electrolytic 10 uF 100 V Electrolytic 10 uF 100 V 647-UVP2A100MPD1TD(non-polarized)
Power amp board X 2 C704,C722 4 Capacitor Electrolytic 100 uF 100 V Electrolytic 100 uF 100 V 647-UPW2A101MHD1TO
Power amp board X 2 C707 2 Capacitor Electrolytic 250 uF 4 V Electrolytic 250 uF 4 V 647-UVP1C331MPD(non-polarized)
Power amp board X 2 C715,C716 4 Capacitor Electrolytic 250 uF 15 V Electrolytic 330 uF 25 V 647-UPW1E331MPD6
Chassis C7,C8 2 Capacitor Electrolytic 10,000 uF 55 V Electrolytic 12,000 uF 63 V 647-LLS1J123MELC
Chassis C3 1 Capacitor Electrolytic 6000 uF 25 V Electrolytic 6800 uF 25 V 647-UPW1E682MHD
Power Supply C805,C806 2 Capacitor Electrolytic 2500 uF 30 V Electrolytic 2700 uF 35 V 647-UPW1V272MHD6
Power Supply C808 1 Capacitor Electrolytic 50 uF 15 V Electrolytic 100 uF 35 V 647-UPW1E101MED
Power Supply C809,C813,C814,C816 4 Capacitor Electrolytic 100 uF 25 V Electrolytic 100 uF 35 V 647-UPW1V101MPD1TD
Power Supply C810 1 Capacitor Electrolytic 2.2 uF 50 V Electrolytic 2.2 uF 50 V 647-UKL1H2R2MDDANA
Power Supply C811 1 Capacitor Electrolytic 10 uF 50 V Electrolytic 10 uF 50 V 647-UKL1H100MDD1TA
Preamp C501,C511 2 Capacitor Electrolytic 10 uF 50 V Electrolytic 10 uF 50 V 647-UKL1H100MDD1TA
Preamp C506,C516 2 Capacitor Electrolytic 39 uF 50 V Electrolytic 39 uF 50 V 647-UPJ1J390MED1TD
Preamp C509,C519,C524,C544 4 Capacitor Electrolytic 5 uF 50 V Electrolytic 5 uF 50 V 667-ECQ-E2475JBB
Readout C521,C541 2 Capacitor Electrolytic 100 uF 50 V Electrolytic 100 uF 50 V 647-UKL1H101MPD
AM FM IF C222 1 Capacitor Electrolytic 1000 uF 25 V Electrolytic 1000 uF 25 V 647-UKL1E102KHD
AM FM IF C229,C231,C234,C253,C258 5 Capacitor Electrolytic 100 uF 25 V Electrolytic 100 uF 25 V 647-UKL1E101MPDANA
AM FM IF C242,C264,C272 3 Capacitor Electrolytic 10 uF 50 V Electrolytic 10 uF 50 V 647-UKL1H100MDD1TA
AM FM IF C243 1 Capacitor tantalum 2.2 uF 20 V Electrolytic 2.2 uF 50 V 647-UKL1H2R2MDDANA
AM FM IF C246,C265 2 Capacitor tantalum 47 uF 15 V electrolytic 47 uF 25 V 647-UKL1V470KPDANATA
AM FM RF C105,C109,C159 3 Capacitor Electrolytic 100 uF 25 V Electrolytic 100 uF 25 V 647-UKL1E101MPDANA
AM FM RF C156 1 Capacitor Electrolytic 10 uF 50 V Electrolytic 10 uF 50 V 647-UKL1H100MDD1TA
Control C601,C602 2 Capacitor Electrolytic 100 uF 25 V Electrolytic 100 uF 25 V 647-UKL1E101MPDANA
Control C608,C617,C638,C647 4 Capacitor Electrolytic 5 uF 50 V Film 10 uF 50 V 505-MKS210/50/20
Control C614,C644 2 Capacitor Electrolytic 10 uF 50 V Film 10 uF 50 V 505-MKS210/50/20
Counter C409 1 Capacitor Electrolytic 100 uF 25 V Electrolytic 100 uF 25 V 647-UKL1E101MPDANA
FM-Dolby C1205,C1207,C1212 6 Capacitor Electrolytic 10 uF 35 V Electrolytic 10 uF 50 V 647-UKL1H100MDD1TA
FM-Dolby C1208 2 Capacitor Electrolytic 100 uF 35 V Electrolytic 100 uF 50 V 647-UKL1H101MPD
FM-Dolby C1215 2 Capacitor Electrolytic 2 uF 35 V Electrolytic 2.2 uF 50 V 647-UKL1H2R2MDDANA
Multiplex C301,C312,C313,C315 4 Capacitor Electrolytic 10 uF 50 V Electrolytic 10 uF 50 V 647-UKL1H100MDD1TA
Multiplex C314 1 Capacitor Electrolytic 2000 uF 15 V Electrolytic 2200 uF 16 V 647-UKL1C222MHD
Multiplex C316 1 Capacitor Electrolytic 100 uF 16 V Electrolytic 100 uF 25 V 647-UKL1E101MPDANA
Multiplex C317 1 Capacitor Electrolytic 10 uF 25 V Electrolytic 10 uF 50 V 647-UKL1H100MDD1TA
Muting C51 1 Capacitor Electrolytic 15 uF 50 V Electrolytic 15 uF 50 V 647-UKL1H150KEDANA
Power amp board X 1 C701 2 Capacitor Electrolytic 10 uF 100 V Electrolytic 10 uF 100 V 647-UVP2A100MPD1TD (non-polarized)
Power amp board X 1 C704,C722 4 Capacitor Electrolytic 100 uF 100 V Electrolytic 100 uF 100 V 647-UPW2A101MHD1TO
Power amp board X 1 C707 2 Capacitor Electrolytic 250 uF 4 V Electrolytic 250 uF 4 V 647-UVP1C331MPD(non-polarized)
Power amp board X 1 C715,C716 4 Capacitor Electrolytic 250 uF 15 V Electrolytic 330 uF 25 V 647-UPW1E331MPD6
Power amp board X 2 C701 2 Capacitor Electrolytic 10 uF 100 V Electrolytic 10 uF 100 V 647-UVP2A100MPD1TD(non-polarized)
Power amp board X 2 C704,C722 4 Capacitor Electrolytic 100 uF 100 V Electrolytic 100 uF 100 V 647-UPW2A101MHD1TO
Power amp board X 2 C707 2 Capacitor Electrolytic 250 uF 4 V Electrolytic 250 uF 4 V 647-UVP1C331MPD(non-polarized)
Power amp board X 2 C715,C716 4 Capacitor Electrolytic 250 uF 15 V Electrolytic 330 uF 25 V 647-UPW1E331MPD6
Chassis C7,C8 2 Capacitor Electrolytic 10,000 uF 55 V Electrolytic 12,000 uF 63 V 647-LLS1J123MELC
Chassis C3 1 Capacitor Electrolytic 6000 uF 25 V Electrolytic 6800 uF 25 V 647-UPW1E682MHD
Power Supply C805,C806 2 Capacitor Electrolytic 2500 uF 30 V Electrolytic 2700 uF 35 V 647-UPW1V272MHD6
Power Supply C808 1 Capacitor Electrolytic 50 uF 15 V Electrolytic 100 uF 35 V 647-UPW1E101MED
Power Supply C809,C813,C814,C816 4 Capacitor Electrolytic 100 uF 25 V Electrolytic 100 uF 35 V 647-UPW1V101MPD1TD
Power Supply C810 1 Capacitor Electrolytic 2.2 uF 50 V Electrolytic 2.2 uF 50 V 647-UKL1H2R2MDDANA
Power Supply C811 1 Capacitor Electrolytic 10 uF 50 V Electrolytic 10 uF 50 V 647-UKL1H100MDD1TA
Preamp C501,C511 2 Capacitor Electrolytic 10 uF 50 V Electrolytic 10 uF 50 V 647-UKL1H100MDD1TA
Preamp C506,C516 2 Capacitor Electrolytic 39 uF 50 V Electrolytic 39 uF 50 V 647-UPJ1J390MED1TD
Preamp C509,C519,C524,C544 4 Capacitor Electrolytic 5 uF 50 V Electrolytic 5 uF 50 V 667-ECQ-E2475JBB
Readout C521,C541 2 Capacitor Electrolytic 100 uF 50 V Electrolytic 100 uF 50 V 647-UKL1H101MPD
And a cut-and-paste BOM for use with mouser's BOM tool of the above is as follows:
505-MKS210/50/20 6
647-LLS1J123MELC 2
647-UKL1C222MHD 1
647-UKL1E101MPDANA 12
647-UKL1E102KHD 1
647-UKL1H100MDD1TA 18
647-UKL1H101MPD 4
647-UKL1H150KEDANA 1
647-UKL1H2R2MDDANA 4
647-UKL1V470KPDANATA 2
647-UPJ1J390MED1TD 2
647-UPW1E101MED 1
647-UPW1E331MPD6 8
647-UPW1E682MHD 1
647-UPW1V101MPD1TD 4
647-UPW1V272MHD6 2
647-UPW2A101MHD1TO 8
647-UVP1C331MPD 4
647-UVP2A100MPD1TD 4
667-ECQ-E2475JBB 4
647-LLS1J123MELC 2
647-UKL1C222MHD 1
647-UKL1E101MPDANA 12
647-UKL1E102KHD 1
647-UKL1H100MDD1TA 18
647-UKL1H101MPD 4
647-UKL1H150KEDANA 1
647-UKL1H2R2MDDANA 4
647-UKL1V470KPDANATA 2
647-UPJ1J390MED1TD 2
647-UPW1E101MED 1
647-UPW1E331MPD6 8
647-UPW1E682MHD 1
647-UPW1V101MPD1TD 4
647-UPW1V272MHD6 2
647-UPW2A101MHD1TO 8
647-UVP1C331MPD 4
647-UVP2A100MPD1TD 4
667-ECQ-E2475JBB 4
Be sure to double-check these before you order! I'm doing my best to help save you hours going through the service manual, but that second-order-from-Mouser-shipping-fee is the risk you accept....
If you plan to do more than just the recap, here is a CSV spreadsheet with all the data I collected and part numbers for the components I replaced or considered replacing.
Again, use at your own risk.
Download it as TXT, then rename to CSV so you can open it in your favorite spreasheet program.
Again, use at your own risk.
Download it as TXT, then rename to CSV so you can open it in your favorite spreasheet program.
Attachments

infullview
Super Member
Wow... that's an insane amount of work to restore this receiver. It is beautifully built though and now it will be around for another 50 years. Good work.
Last edited:

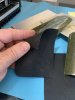
Doug, Wonderful write up. Love all the pics. Question is how did the unit sound before and after the rework? And yes that "Fish paper" tends to curl like that over the years.
maybe we can convince @nj pheonix to share his A/B findings....

nj pheonix
Lunatic Member
Let me see what I can do

Helios
Active Member
Good job, Doug! and surely time consuming. I still have the AR-1515 that I built in the 70s, and I think that I will overhaul it too. Many years ago, I changed the indicator lights with LED, work fine.
I too am curious to see (hear) from changes in sound before and after the job. When I try to access the Bartetown thread, I get an error: You do not have permission to view this page, although I am logged, like now. Curious ...
When you replaced the reservoir caps, you used wood disks to reuse the original collars; but how are the new caps attached to the disks, glue ?
Finally, I may like you replace the opamp (ua739pc with LME49720), but I tried to locate the SMD to DIP adapter at revox-online, to no avail this now. Any pointer ?
Thanks again, nice pics.
Helios
I too am curious to see (hear) from changes in sound before and after the job. When I try to access the Bartetown thread, I get an error: You do not have permission to view this page, although I am logged, like now. Curious ...
When you replaced the reservoir caps, you used wood disks to reuse the original collars; but how are the new caps attached to the disks, glue ?
Finally, I may like you replace the opamp (ua739pc with LME49720), but I tried to locate the SMD to DIP adapter at revox-online, to no avail this now. Any pointer ?
Thanks again, nice pics.
Helios
I may like you replace the opamp (ua739pc with LME49720), but I tried to locate the SMD to DIP adapter at revox-online, to no avail this now. Any pointer ?
If you search On eBay for “ua739 replacement” you should see a few listings from Germany. that’s who I bought mine from.