• The move to the new server is done. There are some software and database maintenance updates in process. This has us passing the hat around to help out. We appreciate any donations. Seriously, even a dollar helps. The payment page may be found here - https://www.audiokarma.org/support.html

Russco Studio Pro Plinth Build

OK this looks great , for someone who says not much is his forte :confused: .
I like the "roubo "workbench , the fact that you use handtools , the tools , the tricks , frankly I like everything about this thread .
This is why I keep coming back to this site .
Keep on building , and posting it inspires others to try to the same and lifts up the entire community .
Chapeau (" I lift my hat " ) to you .
Kind regards F.
 
@cannext

I’m humbled by your comments, thanks…..

I’ve been woodworking most of my life, and handtools were always part of that mainly because of my Grandfather, but they weren’t the focus, have a room full of machines to prove it ;)

The great thing about handtools is that a very small area will suffice, especially for small projects. The initial skills can be learned by most in a very short period.

Rob Cosman (world renowned woodworker) runs a week long course for wounded & disabled veterans called “The Purple Heart Program”. He gives vets a basic set of tools and trains them to use them for one week, all for free! (including room and board).

At the end of that week those students can care for their tools and can do near perfect hand cut dovetails! It’s an extraordinary thing to witness, because many of them have never done any woodworking….

Full disclosure, I’m also a graduate of Rob’s Purple Heart Program, was severely wounded in Iraq in 2004. I’m still severely disabled, actually considered “homebound” by the VA. Not revealing that to garner anyone’s pity; say it to point out that many can do this type of work, even the disabled.

Again thanks for the kind words,
Andy
 
Adnick , no need to feel humbled , if anything , I should be the humbled one.
Even though I am not from the USA and don"t live there ; thank you for your service !!
Again keep making things , if possible spread the skills , keep posting .
Enjoy life , music , everything .
Stay healthy , regards F.
 
Adnick , no need to feel humbled , if anything , I should be the humbled one.
Even though I am not from the USA and don"t live there ; thank you for your service !!
Again keep making things , if possible spread the skills , keep posting .
Enjoy life , music , everything .
Stay healthy , regards F.

Again, appreciate the thoughts….
 
Andy, that's looking great! Don't slide it towards the end of your bench, it's liable to tip the bench. LOL I like the sap wood up as pictured but it would probably look good either way.
I'd be interested in seeing the results of your test. Since your table is "as is" and not rebuilt yet it's sure to have some noise. A perfect test specimen.

BillWojo

Yeah Bill I’ll post my findings, it will be obvious how well the plinth works or doesn’t work ;)

Past experiences are indicators of success…

The unrestored Russco will make the perfect test subject.

The silent track on a test record will reveal just how successful the work will be. There are no standardized numbers to quote from such a test like there are with a Wow & Flutter test. However it’s directly related to the goal, reducing noise.

No reason to do a W&F test right now ;)
 
Let’s talk 45 deg miters :)

As a handtool guy, cutting precise wide/thick miters freehand is a task mastered by few, but never fear there’s hope for the rest of us, there are several ways to produce a precise miter.

Problem is any variation generally gets worse over distance, it’s something like shooting a long distance azimuth with a compass, off 1 deg at the source multiples over distance :oops:

Just minor variations in each of 2 mated corners results in ugly gaps and such. However one can overcome these problems with a miter shooting board. It’s construction is based on whatever degree miter one desires.

Start by cutting the miter slightly longer than needed, how much depends on one’s skills with the handsaw.:thumbsup:
Then the mitered board is placed in the shooting board and precisely trimmed. The photo below is an actual example of my miter shooting board in the process of shaping a miter for the plinth in the photo. One does not need the fancy shooting board plane, any plane that’s wide enough will do nicely..

0B89C794-6215-4E23-86D3-6EC84B0BEB6C.jpeg


These miters can be cut with a chopsaw, most of them are actually mitersaws:naughty: Of course it has to be able to accommodate the board width and it needs a very good blade.

Another method preferred by many is a tablesaw, it also needs a good blade and blade flex can cause issues (blade flex can be a problem with mitersaws also)

Another jig for the tablesaw can pay big dividends when cutting miters, it’s a zero clearance miter tablesaw sled. Here’s a picture of my very rudimentary zero clearance sled. Zero clearance refers to the distance between the sled wood and the blade, this provides side to side support against flex and can also cut down on vibration.

35F4D45F-2C79-4710-A00E-FF7A7BA9AB79.jpeg

There’s many possible variations to the above and other ways to do corner joinery, but hopefully this provides a bit of insight :cool:
 
That's pretty neat Andy. I can only imagine how sharp that plane needs to be to cut across the grain like that.
That "shooting board" needs to be built with the utmost accuracy especial for those wide planks. That's really impressive.
There's a big difference between doing precision machine work using precision machine tools and what your doing. You get the precision needed but your doing it all by hand.

BillWojo
 
That's pretty neat Andy. I can only imagine how sharp that plane needs to be to cut across the grain like that.
That "shooting board" needs to be built with the utmost accuracy especial for those wide planks. That's really impressive.
There's a big difference between doing precision machine work using precision machine tools and what your doing. You get the precision needed but your doing it all by hand.

BillWojo

Yes the shooting board has to be spot on, but it’s worth the effort in the long run….

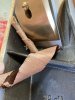
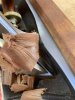
The plane iron is sharp enough to shave with, but wouldn’t recommend it ;) Take a look at these photos of the end grain shavings, note that one of them is diaphanous :eek:

1FE4F8B5-FD0E-44BD-B36C-39457AE43F8B.jpeg DEA18963-B8C2-4856-B1B5-06C77C9747FC.jpeg 583233EF-5C27-41E9-8293-D52FF68F3836.jpeg
 
Not much glamour in fitting layers of plywood so to fill the space, a little inspiration:thumbsup:

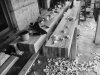
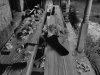
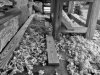
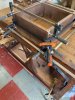
When I said in an earlier post that one does not need much space to do handtool woodworking, here’s an example.
The Roubo bench in the photos was built on my front porch, cause I didn’t have a shop at the time….

64C7DE06-80F5-4EDB-B9F8-5A93E19F40A0.jpeg E0B5E80A-AF09-42F9-AD73-742371FDB4C8.jpeg 8F6A6427-221B-4D76-8A87-B06E72E22D43.jpeg


VR
Andy
 
Those chips are amazingly thin, I had to look up the definition of diaphanous, and yes they are! I'm just surprised that you can work end grain with that kind of delicacy. Never would have thought it possible.
It's funny, I grew up with my Dad always building stuff from wood, including two grandfather clocks. His shop was in the basement, same place were I was always working on my hobbies and I hated all the sawdust that got into everything. But you don't produce that fine dust, at least very little of it, mostly shavings.
That dust is part of what kept me away from woodworking, plus woodworking power tools like a table saw scare the hell out of me. Now running a big monster metal lathe making big blue chips that will brand you if your not careful is fun for me. LOL Different strokes for different folks.
Looks like you made a lot of shavings making that bench. It's a work of art.

BillWojo
 
Those chips are amazingly thin, I had to look up the definition of diaphanous, and yes they are! I'm just surprised that you can work end grain with that kind of delicacy. Never would have thought it possible.
It's funny, I grew up with my Dad always building stuff from wood, including two grandfather clocks. His shop was in the basement, same place were I was always working on my hobbies and I hated all the sawdust that got into everything. But you don't produce that fine dust, at least very little of it, mostly shavings.
That dust is part of what kept me away from woodworking, plus woodworking power tools like a table saw scare the hell out of me. Now running a big monster metal lathe making big blue chips that will brand you if your not careful is fun for me. LOL Different strokes for different folks.
Looks like you made a lot of shavings making that bench. It's a work of art.

BillWojo

Not much dust in handtool woodworking, until one starts messing with plywood and/or MDF :) Makes for a much cleaner shop.

Metal lathes are much different until one starts cutting cast iron :eek:
 
Inching forward with the glue up of what I refer to as show wood, this is the outside portion; since it’s a plinth within a plinth my terminology keeps it straight in my head. :confused:

Probably haven’t revealed this yet but I’m actually building 3 Russo plinths concurrently, 2 of them are nearly identical.

Anyway here’s the first Black Walnut glue up:

7BD29FED-BB87-476F-ADE7-5289D0DBDBEF.jpeg FE32B66E-5468-4337-AA13-1A7815A6814A.jpeg


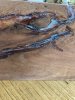
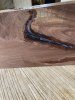
If you recall I showed a board with a huge knot….here’s how we stabilize and use a board like that. In this example I’m using epoxy that dries to a black color to fill all the voids, if this was a larger area a heat gun might be required to flow it better and remove air bubbles….

Here’s that same board right after the application of epoxy, it will need a day or two to dry, then a hand plane will smooth it out for finish.
274A64CA-A533-4A2C-B515-93C4FC34954F.jpeg
069D3F03-CD02-4EFC-89BC-C5766A1C75F4.jpeg
 
That's looking good Andy! I'm curious how that knot is going to look when your finished. Your "show wood" is going to be a show piece!

BillWojo
 
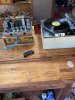
Dropped the old Russco in the plywood inner plinth, added an S220 tonearm with an AT cart on the original metal arm board.

Using an ST70 and slightly modified PAS 3 to do the test, keep in mind nothing has been done to the Russco…

Speed was good so played some Sinatra just to check sound, actually sounds good:naughty:

One thing to note, it had a bit of hum and yes the tonearm was grounded, not much but had to investigate.

The solution was to add plastic washers above and below the metal arm board, after that the hum was gone:thumbsup:

F79D9A6B-D492-4962-9397-BD9B6572D421.jpeg

Next was to use a test record with a silent track to listen for noise, have a few test records, and unfortunately one may need to buy more than a single test record if you have other test equipment that uses other tracks on the record to ensure all tracks work as required.

Tried several different platter mats, they do make a difference, the combo of a Herbie’s 2 & acrylic mat.

Also have noticed that certain tonearms/carts can cause noise, so I always test with more than one. And yes at higher volumes there’s idler noise, it started as audible to the ear, remember it has the old idler, mounts and such.

When it was making an audible sound, I noticed the motor drive shaft (capstan) was rusted, a few different passes with sandpaper and rubbing compound solves this, but it’s still there at higher volume with the silent track…

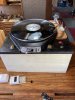
Changed the tonearm to my ESL 1000, all original with the Bakelite headshell and Shure M3d cartridge! Have to give a huge thanks to @BillWojo for making a new aluminum base; the original Bakelite was fine but not substantial enough to securely mount the arm without some additional stuff.

Bill did an amazing job, the tolerances are perfect:trebon:

2E0448FF-1C8E-4B48-9ECC-05BD11D494A8.jpeg 8D1DB2A9-5A1B-4C88-B150-E71DDC96E0F0.jpeg

Will leave it with the idler noise for now because it make a perfect candidate to test our plinth design….

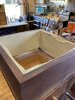
Next test will be with the plywood plinth installed inside the Black Walnut plinth and we’ll see if that reduces the noise any. After that we’ll add the layers and again note the results, if the plinth functions as advertised/planned then there should be an overall reduction in noise even before the table is rebuilt!

Here’s the plinth assembled for the next test….
DBD81071-E998-43A8-8079-421B011D8E28.jpeg
 
It's really looking good Andy. When you do your test again I would screw that down to the plinth to help sink any vibrations. Should make a big difference but I think you already know all that.
That ESL 1000 tonearm looks period correct and that tone arm lift is over the top. I'd be sorely tempted to paint it to match the turntable. Who makes that?
The corner holes to secure the turntable to the plinth are kind of small, maybe for #8 screws? I drilled mine out for #10. Maybe it's needed, maybe not. Let me know what you think.
94695A270p1-b01-digitall@1x_636923212592121014.png

I was going to order a few of these from McMaster Carr and see what kind of nice screws they have. They call them "countersunk washers" They have that "vintage" vibe and I think might match the table well. I'm a little funny with hardware, wouldn't want some cheesy looking screws to mess up the presentation of a beautiful table.
I'll keep that in mind about the grounding. The first arm up is going to be a JVC UA-5045 on a reproduction aluminum tone arm board. Need to make a mounting collar for it like I made for yours. I'm happy that worked out for you.

BillWojo
 
Andy,
What's the arm lifter on that table? The lift lever with the red ball looks a whole lot like the arm lift on the Fairchild SA-12 tonearm, which I've yet to find a solid design attribution on. However, given the style, the relationship between Fairchild and Raymond Lowey, and the other work that Lowey did for Fairchild, I'm almost certain he did the cosmetic design for the SA-12.
 
@BillWojo, @Sam Cogley

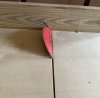
That tonearm lift is a Dextrafix lift, but Decca made one similar I think. Originally it had material over the metal arm and had a sliding stop, both deteriorated over time, but it works well without so I’ve never replaced them….

Don’t know a lot about them other than the name and this one came from Europe….

Sam: interesting that you find it similar to the Fairchild design. Had the notion of using it on my upcoming Fairchild 412 endeavor :thumbsup:

Bill:
Not to the point of clenching it down yet, but your right about increasing contact area. There’s also a version or variation of that washer which has a “cap” on top that conceals the screw head.

The grounding quirk was probably because of the metal table with a separate metal arm board, but that’s a guess; educated or not is up for debate ;)

I’ve got to get busy, have 2 more Russco plinths to finish, a repair to a ROK plinth and there’s an early version of a Fairchild 412 basic inbound that’s in need of TLC and a plinth :eek:

Was thinking that I might do another build thread with the Fairchild? It shouldn’t need a heavy layered plinth, but since I’ve never done one it should be a learning experience, at least for me:cool:
 
Back
Top Bottom