• The move to the new server is done. There are some software and database maintenance updates in process. This has us passing the hat around to help out. We appreciate any donations. Seriously, even a dollar helps. The payment page may be found here - https://www.audiokarma.org/support.html

Show us your DIY speaker projects!

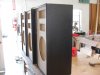
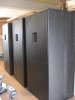
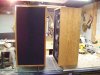
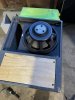
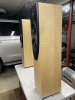
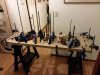
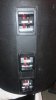
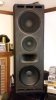
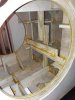
My current garage project, Traynor cabs with JBL 2226h woofers and the horns pulled out and mounted up top.

These are for me to dip my toes into biamping with active crossover, I just gotta pick up a couple of amps to get started.

Currently running the woofer full range with just a cap on the tweet for now.

Not a pretty project for sure but they do play loud.

7003843E-9C3D-4573-BA66-8A1EDEFE7585.jpeg A5BF5571-697C-484E-9068-E829477E3CB6.jpeg A4298136-7818-492F-8F90-CD7087475354.jpeg 6CD549D5-3314-4C0B-A795-C94352090183.jpeg
 
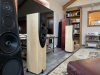
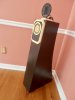
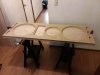
Finished these up last week. My second DIY effort. These are Jeff Bagby designed Solstice speakers that are sold through Parts Express. I’m really pleased with how they turned out and the sound is truly reference class. They have some stiff competition in my home and they DO NOT disappoint. :bigok:

33F1367B-73F2-475D-9ED5-E632C2D01A12.jpeg AA418296-0E64-466D-A902-B5E2ECBC7C31.jpeg 764F1723-10F0-438B-8A56-3495C6AC5CB4.jpeg
 
Subs are easy, I made my main speakers the hard way. Instead of a rectangular box, I opted for Sonotube. No big deal, except I wanted a flat baffle down the front. And that's where everything got complicated! Working with a slit-open piece of cardboard tube made measuring and layout tricky. And for obvious reasons, this approach is not popular. So I was in uncharted waters.

Speakers are the Intrusive 1899 from DIY Sound Group. Not many of these kits were sold, and I think they're discontinued. For some reason, not much demand.

First step was to ~double the thickness of the precut 1" baffle with 3/4" plywood. I used oak veneer ply for quality, a shame nobody will ever see it!

34045.jpeg

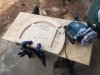
I transferred the layout for the holes, then rough cut them out:

34044.jpeg

Then back together to be glued:

34046.jpeg

And then used the precut baffle as a pattern to route the extra layer to match:

34096.jpeg

So far, pretty standard stuff. It's about to get tricky!
 
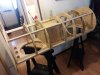
I decided to hedge my bets, and make a skeleton frame, then wrap the Sonotube around and secure. But first, I wanted a curved bevel on the baffle edges to match the radius. There's more than one way to skin a cat, here's what I came up with.

I figured I'd make a "long compass" to get the radius I needed (finished speaker would be 24" in diameter. Helps to have a 36" vernier caliper for this kind of work! And I figured if I was going to go through all this trouble, I'd make a jig to set up both baffles to work them at the same time. So the first step was to brace the now-reinforced baffles together, spaced the exact distance apart, but absolutely parallel with each other. Hmmm... This is what I came up with. I used the "crossed wires" method to get them perfectly straight and parallel to each other(I only have a pic of after beveling)34041.jpeg :

Then I needed guides outside the baffles for the router sled. Again, distance, width, straight, and parallel were critical. I made another frame that would drop around the baffle jig, used crossed wires again. Note the vinyl molding as low-friction wear strips on the guide surfaces:

34029.jpeg

And finally, the "long compass" router sled. I used strips of melamine whiteboard for the guide surface, which held up just well enough. 12" radius of curvature is pretty much the max before that stuff snaps!:

34098.jpeg

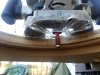
And here it is in use. I used a 1/2" square straight-cut bit. Not exactly correct for the geometry, but it worked! (as you can see with the final result in the first pic of this post)

34097.jpeg

That was the most involved part, those darn bevels. But it let the Sonotube wrap around the sides of the baffle perfectly.
Not out of the woods yet!
 
Time for the skeleton frame. I figured since I was making a bunch of the same parts, I'd make patterns for them:

34095.jpeg

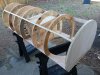
So here's the resulting frame:

34036.jpeg

41576.jpeg

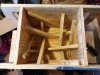
The box for the 12" mid-range is sealed, but the kit said bracing it well was the most important part of the entire construction. So I braced it pretty thoroughly!:

34038.jpeg

Now for some details before she gets wrapped up...
 
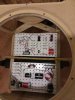
Instead of buying the available premade PCB boards for the crossovers, I decided to lay them out myself on pegboard. If I ever run these speakers at their rated 2500 watts continuously, I have peace of mind that the components have ample spacing for heat. Wire is nothing special, 16ga. Resistors are safety wired down, with pieces of ceramic tile as thermal insulators under them. Layout is such to mitigate heat rise from resistors to not cook the caps. I also made provisions for them to be able to be tri-amped:

34030.jpeg

After getting that worked out, time to wrap. Peeled the super-thin clear plastic layer off the inside of the tube (a pain to get started, then it molted away in less than a minute. Cut the side of the tube away (peel that plastic wrap out *first*!!). Slid the tube down around the speaker frame, clamped it. Then went in through the driver holes from underneath, to trace out the locations of all the frame members. Removed the tube, and drilled from the marked inside out to locate through-holes visible from the outside:

34032.jpeg

Applied lots of PL Premium, then screwed everything down from outside.
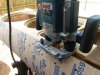
That left overhang at the ends, easy enough to trim. But the excess where the tube wrapped around the beveled sides of the baffle? A trim bit wouldn't work. But I already had a plan! I put a "shoe" on the router baseplate, so the end of the square bit could stay parallel to the baffle front, while making an overhanging cut:

41565.jpeg

Then it was time for the rear terminals. I took the scrap pieces from the Sonotube (they matched radius), stacked them up, routed them flat, and cut the windows for the terminal cups. I had to do some creative soldering to rearrange the supplied electrical straps to facilitate the tri-amping option:

42171.jpeg

Oh yes, finish was Deckover, hides all sins!
 
Finally I ordered some custom nameplates from an eBay vendor. Took three tries for him to get them right, but good service nonetheless!:

42851.jpeg

I hope Bill Waslo doesn't mind being associated with my crude execution of his design!
Here's a front pic of one of the finished speakers. Pretty darn efficient at 99+dB/2.83V, and very well controlled directivity with the SEOS-15 waveguide.

46596.jpeg

Hope that gives somebody food for thought- like maybe why *not* to do it my way!
BTW, each speaker used over *300* screws total, they added up!
 
Finally I ordered some custom nameplates from an eBay vendor. Took three tries for him to get them right, but good service nonetheless!:

View attachment 2088010

I hope Bill Waslo doesn't mind being associated with my crude execution of his design!
Here's a front pic of one of the finished speakers. Pretty darn efficient at 99+dB/2.83V, and very well controlled directivity with the SEOS-15 waveguide.

View attachment 2088030

Hope that gives somebody food for thought- like maybe why *not* to do it my way!
BTW, each speaker used over *300* screws total, they added up!

Are you planning to run these in a huge room?
 
Are you planning to run these in a huge room?
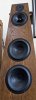
They've been in my living room, at a 13 foot listening distance. The constant directivity design reduces problems with early reflections, so placement and treatments aren't so critical.
I don't have a projector/screen, so the center channel is a pair of horizontal Aggressive 1299 speakers above and below the TV. Reasonably well timbre-matched.
They don't actually go very low, about 45 Hz, but they weren't designed to. I have the eight 18" sub drivers posted earlier in this thread to take care of the bottom two octaves and below.
 
Back
Top Bottom