

You are using an out of date browser. It may not display this or other websites correctly.
You should upgrade or use an alternative browser.
You should upgrade or use an alternative browser.
VPI HW-16.5 Motor Swap
- Thread starter sichejo
- Start date
Register to hide this ad

markd51
Nyuk Nyuk
Has anyone changed the motor in a HW-16.5 to the reversible motor that is in a HW-17?
I know it would need a run cap and a new switch. I was wondering about the mechanical mounting of the motor, and attaching the platter arbor.
I know of noone who has done it, but I suspect the motors are identical in size, so mounting should be no issue. I think one motor (the 16.5) runs at 18rpm, and the motor in the 17 runs at 16rpm?
Both are Dayton Motors as far as I know. I also believe you are correct, you would need a run capm and a different switch.
I believe I have the model numbers for both motors on hand, from WW Grainger, the prices are less money than through VPI, including the run cap that goes with that motor.
But I have a question, Are you planning perhaps on mounting a deck mounted brush? Otherwise, dual-direction scrubbing can be accomlished by hand, of course with a little more work.
As far as the vacuum process goes, all VPI machines must run in one direction only to remove fluids, due to the design of the vacuum wand.
Mark
markd51
Nyuk Nyuk
http://www.grainger.com/Grainger/ww...uery=3m153&op=search&Ntt=3m153&N=0&sst=subset
Getting back to you on this one, I looked, and the part number I have on hand is for the Platter Motor for the top of the line VPI Typhoon RCM.
I have the suspicion that both the model 17, and Typhoon use the same Platter Motor, but use a different Vacuum Motor. Reason I say this, is that I personally see no other dayton motor listed, that has a similar, compatible rpm speed such as these two motors I mention here?
You can comb the site for all similar motors such as I have pictured in the link.
Note in the picture of the Typhoon Motor, on the right hand of the page is the Platter Motor used in the VPI 16.5 RCM (part #3m099)
Note that the Typhoon Motor has an offset Gearcase-and Output Shaft in relation to the Motor that is used in the 16.5.
I'm certain though that the hole mounting pattern-spacing on the gearcase is the exact same on both models.
And I also believe there is enough empty space within the case if the motor would be offset and not in direct line with the upper gearcase. I also suspect output shafts being of the same length, and diameter, so the Platter Arbor should fit.
The only problem I possibly forsee, is due to the gearcase being offset, and the use of four 1/2" thick rubber spacers, that the motor then mounts to a stainless steel mounting plate, will there then be enough clearance between the larger sized gearcase, and the undersude of the top deck plate?
This I am unsure of, but you could ask a simple question of VPI themselves, if the reversible 17, or Tyhoon Platter Motors will physically fit within the 16.5 RCM? They for sure will know. Mark
The problem that might occur,
Getting back to you on this one, I looked, and the part number I have on hand is for the Platter Motor for the top of the line VPI Typhoon RCM.
I have the suspicion that both the model 17, and Typhoon use the same Platter Motor, but use a different Vacuum Motor. Reason I say this, is that I personally see no other dayton motor listed, that has a similar, compatible rpm speed such as these two motors I mention here?
You can comb the site for all similar motors such as I have pictured in the link.
Note in the picture of the Typhoon Motor, on the right hand of the page is the Platter Motor used in the VPI 16.5 RCM (part #3m099)
Note that the Typhoon Motor has an offset Gearcase-and Output Shaft in relation to the Motor that is used in the 16.5.
I'm certain though that the hole mounting pattern-spacing on the gearcase is the exact same on both models.
And I also believe there is enough empty space within the case if the motor would be offset and not in direct line with the upper gearcase. I also suspect output shafts being of the same length, and diameter, so the Platter Arbor should fit.
The only problem I possibly forsee, is due to the gearcase being offset, and the use of four 1/2" thick rubber spacers, that the motor then mounts to a stainless steel mounting plate, will there then be enough clearance between the larger sized gearcase, and the undersude of the top deck plate?
This I am unsure of, but you could ask a simple question of VPI themselves, if the reversible 17, or Tyhoon Platter Motors will physically fit within the 16.5 RCM? They for sure will know. Mark
The problem that might occur,
markd51
Nyuk Nyuk
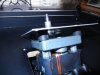
Here is a pic of the VPI 16.5 Platter Motor, the Motor Mounting Plate, and the four rubber mounting standoffs used from the factory.
Now, with an offset gearcase, such as on the Typhoon Motor, there may be a possibility of a clearance problem with the underside of the top deck plate, and the top face of the gearcase?
I believe the thickness of the top deck plate is 1/2".
If the clearance issue was ever so slight, four additional 1/4" washers could probably be added in between the standoffs, and Motor Mounting Plate to ever so slightly lower the Motor-Gearcase, and offer better clearance.
I'm quite certain that in turn, the Platter-Motor Arbor Could then be slightly raised on the Motor Gearcase Output Shaft to compensate for the slight drop in Motor Height. Thus, by raising the Arbor, you would then be insuring proper platter height.
Hope this helps. Mark
Last edited:
Mark,
Yes, I am trying to save a little brushing work. I never thought about a hard mounted brush. That is a cool idea!
I would like to start with the motor. I would need to find a a way to swing a brush out on top of the record. I like to wash the brush between uses, that would mean removing the brush to wash it. I am not sure it would be worth it.
On a side note, I have found leaving the cleaning fluid on the record for 5-10 minutes makes a huge difference. Most of the records I clean are 45s that are very dirty from the junk section of the record shop. I use one of the recipes for fluid that been floating around on the net that uses anti-freeze.
Thanks
Yes, I am trying to save a little brushing work. I never thought about a hard mounted brush. That is a cool idea!
I would like to start with the motor. I would need to find a a way to swing a brush out on top of the record. I like to wash the brush between uses, that would mean removing the brush to wash it. I am not sure it would be worth it.
On a side note, I have found leaving the cleaning fluid on the record for 5-10 minutes makes a huge difference. Most of the records I clean are 45s that are very dirty from the junk section of the record shop. I use one of the recipes for fluid that been floating around on the net that uses anti-freeze.
Thanks
markd51
Nyuk Nyuk
As you can see from this inside pic of the VPI 16.5, it does appear that there is sufficient room to mount the Tyhoon Motor, even though it has a larger, an an offset gearcase.
Won't matter which way it is positioned, as long as it fits. There should also be room on a wall to mount the Run Cap. Mark
markd51
Nyuk Nyuk
I am guessing that there is perhaps ample room on the upper left hand side of the 16.5's top deck to mount VPI's own deck mounted Brush that comes on the model 17 machine.
The only thing you wouldn't have, is the fluid dispensing pump, and hose that also mounts together with the deck mounted VPI Brush.
Those parts can be bought direct from VPI, and again, VPI will know for sure if their deck mounted brush could mount to the 16.5 RCM.
The personal reasons I eschewed such, and did not want the added features of the model 17, versus the lesser 16.5 whch I bought are this.
From the very get go, I knew before I even bought the model 16.5, I was well aware that I would be using a multi-step cleaning process.
I knew beforehand of the consequences of cross contamination of fluids on just one singular brush, and not wishing to deal with cleaning any brush in between cleaning steps with various formulas, and a rinse.
I knew I'd be most likely using Audio Intelligent Vinyl Solutions assortment of cleaners, and pure water rinse, and would therfore need to dedicate a singular brush for eash step.
I also knew, with the model 17, that I'd be paying for a brush that I may not wish to use. As far as I know, the brush that comes with the model 17 deck mounted affair, is the exact same brush given for free with the model 16.5. It is a brush I have preferred not to use, and have never used yet.
I preferred to initially use the MoFi, or Disc Doctor Brush Pads, which are softer than the VPI Brush, and recently, I have gotten a set of four AIVS Listener Select Brushes, which I think will be the hands down best of the best brush for applying-spreading fluids, and rinse waters.
Since I commonly use a 4-ste p cleaner-rinse method currently, and don't forsee me changing from this spectacular cleaning system anytime soon, I simply apply the first step, which is AIVS #15 Pre-Cleaner.
I insure full coverage by operating the platter motor with one hand, holding the brush in place with the other, until I have complete coverage. Then I shut off the platter motor and wait a period of minutes. If I begin to see a cleaning fluid drying, I'll then apply a little more fluid.
Then, after a predetermined time, with brush in the right hand, and motor switch in the other, I will do a very gentle back and forth agitation of the fluids following the groove. Once I have done a 1/4 to a 1/3 of the record's surface, I simply flick the motor switch momentarily, to position the record to an unscrubbed position, and continue, insuring I overlap my strokes, until the entire record has been done this way.
Then i simply position the vacuum wand over the record, hit the vacuum switch to remove that fluid step, and then go onto the next in the exact same fashion.
It's very easy, and I would rather myself have complete control of the brushes, as I sometimes will "tilt, and feather" the brushes slightly, as this seems to aid spreading of fluids, and as well seems gentler to the record's surface.
I too had seriously for a moment considered the different platter motor like you are contemplating, but felt it wasn't going to offer any advantage as far as cleaning, and for how much more work was inolved with hand scrubbing, the money I would've spent could be used for other things, such as brushes, cleaners, sleeves, etc.
As I think I mentioned, the reversible motor will be useless for fluid removal, the platter must rotate in a clockwise rotation as there is a stop machined into the vacuum wand tower tube itself.
Technically, the vacuum wand slot is not supposed to be at an exact 90 degree angle to the record's surface. That there is actually a slight canting of the slot by a degree or two (facing the rear of machine) that aids fluid pickup with the wand.
Hope this all helps you, and of course, you must decide the route, and path you personally wish to take. I wanted to give you all the options, and possibilities, and let you then ultimately decide which will be best for you. Mark
The only thing you wouldn't have, is the fluid dispensing pump, and hose that also mounts together with the deck mounted VPI Brush.
Those parts can be bought direct from VPI, and again, VPI will know for sure if their deck mounted brush could mount to the 16.5 RCM.
The personal reasons I eschewed such, and did not want the added features of the model 17, versus the lesser 16.5 whch I bought are this.
From the very get go, I knew before I even bought the model 16.5, I was well aware that I would be using a multi-step cleaning process.
I knew beforehand of the consequences of cross contamination of fluids on just one singular brush, and not wishing to deal with cleaning any brush in between cleaning steps with various formulas, and a rinse.
I knew I'd be most likely using Audio Intelligent Vinyl Solutions assortment of cleaners, and pure water rinse, and would therfore need to dedicate a singular brush for eash step.
I also knew, with the model 17, that I'd be paying for a brush that I may not wish to use. As far as I know, the brush that comes with the model 17 deck mounted affair, is the exact same brush given for free with the model 16.5. It is a brush I have preferred not to use, and have never used yet.
I preferred to initially use the MoFi, or Disc Doctor Brush Pads, which are softer than the VPI Brush, and recently, I have gotten a set of four AIVS Listener Select Brushes, which I think will be the hands down best of the best brush for applying-spreading fluids, and rinse waters.
Since I commonly use a 4-ste p cleaner-rinse method currently, and don't forsee me changing from this spectacular cleaning system anytime soon, I simply apply the first step, which is AIVS #15 Pre-Cleaner.
I insure full coverage by operating the platter motor with one hand, holding the brush in place with the other, until I have complete coverage. Then I shut off the platter motor and wait a period of minutes. If I begin to see a cleaning fluid drying, I'll then apply a little more fluid.
Then, after a predetermined time, with brush in the right hand, and motor switch in the other, I will do a very gentle back and forth agitation of the fluids following the groove. Once I have done a 1/4 to a 1/3 of the record's surface, I simply flick the motor switch momentarily, to position the record to an unscrubbed position, and continue, insuring I overlap my strokes, until the entire record has been done this way.
Then i simply position the vacuum wand over the record, hit the vacuum switch to remove that fluid step, and then go onto the next in the exact same fashion.
It's very easy, and I would rather myself have complete control of the brushes, as I sometimes will "tilt, and feather" the brushes slightly, as this seems to aid spreading of fluids, and as well seems gentler to the record's surface.
I too had seriously for a moment considered the different platter motor like you are contemplating, but felt it wasn't going to offer any advantage as far as cleaning, and for how much more work was inolved with hand scrubbing, the money I would've spent could be used for other things, such as brushes, cleaners, sleeves, etc.
As I think I mentioned, the reversible motor will be useless for fluid removal, the platter must rotate in a clockwise rotation as there is a stop machined into the vacuum wand tower tube itself.
Technically, the vacuum wand slot is not supposed to be at an exact 90 degree angle to the record's surface. That there is actually a slight canting of the slot by a degree or two (facing the rear of machine) that aids fluid pickup with the wand.
Hope this all helps you, and of course, you must decide the route, and path you personally wish to take. I wanted to give you all the options, and possibilities, and let you then ultimately decide which will be best for you. Mark
Last edited:
Mark,
I have decided against mounting a scrubbing brush because of contamination problems.
I placed an order with Grainger's for the motor, run capacitor, and two switches. When I added the fan, I replaced the vacuum switch with one from Lowe's that does not match.
I had access to some high quality 24 VDC fans, I used epoxy to mount a 12 VDC wall transformer to the inside of the case. Placed a strip of wood on the bottom of the unit separating the original vent from the fan hole. Raised the unit by installing slightly taller rubber feet to improve the air circulation. At half speed, it stays very cool.
A machinist friend that has been helping me with the project. He made a real cool clamping solution that covers the entire label. It uses an o-ring to seal off the label.
When it is done, I will post pictures and part numbers.
I have decided against mounting a scrubbing brush because of contamination problems.
I placed an order with Grainger's for the motor, run capacitor, and two switches. When I added the fan, I replaced the vacuum switch with one from Lowe's that does not match.
I had access to some high quality 24 VDC fans, I used epoxy to mount a 12 VDC wall transformer to the inside of the case. Placed a strip of wood on the bottom of the unit separating the original vent from the fan hole. Raised the unit by installing slightly taller rubber feet to improve the air circulation. At half speed, it stays very cool.
A machinist friend that has been helping me with the project. He made a real cool clamping solution that covers the entire label. It uses an o-ring to seal off the label.
When it is done, I will post pictures and part numbers.
Last edited:
The swap is complete. It was worth the trip!
Parts Required -
New Motor - 3M153
Motor Cap - 2MDY4
Cap Bracket - 2MEV1
Switch - 4X851
Modifications -
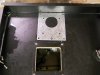
New Motor Mounting Plate
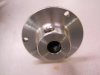
Arbor Bushing
Enlarge Motor Cutout Hole
Tap Motor Mounting Holes
First the motor swap -
Remove the platter using the 3 small Phillips self tapping screws.
Remove the wiring to the motor.
Remove the motor mounting plate from the top (4 Phillips screws), the motor is attached.
Remove the arbor. I believe they are 3/32" Allen screw(s), correct me if I am wrong.
Enlarge the motor cutout in the case.
Fabricate a 5/16' to 1/4" brass bushing for the arbor. The old motor uses a 5/16" shaft, the new motor has a 1/4" shaft.
More to follow.
Parts Required -
New Motor - 3M153
Motor Cap - 2MDY4
Cap Bracket - 2MEV1
Switch - 4X851
Modifications -
New Motor Mounting Plate
Arbor Bushing
Enlarge Motor Cutout Hole
Tap Motor Mounting Holes
First the motor swap -
Remove the platter using the 3 small Phillips self tapping screws.
Remove the wiring to the motor.
Remove the motor mounting plate from the top (4 Phillips screws), the motor is attached.
Remove the arbor. I believe they are 3/32" Allen screw(s), correct me if I am wrong.
Enlarge the motor cutout in the case.
Fabricate a 5/16' to 1/4" brass bushing for the arbor. The old motor uses a 5/16" shaft, the new motor has a 1/4" shaft.
More to follow.
Attachments
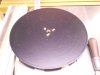


Last edited:
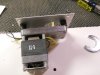
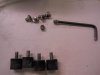
Fabricate a new motor mounting plate. I believe the arbor hole is 1-7/8".
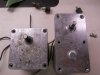
Tap the mounting holes on the new motor. The isolation standoffs are 10-32, the holes on the new motor are 8-32.
More to follow.
Tap the mounting holes on the new motor. The isolation standoffs are 10-32, the holes on the new motor are 8-32.
More to follow.
Attachments


Last edited:
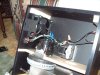
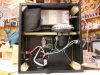
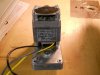
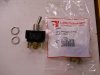
Install the cap and the new DPDT switch(s). Add the second switch if you are installing a fan (recommended).
The Yellow and Gray wires go to the outside of the switch, the AC line goes to the center.
The extras are next.
The Yellow and Gray wires go to the outside of the switch, the AC line goes to the center.
The extras are next.
Attachments

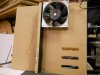
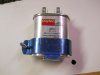
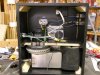
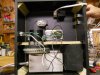
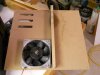
For me, the fan is a must have. The unit gets pretty warm inside. The fan will require replacing the vacuum switch. That allows you to put the switch in the down position to turn the fan on. The new platter motor gets so warm, it has a built in fan. The wall transformer is 12VDC and powers a 24VDC fan. It epoxied to the inside of the case. I switch the primary side of the transformer through the new contacts of the vacuum switch. I used an end of a AC extension cord to mate to the transformer.
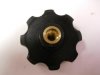
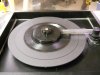
The record clamp is not available. He made it for me as a favor.
The clamp is nice because it uses an o-ring to seal against the record surface to protect the label from the cleaning solution. Hopefully if anyone wants to make one, you can use the pictures as a reference. He used a longer o-ring and cut it to size. Then he glued it into the groove. I think a an OEM Technics 1200 aluminum 45 adapter will work at the centering insert.
Some interesting stuff about the different versions of the vacuum rods, the diameter of the tube varies .015". The later rods are pinned, and need to be turned down in a lathe to fit the holder. Pay attention to the clearance the rod has going into the holder, it varies greatly. The clearance inside of the holder determines the suction through the rod. About half the rod should be exposed in the holder. If it is shoved in too far, it causes too much restriction. If it is not in far enough, the rod will not seat well enough, and will not have enough restriction. That could cause damage to the vacuum motor by letting liquid in from the tank.
I installed taller mounting feet to allow for more ground clearance for circulation. I picked them up at Lowe's, and did not note the part number. A strip of wood is a good idea to separate the in and out vents. You want outside air to be drawn into the case.
Looking back on the project, it would have been easier to purchase the arbor. Since I do not have a HW-17, I do not know if the motor plate and standoffs would have worked. If they would work, I would suggest buying them.
I never liked to cork mat. I am using a rubber one from an old TT.
It was a labor of love that paid off. I just hold the VPI brush and switch the motor direction. No more scrubbing.
Let me know if I can provide any more info. Happy cleaning.
The record clamp is not available. He made it for me as a favor.
The clamp is nice because it uses an o-ring to seal against the record surface to protect the label from the cleaning solution. Hopefully if anyone wants to make one, you can use the pictures as a reference. He used a longer o-ring and cut it to size. Then he glued it into the groove. I think a an OEM Technics 1200 aluminum 45 adapter will work at the centering insert.
Some interesting stuff about the different versions of the vacuum rods, the diameter of the tube varies .015". The later rods are pinned, and need to be turned down in a lathe to fit the holder. Pay attention to the clearance the rod has going into the holder, it varies greatly. The clearance inside of the holder determines the suction through the rod. About half the rod should be exposed in the holder. If it is shoved in too far, it causes too much restriction. If it is not in far enough, the rod will not seat well enough, and will not have enough restriction. That could cause damage to the vacuum motor by letting liquid in from the tank.
I installed taller mounting feet to allow for more ground clearance for circulation. I picked them up at Lowe's, and did not note the part number. A strip of wood is a good idea to separate the in and out vents. You want outside air to be drawn into the case.
Looking back on the project, it would have been easier to purchase the arbor. Since I do not have a HW-17, I do not know if the motor plate and standoffs would have worked. If they would work, I would suggest buying them.
I never liked to cork mat. I am using a rubber one from an old TT.
It was a labor of love that paid off. I just hold the VPI brush and switch the motor direction. No more scrubbing.
Let me know if I can provide any more info. Happy cleaning.
Attachments



Last edited:
markd51
Nyuk Nyuk
Hi, I browsed over your pics, and what you have written.
I reckon what you have done, is what you felt you wanted to do, to have the features you have wanted on your machine.
It could probably be viewed as a person who chooses what kind of wheels, and tires one wants to place on their vehicle. Or stripes, graphics, or other modifications.
I hope you will not take any of my comments as rude, or that any given way is a right way, or a wrong way to make improvements to such a machine.
It did though seem like the long hard, and more expensive way to go, to accomplish a task (dual rotation of platter) which of course can be accomplished for free by the use of one's hand. I can understand in perhaps a certain special need, where a person is perhaps handicapped, or some other physical reason as to desire such a feature.
The feature is a convenience which is offered on better, more expensive VPI machines, but yet there are machines even more expensive than these, which still do not offer such a feature I believe.
My simple, and of course "free" method, doesn't differ than the majority of others, in that they will take a small section of the record, and use the brush in both directions, then move onto another small section of the record, and continue. Yes, a little more work, but since I'm at the machine anyway, I reckon it kills time.
I am a firm believer, that no matter what machine, its complexity, or its price, that the cleaners, and rinses themselves are major contributors to the quality of final cleanliness the record will possess.
I agree about the mat, that cork is not the optimum material to use, that it can eventually begin to hold dirts-dusts, contaminated cleaning liquids that one will pass onto another record. (cross contamination)
Your choice of fan location is of course but one of a few different places one could choose. And as well, one could implement a number of different means to offer additional ventilation to the Cabinet itself, to offer better crossflow of air.
My way, which you may be familiar with, was a relative simplistic way to modify, without incurring too high an added cost.
And as you have experienced, and now know yourself, there's no doubt even simpler, and less expensive ways yet still. Just a simple 120V cooling fan mounted over the existing 3 bottom slots would no doubt still be better than no fan at all, for additional cooling to the machine's two internal motors.
On the other side of the coin, I imagine one could also take a VPI 16.5, and mod it into another totally different machine, seperating the vacuum motor, isolating it, and alleviating one of the 16.5's largest drawbacks, noise.
I know I've seen a number of DIY machines here that were quite the work of art, and that were basically designed off the basic principles of the 16.5 RCM.
I wish to thank you for your follow up, the information is indeed valuable, and I'm glad that this additional info will always be present in this forum's archives, for others to benefit from in the future. Mark
I reckon what you have done, is what you felt you wanted to do, to have the features you have wanted on your machine.
It could probably be viewed as a person who chooses what kind of wheels, and tires one wants to place on their vehicle. Or stripes, graphics, or other modifications.
I hope you will not take any of my comments as rude, or that any given way is a right way, or a wrong way to make improvements to such a machine.
It did though seem like the long hard, and more expensive way to go, to accomplish a task (dual rotation of platter) which of course can be accomplished for free by the use of one's hand. I can understand in perhaps a certain special need, where a person is perhaps handicapped, or some other physical reason as to desire such a feature.
The feature is a convenience which is offered on better, more expensive VPI machines, but yet there are machines even more expensive than these, which still do not offer such a feature I believe.
My simple, and of course "free" method, doesn't differ than the majority of others, in that they will take a small section of the record, and use the brush in both directions, then move onto another small section of the record, and continue. Yes, a little more work, but since I'm at the machine anyway, I reckon it kills time.
I am a firm believer, that no matter what machine, its complexity, or its price, that the cleaners, and rinses themselves are major contributors to the quality of final cleanliness the record will possess.
I agree about the mat, that cork is not the optimum material to use, that it can eventually begin to hold dirts-dusts, contaminated cleaning liquids that one will pass onto another record. (cross contamination)
Your choice of fan location is of course but one of a few different places one could choose. And as well, one could implement a number of different means to offer additional ventilation to the Cabinet itself, to offer better crossflow of air.
My way, which you may be familiar with, was a relative simplistic way to modify, without incurring too high an added cost.
And as you have experienced, and now know yourself, there's no doubt even simpler, and less expensive ways yet still. Just a simple 120V cooling fan mounted over the existing 3 bottom slots would no doubt still be better than no fan at all, for additional cooling to the machine's two internal motors.
On the other side of the coin, I imagine one could also take a VPI 16.5, and mod it into another totally different machine, seperating the vacuum motor, isolating it, and alleviating one of the 16.5's largest drawbacks, noise.
I know I've seen a number of DIY machines here that were quite the work of art, and that were basically designed off the basic principles of the 16.5 RCM.
I wish to thank you for your follow up, the information is indeed valuable, and I'm glad that this additional info will always be present in this forum's archives, for others to benefit from in the future. Mark
Mark,
I certainly did not take your comments as rude, I respect your opinion.
I did accomplish what I wanted. I had an idea in mind, and it worked out. Not saying if it was the right thing to do, but it is done. I do marathon cleaning sessions where I will clean 50 or so 45s a day. (I know I am an outcast here for cleaning 45s). Already I have cleaned about 70 records, and I like it. Most of my records are the nastiest junk store records around. This RCM is their lifeline.
If I had a second 16.5, I would do it again. This time, I would see what parts Harry had to offer to cut down the making of new parts. I still think that is was worthwhile. Maybe just watching it work is cool. If nothing else, the pictures can be used for others doing repairs to the unit.
Your analogy about modding a car is completely accurate. What one person does to a car, I would never think about doing to mine, and vice-verse. I could tell you things I have done to past vehicles, I don't think this would be the right place. I guess some of us could be considered eccentric. If I was not before, I have now joined the club.
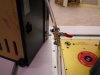
One thing I forgot to mention. I found a cool drain valve on eBay, I think it was $8. I replaced the 1/4" tubing, and added the drain valve. I hate that plastic thing. Besides, mine was cracked.
Thanks
I certainly did not take your comments as rude, I respect your opinion.
I did accomplish what I wanted. I had an idea in mind, and it worked out. Not saying if it was the right thing to do, but it is done. I do marathon cleaning sessions where I will clean 50 or so 45s a day. (I know I am an outcast here for cleaning 45s). Already I have cleaned about 70 records, and I like it. Most of my records are the nastiest junk store records around. This RCM is their lifeline.
If I had a second 16.5, I would do it again. This time, I would see what parts Harry had to offer to cut down the making of new parts. I still think that is was worthwhile. Maybe just watching it work is cool. If nothing else, the pictures can be used for others doing repairs to the unit.
Your analogy about modding a car is completely accurate. What one person does to a car, I would never think about doing to mine, and vice-verse. I could tell you things I have done to past vehicles, I don't think this would be the right place. I guess some of us could be considered eccentric. If I was not before, I have now joined the club.
One thing I forgot to mention. I found a cool drain valve on eBay, I think it was $8. I replaced the 1/4" tubing, and added the drain valve. I hate that plastic thing. Besides, mine was cracked.
Thanks
Attachments
markd51
Nyuk Nyuk
Nope, you're far from an outcast, you are an innovator, a person who has taken something, and made it better, at a reasonable cost.
The cost for the 17, or Typhoon is a considerable step up from the 16.5.
I only hope some of my input has been of help to you, and I'm sure the little shining light from the folks here, and the moderators will shine down upon me, upon us, and the rest of the fine folks here, saying "a job well done, bravo!"
That this is the essence, and the heart of AK. A good repore between it's members, and valuable information, and advice shared.
Yep, I have hindsight with my mods as well. Little did I know, that the acrylic platter that VPI makes for it's better machines will retrofit to the VPI 16.5 with little effort. I didn;t know this, and set out to have a custom platter lathe turned by a local machinist. Costs were the same, $50 in either case. I was only lucky to not spend more than this, as the owner of the acrylic company send me the 12"x12" sheet of grren edge clear acrylic for free, and no shipping costs either.
Otherwise the costs probably would've been close to $100 for the 16.5 Platter alone.
I also bought self stick neoprene rubber sheet from McMaster Carr which did not work out too well. Another $20 or so wasted.
I did buy 1/2" nylon standoff spacers to mount the Platter Motor to top mounting sheet, and in fact still have them on the machine, but will probably take them off, and replace them with the stock rubber standoffs. No benefit was noted with the Nylon spacers.
I use nothing but AIVS Cleaners, and AIVS Pure Water Rinse. The AIVS #15 Precleaner is a great product for really filthy records, used as a first step.
So good a product, I feel all records, new or old are worthy of being treated first with this product.
The 16.5, with the addition of AIVS cleaning products I feel make my little combination extremely effective. So effective, I've never felt that something was lacking, or that I needed to ask others of what I was doing wrong. There is no wrong, I'm getting nothing but 100% satisfaction with end results. Mark
The cost for the 17, or Typhoon is a considerable step up from the 16.5.
I only hope some of my input has been of help to you, and I'm sure the little shining light from the folks here, and the moderators will shine down upon me, upon us, and the rest of the fine folks here, saying "a job well done, bravo!"
That this is the essence, and the heart of AK. A good repore between it's members, and valuable information, and advice shared.
Yep, I have hindsight with my mods as well. Little did I know, that the acrylic platter that VPI makes for it's better machines will retrofit to the VPI 16.5 with little effort. I didn;t know this, and set out to have a custom platter lathe turned by a local machinist. Costs were the same, $50 in either case. I was only lucky to not spend more than this, as the owner of the acrylic company send me the 12"x12" sheet of grren edge clear acrylic for free, and no shipping costs either.
Otherwise the costs probably would've been close to $100 for the 16.5 Platter alone.
I also bought self stick neoprene rubber sheet from McMaster Carr which did not work out too well. Another $20 or so wasted.
I did buy 1/2" nylon standoff spacers to mount the Platter Motor to top mounting sheet, and in fact still have them on the machine, but will probably take them off, and replace them with the stock rubber standoffs. No benefit was noted with the Nylon spacers.
I use nothing but AIVS Cleaners, and AIVS Pure Water Rinse. The AIVS #15 Precleaner is a great product for really filthy records, used as a first step.
So good a product, I feel all records, new or old are worthy of being treated first with this product.
The 16.5, with the addition of AIVS cleaning products I feel make my little combination extremely effective. So effective, I've never felt that something was lacking, or that I needed to ask others of what I was doing wrong. There is no wrong, I'm getting nothing but 100% satisfaction with end results. Mark
markd51
Nyuk Nyuk
Mark,
Tell me about the acrylic platter mod.
My platter is warped. I had sprayed it with clear lacquer, but I think it already was too far gone.
Thank You
Well, I simply got a 12" square sheet of 1/2" thick arcylic, and had a local machinist clone the original VPI 16.5 Platter to the exact same size.
I like the fact the VPI Platter is slightly smaller than a LP. This enables a person to easily wipe the underside of LP if any spills go over the edge.
I still have my original 16.5 Platter, it is like new, and unaltered, with cork mat still intact. Doubtful I'll ever use it again, been keeping it in a box in case someone else ever needs it for a DIY project, or a replacement for a bad one.
I also had the 3 Arbor screw holes re-drilled, and re-tapped for the acrylic platter, from 6-32, to a larger 8-32 screw. Mark
Last edited:
markd51
Nyuk Nyuk
I like the idea of the new drain valve you used.
Agreed that the stock clamp is a bit of a pain, and while I have yet to address this myself, I think I will at some point, do something very similar to your implementation.
There's somebody out there that probably makes a small plastic 1/4 turn cock, like something such as a shut off valve for a toilet water feed line?
Since the VPI 16.5 seems like a combo of Grainger, and Home Depot off the shelf parts, perhaps I'll be able to dig something up at the Home Improvement Stores for a few dollars which will serve the purpose, and similar to what you have done.
As I'm hoping that others too are following along, you have recognized the importance of keeping this drain line tightly shut.
Again, thanks for your article, and the pics. And also a Merry Christmas! Mark
Agreed that the stock clamp is a bit of a pain, and while I have yet to address this myself, I think I will at some point, do something very similar to your implementation.
There's somebody out there that probably makes a small plastic 1/4 turn cock, like something such as a shut off valve for a toilet water feed line?
Since the VPI 16.5 seems like a combo of Grainger, and Home Depot off the shelf parts, perhaps I'll be able to dig something up at the Home Improvement Stores for a few dollars which will serve the purpose, and similar to what you have done.
As I'm hoping that others too are following along, you have recognized the importance of keeping this drain line tightly shut.
Again, thanks for your article, and the pics. And also a Merry Christmas! Mark

eidling
Active Member
question about VPI vacuum rods
Could you please clarify a few things about this statement? I have definitely noticed the tubes do not fit well, but what do you mean by "pinned"? I see they have a slot at the end that goes into the holder - is that what you mean? Should some/all/half of that slot be outside of the housing?
Thanks for any clarification you might give!
Some interesting stuff about the different versions of the vacuum rods, the diameter of the tube varies .015". The later rods are pinned, and need to be turned down in a lathe to fit the holder. Pay attention to the clearance the rod has going into the holder, it varies greatly. The clearance inside of the holder determines the suction through the rod. About half the rod should be exposed in the holder. If it is shoved in too far, it causes too much restriction. If it is not in far enough, the rod will not seat well enough, and will not have enough restriction. That could cause damage to the vacuum motor by letting liquid in from the tank.
Could you please clarify a few things about this statement? I have definitely noticed the tubes do not fit well, but what do you mean by "pinned"? I see they have a slot at the end that goes into the holder - is that what you mean? Should some/all/half of that slot be outside of the housing?
Thanks for any clarification you might give!
markd51
Nyuk Nyuk
Some interesting stuff about the different versions of the vacuum rods, the diameter of the tube varies .015". The later rods are pinned, and need to be turned down in a lathe to fit the holder. Pay attention to the clearance the rod has going into the holder, it varies greatly. The clearance inside of the holder determines the suction through the rod. About half the rod should be exposed in the holder. If it is shoved in too far, it causes too much restriction. If it is not in far enough, the rod will not seat well enough, and will not have enough restriction. That could cause damage to the vacuum motor by letting liquid in from the tank.
Could you please clarify a few things about this statement? I have definitely noticed the tubes do not fit well, but what do you mean by "pinned"? I see they have a slot at the end that goes into the holder - is that what you mean? Should some/all/half of that slot be outside of the housing?
Thanks for any clarification you might give!
I hope you don't mind me chiming in, and responding in place of the original poster?
I believe the point he is trying to make, and what he speaks of, is how the clear acrylic vacuum wand slips into the hole of the vertical wand tower.
While I have yet to break a clear acrylic wand, and thus need to replace it with a new one, to notice any manufacturing differences, it sould like the original poster has.
That hypothetically, a brand new wand bought from VPI, or their dealer network now seems to fit differently into a Wand Holder that is a few years old> This, I'm not sure of, but if specs, or the way they are made has changed, then yes, I can see this being a possible problem.
I believe some years ago, The VPI black delrin wand towers did not have a alignment-locating pin, which helps to properly align the clear acrylic wand in the hole when inserting. In any case, the fit is not so highly precise, that some fine tuning of the wand slot in regards to the surface of the record is slightly tuneable, and adjustable.
I understand, that the slot itself is not supposed to be exactly perpendicular to the record's surface, but canted ever so slightly, perhaps no more than a degree or so, to the rear of the machine. This aids fluid flow into the wand, and thus better fluid pickup.
Now, if one should find when they insert a new wand into the tower, and the locating slot in the wand is still exposed after seating, then yes, this is a problem, and will cause a loss of vacuum pressure. That sort of tells me there is not a proper fit then.
VPI is the sort of company though, if any problems such as this are ever experienced, I have little doubt, that regardless of time, even if you've had the machine for ten years, contact them, and they will somehow make everything right, no charge. They like happy customers.
VPI has recently gone through some very recent sorrows in the family, with the passing of Co-Owner, Sheila Weisfield, Harry's Wife. Mark


