• Please note that Audiokarma will be offline briefly for updates early on Monday morning, September 28th.

VPI HW-16.5 Motor Swap

I don't mind you responding instead of the original post. No problem at all. There was one point you made that made all the difference in my understanding. My 16.5 is about 10 years old and it does not have the little guide for the tube. I did not know about that change and was therefore confused about the slot at the tube holder end of the tube. I may just look into getting the newer tube holder.

thanks!
 
The swap is complete. It was worth the trip!

Parts Required -
New Motor - 3M153
Motor Cap - 2MDY4
Cap Bracket - 2MEV1
Switch - 4X851

Modifications -
New Motor Mounting Plate
Arbor Bushing
Enlarge Motor Cutout Hole
Tap Motor Mounting Holes

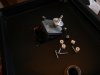
First the motor swap -
Remove the platter using the 3 small Phillips self tapping screws.
Remove the wiring to the motor.
Remove the motor mounting plate from the top (4 Phillips screws), the motor is attached.
Remove the arbor. I believe they are 3/32" Allen screw(s), correct me if I am wrong.
Enlarge the motor cutout in the case.
Fabricate a 5/16' to 1/4" brass bushing for the arbor. The old motor uses a 5/16" shaft, the new motor has a 1/4" shaft.

More to follow.

Pardon my ignorance but what is the "spindle" piece that sits over the brash bushing called? Is that something that came with the original VPI or was that crafted? Is this something that can be bought?
 
I don't mind you responding instead of the original post. No problem at all. There was one point you made that made all the difference in my understanding. My 16.5 is about 10 years old and it does not have the little guide for the tube. I did not know about that change and was therefore confused about the slot at the tube holder end of the tube. I may just look into getting the newer tube holder.

thanks!

Glad I was able to help in sme way with my comments.

I reckon, provided that a brand new issue Clear Acrylic Wand correctly fits into the older Wand Tower-Wand Holder, without any slot exposed outside, or seating in too far, then I don't really any issues, or advantages-disadvantages one way, or the other.

As I think I mentioned, even with the newer Black Delrin Wand Holder, with Locating Pin, and a brand new Wand, there still is a bit of rotational adjustability with the Wand to fine tune it.

If the other one works satisfactory, then that's great. I have two complete wand assemblies, I use one for the cleaners, and specifically dedicate the other for rinse waters only.

Here another little tidbit about VPI Wands. VPI does now make a black delrin vacuum wand, I believe list is $70, sort of pricey, but comes with a lifetime guarantee against breakage, and should be the last wand one will ever need.
Dealers "might" offer it for slightly less, I don't know?

Anyway, there's still an issue, and I've conversed with Mike at VPI about this.

And that is, even with a supposed non breakable delrin wand, VPI still does not offer the option of replaceable velver protective strips for their Wands.

Mike responded that they are seriously looking into offering this option, of replaceable protective strips that a customer can buy from them, and thus rejuvenate their wands.

At the present, I only know of one who sell simple peel and stick strips for the VPI, and other similar sized wands, and that is Disc Doctor. I believe two sets of strips (4 total) are $14.

Lastly, just one more tip about the VPI Machines, and the fine tuning of the vacuum wand. There is also adjustability of verticle down-travel of the wand.

The Wand tower does have an adjustable locking collar-ring, and that has a locking allen screw.

To adjust for correct height, you simply place an average record on the platter, clamp, then remove the wand assembly off the top of the machine.

Now replace the wand assembly, minus the coil spring. The vacuum wand should only drop far enough that it just touches the record's surface. If it doesn[t touch, or it perhaps drops too far before the locking collar contacts the wand assembly base screwed to the top deck, then loosen the allen locking screw, and raise-lower the collar till the adjustment is correct, that the wand just touches the record, Then tighten the allen lock screw, remove wand, replace with coil spring, and you are done. Hope this all makes sense.
Mark

 
Last edited:
DSCN0138.jpg
Pardon my ignorance but what is the "spindle" piece that sits over the brash bushing called? Is that something that came with the original VPI or was that crafted? Is this something that can be bought?

Look at the pic I posted of the stock VPI 16.5 Motor.

Are you referring to the machined part that is attached to the Motor Shaft, and attaches the Motor to the Platter? This is called an "Arbor".

Since the original poster upgraded his motor to actually the exact same motor that VPI uses for their flagship RCM, the Typhoon, then yes, I would imagine VPI also sells the correct Arbor to fit this specific Motor.

The question is, and it is one I am unsure of, is, is this particular Arbor, that VPI makes that is correctly drilled to fit the smaller diameter shaft of the Typhoon Motor, is it also correctly drilled-machined on the top to fit the stock VPI 16.5 Platter?

VPI will of course know.

The reason I say this, is because the VPI Model 17, and the flagship Typoon come with Acrylic Platters, and they might possibly be drilled different? Mark
 
I hope the OP and the others who contributed to this thread will still see this so they can help me out. I am planning to build DIY RCM based on the VPI design and using their wand update kit. I have a line on a Dayton motor for a good price that is almost exactly like the OP used on his mod (the only difference I think is that it is 10rpm instead of 20rpm, and it has a 5/16" shaft diameter). I don't have a VPI 16.5 to "reverse engineer," and I am trying to figure out the thrust bearing situation here. Based on the excellent pics markd51 posted, it appears that in VPI's design the weight of the platter, record, and clamp (i.e., all the weight that gravity pulls downward along the spindle axis) is taken by the output shaft of the motor's gearcase. That is, the arbor is solidly fixed to the gearcase output shaft and there is no separate thrust bearing such as a "lazy susan" style of ball bearing for the arbor/platter. Is this right?

I ask, because I can't find any kind of thrust load rating for any of these Dayton motors, which makes me think they aren't designed to take any thrust loads. Preventing it from taking any thrust loads would require a separate thrust bearing with some kind of splines on the spindle shaft so that the arbor/platter would float on the shaft (think along the lines of a microwave's turntable). But it appears that VPI has successfully avoided all of that complication, and I would like to avoid it also if it won't ruin the gearcase. So can anyone confirm the VPI's design in this area?
 
That is correct. The motor gearcase takes all the force. The shaft does feel a little sloppy, but it seems to work ok.

What is the wand update kit?
 
the platter attaches to the arbor with three screws and the arbor is attached to the motor shaft with a set screw

i too am designing a diy'er :D although i'm going on 3 months :sigh:
 
Pardon my ignorance but what is the "spindle" piece that sits over the brash bushing called? Is that something that came with the original VPI or was that crafted? Is this something that can be bought?

Kind of a late answer...I think you are talking about the arbor. It was originally supplied with the machine. I'm sure you could order it from VPI. That might save you from machining a bushing if you are doing the motor swap.
 
Kind of a late answer...I think you are talking about the arbor. It was originally supplied with the machine. I'm sure you could order it from VPI. That might save you from machining a bushing if you are doing the motor swap.
they sell them. $18 +ship
 
Thank you all for that info! I may just take the easy way out and buy the arbor from VPI, then. I don't see the arbor for sale by itself anywhere. I will try calling them, but if anybody has a link to this part for sale I would appreciate it. If need be, I can make something easily enough. So we'll see.

The "wand update kit" I referred to is E3015 "Mod Kit" to upgrade a 16 to 16.5 specs. It includes the suction tube (the part that actually gets down on the record and sucks the fluid off of it) and the spring-loaded tube holder/base. Seems like the easiest way to get really effective vacuuming, if not the cheapest: http://vpiindustries.com/shop/index.php?main_page=product_info&products_id=43.

I'm sure I'll be a few months in the making with this idea. It's not going to break any new ground, but I'll post the finished product when the time comes. I am thinking I can get this done for ~$140 all in, without having to engineer very much or reinvent the wheel. When done, I would have the functional (if not aesthetic) equivalent of a 16.5 but with a reversible platter rotation.
 
the arbor isn't listed on their website. you have to e-mail or call. you may also want to buy the motor mounting plate and standoffs. if you take your time you will end up with a real nice diy rcm :yes:
 
Okay, I have two more questions. I don't want to derail this thread too much, but the first applies directly to sichejo's motor swap and the second could also be a mod to a VPI cleaner as well as part of a DIY design. So hopefully this is appropriate.

1. Sichejo, why did you choose a DPTP switch for your new motor rather than a SPDT? It appears that you only used one pole of the DPDT switch you used (i.e, you're using it as a SPDT switch). Was the point of this just to keep both switches the same?

2. Has anyone tried to use a label-sized (4") platter on a VPI or DIY clone? This is how Nitty Gritty RCMs are designed, and the obvious advantage is that their platters can't get dirty and contaminate the clean side of an LP. But of course they vacuum from underneath, the opposite of a VPI. So I'm not sure if this is feasible when vacuuming from the top (although I can't think of why it wouldn't be). Anyway, I can prototype both a 4" and 12" platter from mdf if need be, but I was wondering if anyone else has already tried the small version on a top-vacuum design. I have looked at a bunch of DIY RCMs on this site, and I only see one built like that, and the OP last said (two years ago) that he might build a "proper" platter for it but didn't mention why. I posted this question there, too, but would still appreciate any responses here.
 
Last edited:
I'm going to dig up this thread from the dead.

I'm thinking of doing the reversible motor mod on my older HW-16.5 and I've found 2 motors that should work, one being 20 RPM and the other being 10 RPM. I'm thinking of going with the slower motor because I won't be in a hurry, and I'd think it would do a better job vacuuming up any liquid, and cause less static as the brush drags across the record surface. The 10 RPM motor also has a 5/16 shaft so no sleeve bearing needed to go from 1/4 shaft to 5/16 arbor. Any thoughts?

20 RPM: https://www.grainger.com/product/DAYTON-AC-Gearmotor-Parallel-52JE36
10 RPM: https://www.grainger.com/product/DAYTON-AC-Gearmotor-Parallel-52JE37
 
I'm going to dig up this thread from the dead.

I'm thinking of doing the reversible motor mod on my older HW-16.5 and I've found 2 motors that should work, one being 20 RPM and the other being 10 RPM. I'm thinking of going with the slower motor because I won't be in a hurry, and I'd think it would do a better job vacuuming up any liquid, and cause less static as the brush drags across the record surface. The 10 RPM motor also has a 5/16 shaft so no sleeve bearing needed to go from 1/4 shaft to 5/16 arbor. Any thoughts?

20 RPM: https://www.grainger.com/product/DAYTON-AC-Gearmotor-Parallel-52JE36
10 RPM: https://www.grainger.com/product/DAYTON-AC-Gearmotor-Parallel-52JE37

My memory is fuzzy after only a 1/2 cup of coffee, but believe I am correct about this.

A bi-directional Platter Motor might assist and make things easier for the brushing-scrubbing process.

But reverse rotation from stock won't be able to be used for vacuuming due to the design of the Vacuum Wand Assembly and how it radially locks into position while in use. The Wand will not remain stationary unless some sort of mod would be done.

One of my smallest gripes about my 16.5 was fluid pickup, and I know I explained at length here what can be done to fine tune the Vacuum Wand for most efficient fluid removal.

The proper adjustment of "drop down height", that's what that collar on the Wand Assembly with Allen Set Screw is there for. And having just an ever so slight cant to the angle of the slot in the Wand itself in relation to the record surface.

That slot should not be an exact 90 degree orientation from the record surface, but slightly canted towards the oncoming record as it rotates. Think of the mouth of the slot like a Snow blower machine.

With the slot at an exact 90 degree angle, fluids will have a tendency to "pool" in front of the Wand. The Wand also then has greater propensity to "lock" onto the record, creating more friction-drag.

Yes, only one of the Velvet Strips will then be largely in contact with the Record's surface because of this.
 
Last edited:
My memory is fuzzy after only a 1/2 cup of coffee, but believe I am correct about this.

A bi-directional Platter Motor might assist and make things easier for the brushing-scrubbing process.

But reverse rotation from stock won't be able to be used for vacuuming due to the design of the Vacuum Wand Assembly and how it radially locks into position while in use. The Wand will not remain stationary unless some sort of mod would be done.

One of my smallest gripes about my 16.5 was fluid pickup, and I know I explained at length here what can be done to fine tune the Vacuum Wand for most efficient fluid removal.

The proper adjustment of "drop down height", that's what that collar on the Wand Assembly with Allen Set Screw is there for. And having just an ever so slight cant to the angle of the slot in the Wand itself in relation to the record surface.

That slot should not be an exact 90 degree orientation from the record surface, but slightly canted towards the oncoming record as it rotates. Think of the mouth of the slot like a Snow blower machine.

With the slot at an exact 90 degree angle, fluids will have a tendency to "pool" in front of the Wand. The Wand also then has greater propensity to "lock" onto the record, creating more friction-drag.

Yes, only one of the Velvet Strips will then be largely in contact with the Record's surface because of this.
Yeah, I knew vacuuming wouldn't work in reverse because of the way the wand pivots; it would swing out of the way in reverse. I was mostly curious about a 10 RPM motor instead of 20 RPM, my thinking being the slower motor would allow better liquid vacuuming, and have less potential for static. What do you think?
 
Yeah, I knew vacuuming wouldn't work in reverse because of the way the wand pivots; it would swing out of the way in reverse. I was mostly curious about a 10 RPM motor instead of 20 RPM, my thinking being the slower motor would allow better liquid vacuuming, and have less potential for static. What do you think?
That's hard for me to say if slower rotation will be better, and then require less rotations to remove fluids?
The stock motor was what, 16 RPM? Or was it 13 RPM? I could look and check.

it seems over the years most users said they try to only go 2 full rotations as more would likely bring about the static you speak of.

And I would say provided all is working and adjusted correctly, that's basically correct, that fluid removal should be sufficient with 2 rotations to remove about all that can be removed. I gather that if for say one went 10 full rotations, the Wand's Velvet Strips would be no drier, and that in any instance the velvet will always remain damp.

Usually what is left on the surface can be seen under close examination, a very fine "mist", which as you watch usually evaporates within a number of seconds. Still, it is wise to let records air dry for a period of time before inserting into a sleeve to insure you aren't trapping moisture which can cause damaging mold-fungus.

Question would be, and I might assume you are wishing to maybe only do 1 full rotation?
 
All good advice! I would consider working on your technique & VPI setup rather than motor swap. The vacuum tube can rotate; check for correct orientation.
I do something every similar. ~4 drops of fluid, spread with separate brush, vacuum 2x rotation, bit of pause to evaporate any residual moisture, then next steps.
I do use a plastic 'knife' to knock off any excess moisture/particulates from brush & tube between records.
 
That's hard for me to say if slower rotation will be better, and then require less rotations to remove fluids?
The stock motor was what, 16 RPM? Or was it 13 RPM? I could look and check.

it seems over the years most users said they try to only go 2 full rotations as more would likely bring about the static you speak of.

And I would say provided all is working and adjusted correctly, that's basically correct, that fluid removal should be sufficient with 2 rotations to remove about all that can be removed. I gather that if for say one went 10 full rotations, the Wand's Velvet Strips would be no drier, and that in any instance the velvet will always remain damp.

Usually what is left on the surface can be seen under close examination, a very fine "mist", which as you watch usually evaporates within a number of seconds. Still, it is wise to let records air dry for a period of time before inserting into a sleeve to insure you aren't trapping moisture which can cause damaging mold-fungus.

Question would be, and I might assume you are wishing to maybe only do 1 full rotation?
The stock motor is 18 RPM, the one I'm looking at is 10 RPM. 18 RPM motor has a 1/4 shaft, and the 10 RPM motor has a 5/16 shaft, so no sleeve bearing needed to adapt to the 5/16 arbor. Even if I did two full rotations I'd think the slower RPM motor would do a better job of drying, and cause less static. I kind of compare it to vacuuming your floor or carpet; slower does a more thorough job than yanking the vacuum back and forth in a hurry.
 
All good advice! I would consider working on your technique & VPI setup rather than motor swap. The vacuum tube can rotate; check for correct orientation.
I do something every similar. ~4 drops of fluid, spread with separate brush, vacuum 2x rotation, bit of pause to evaporate any residual moisture, then next steps.
I do use a plastic 'knife' to knock off any excess moisture/particulates from brush & tube between records.
It works great as it is, but I'd like the reversible motor so I can easily spread fluid in both directions to really get solution into the grooves, same reason the new versions have the reversible motors..
 
It works great as it is, but I'd like the reversible motor so I can easily spread fluid in both directions to really get solution into the grooves, same reason the new versions have the reversible motors..
I do this, but manually by hand, on say a 1/3rd of the record's surface, and commonly would have one hand on the Brush, and the other on the Platter Switch.

That after a few swipes back and forth, simply rotate the record slightly so that I remain in a comfortable position is all. And then proceed to brush-agitate fluids on another section of the record.

My method was first apply cleaning fluids and spread with the platter rotating till the entire record is covered. Then stop and let things sit for 2-3 minutes time. To let the cleaners do their job and acting upon whatever was on the record to loosen and detach from the surface.

This is generally what should be done for best performance of the cleaning fluids. Some go too quickly with initial application and then removal.
 
Last edited:
Back
Top Bottom