• The move to the new server is done. There are some software and database maintenance updates in process. This has us passing the hat around to help out. We appreciate any donations. Seriously, even a dollar helps. The payment page may be found here - https://www.audiokarma.org/support.html

Woodworking and the tools you use and projects and wood porn.

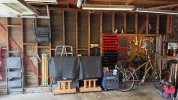
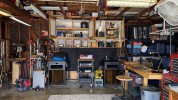
What's it look like now?
Not that other today, this today. ;)
IMG_5156.jpegIMG_5158.jpegIMG_5159.jpegIMG_5160.jpegIMG_5161.jpegIMG_4238.jpeg
In appreciation of MDF and biscuits, blind haters of them take note - These Ultra Lightweight MDF cabinets are only glued and biscuited and attached to the rafter ties and studs directly through the ULMDF with dw screws and without reinforcement, cleat, or glue block one. I’ve adjusted the Blum cup hinges once in 26 years. I just purged at least 500 pounds in corded electric tools and stuff. Originally the cubbies were all power tools with multiple routers set up for a specific cut and sanders of types and grits to save time and support consistency when producing multiples.
Now it’s arranged to comply with my 20 lb overhead limit so heavy stuff lowest.
 
Last edited:
20260319_173712.jpg


Alright Q for you guys -

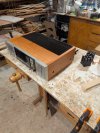
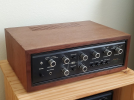
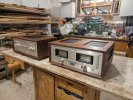
I'm planning on making some 1/4" plywood or MDF cabinets for the Sansui AU 222, not particularly heavy ones, and not ones needing major ventilation, just slots. Leaning toward MDF. I can either get regular MDF, make the box, then veneer, or get veneered MDF.

I don't know if 1/4" is enough, it's really not a lot of mating surface for the joints, but I really want the cabinets to be slim... I'd probably need to use cleats/bracing, but then again that means making them bigger than I want. Suspect will have to settle for 1/2".

Alternatively, I could make the cabinet just have 3 sides, kind of like a 555A - top and sides, no bottom, that would work. But on the 555A this works because the wood is the cabinet, and it ends up being flush with the face. Whereas on the 222 the height/width of the face is exactly the same as the metal case, so any wood I add will surround the face, and then a three-sided cabinet will look weird - because then there is no wood framing the bottom edge.

1782925662383.png

Obviously naked MDF is more complicated in some ways, esp gluing and trimming, but also easier in some ways, less worry about getting dimensions right when cutting panels. I don't have a veneer vacuum press, whatever it's called, so I'd probably be using rubber cement or veneer glue and a J roller. Naked MDF is only 20 bucks a sheet, veneered walnut or cherry is ~5-6x that price. I do already have a bunch of veneer which I've been meaning to use. Which have you done or what thoughts do y'all have?


In other news I turned some little boxes recently - using scraps from my attempts at yosegi and initially inspired by a small sake cup I got from Japan.

20260628_132549.jpg20260628_132613.jpg
 
Last edited:
View attachment 3793183


Alright Q for you guys -

I'm planning on making some 1/4" plywood or MDF cabinets for the Sansui AU 222, not particularly heavy ones, and not ones needing major ventilation, just slots. Leaning toward MDF. I can either get regular MDF, make the box, then veneer, or get veneered MDF.

I don't know if 1/4" is enough, it's really not a lot of mating surface for the joints, but I really want the cabinets to be slim... I'd probably need to use cleats/bracing, but then again that means making them bigger than I want. Suspect will have to settle for 1/2".

Alternatively, I could make the cabinet just have 3 sides, kind of like a 555A - top and sides, no bottom, that would work. But on the 555A this works because the wood is the cabinet, and it ends up being flush with the face. Whereas on the 222 the height/width of the face is exactly the same as the metal case, so any wood I add will surround the face, and then a three-sided cabinet will look weird - because then there is no wood framing the bottom edge.

View attachment 3793187

Obviously naked MDF is more complicated in some ways, esp gluing and trimming, but also easier in some ways, less worry about getting dimensions right when cutting panels. I don't have a veneer vacuum press, whatever it's called, so I'd probably be using rubber cement or veneer glue and a J roller. Naked MDF is only 20 bucks a sheet, veneered walnut or cherry is ~5-6x that price. I do already have a bunch of veneer which I've been meaning to use. Which have you done or what thoughts do y'all have?


In other news I turned some little boxes recently - using scraps from my attempts at yosegi and initially inspired by a small sake cup I got from Japan.

View attachment 3793155View attachment 3793156

For a cabinet that is flush with the component (no faceplate shoulder/inset) as I think yours would be I like 5/8". I'll use 3/4" where the faceplate is inset like a Marantz so that the trim showing is still 5/8".
Butt joint the cabinet and then mitre hardwood edges and then veneer is how I do it.
The Belcor cabinet is done in 5/8" baltic birch with cherry veneer just under 1/16"
The second pic is in progress for a custom cab for Marantz amp using 3/4" particle board and about 1/16" walnut veneer before sanding that will leave about 5/8" of the wood profile showing. PXL_20260626_130928989.jpgPXL_20260701_155245242.MP.jpg

Edit: I did do flush veneer for a Sansui to replace the previous job like your second 3 sided option which I believe was an improvement over the.. whatever you want to call it.
PXL_20260309_151818278.jpgPXL_20260313_201012128.MP.jpg
 
Last edited:
That Belcor cabinet is gorgeous, nice clean job on that Sansui as well!

5/8 feels like it's just too much visual real estate, especially given the size of these amps. The 555 I did (repurposed cabinet) where the faceplate was inset still showed about that much wood, and it felt like too much! I mean I know I could try softening it by doing bevels but I'm not inclined to it..

1782954965101.png


And these are much smaller, lighter amps than a full sized receiver of tube amp. So I guess I'll be trying 1/2". OR I might just go solid wood and rabbeted joints. This example I found on a search looks pretty good, although they have removed the metal cover and the face is not properly inset:


1782954803857.png
1782954854357.png
 
I guess part of my concern with going less than 1/2" would be glue/fastener area to hold it together. I've used router with drawer lock bits on 1/2" material successfully but not tried on cabinets.
Things like Pioneer cabs (sx-x50/x80) have about 1/8" flush tops into 5/8" sides.
Post pics of the work.
My first thought would be BB plywood w/ box joints and thick veneer so they don’t telegraph through for under a 1/2”. Splined butt joints would be my second choice. 3rd would be finishing to thin the front edge. The AU-222 above would appear to fit like a glove if the rabbet was blacked out with a Sharpie.
 
My first thought would be BB plywood w/ box joints and thick veneer so they don’t telegraph through for under a 1/2”. Splined butt joints would be my second choice. 3rd would be finishing to thin the front edge. The AU-222 above would appear to fit like a glove if the rabbet was blacked out with a Sharpie.
Ooh I do like the idea of box joints for the thin stuff! So that'd preclude buying preveneered stuff. I'm going to get some mdf and give it a try.

What are you guys using for gluing on veneer? I have a J roller, rubber cement, and titebond veneer glue. I do not have any vacuum bags.


(I think I'm still going to try doing a solid case as well. Luckily this amp is less than a foot deep, so that means a single glue up of two nicely jointed 6" boards is all I need. I don't mind a little end grain showing on a rabbeted butt joint. All the wood movement will be front to back so I think it'll hold up fine. )
 
I use a very thin layer of polyurethane glue spread with an old credit card and scrape any excess so as to minimize any foaming at the edges. I use pva glue to attach front/back wood strips. I find less creep with the poly when setting up and clamping and it doesn't show through the finish the way pva can. I generally use boiled linseed oil and a beeswax polish for finishing.
The cabinet I posted above has been veneered and oiled that way and now just waiting to install the grills.
PXL_20260702_150547088.jpg
 
I use a very thin layer of polyurethane glue spread with an old credit card and scrape any excess so as to minimize any foaming at the edges. I use pva glue to attach front/back wood strips. I find less creep with the poly when setting up and clamping and it doesn't show through the finish the way pva can. I generally use boiled linseed oil and a beeswax polish for finishing.
The cabinet I posted above has been veneered and oiled that way and now just waiting to install the grills.
View attachment 3793877
Sssssexy. Flush trim router on the corners of the vents? Leaving the round corners?

Which PU glue? Is it very different from PVA in other properties?
 
Yes, I used flush trim on the vents. Will keep the rounded profile unless the friend I'm doing them for wants them squared - easy fix.
I use Gorilla brand poly glue and it is fairly different - after spreading I mist the air above it as it cures with moisture and you don't want to be spreading it with your fingers the way I do with PVA as it's very sticky. The poly glue will foam up in voids and sqeeze out - can be good/bad depending on situation - good for minor gap filling bad for getting messy if you use too much.
It's also more expensive vs PVA. Worth trying to see if it works for you - a little goes a long way especially if surfaces are smooth. Try it on some sample pieces to get a feel for it before going all in on a project. I've used PVA on a large veneer panel - like 3'x3' and the veneer all buckled and I had to iron it out afterwards to use it. Tough to clamp that size well without a vacuum press. I don't think the poly glue would have done that, but you also won't be able to iron it out with poly.
 
@MegaHurts how do you make sure the hardwood and veneer match each other visually identically? Or are you making your own veneer from the same stock?

It looks like you veneer over the hardwood - can you take a closeup picture of the front edge where the veneer lays on the wood around the perimeter? I'm curious to see how you hide it. Thanks and looks awesome I'm just looking for tips and tricks!
Thanks, yes I do cut my own veneer on the bandsaw and will try to use the same board (or tree) for the hardwood parts. If I charged way more than I do I could spend a lot of time trying to properly grain match everything but this is retirement hobby restoring the guts and cases.
The first pic you can see the opposite grain direction of the veneer to the frame for the grill.
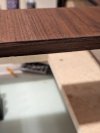
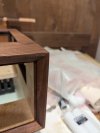
The second pic has same grain direction and you can just make out the veneer at the corner with its rounded overhanhang. Third pic at the front corner where it is veneered over the 5/8" chamfer profile top/side. Last pic shows the vent frame for the grill to sit into and then gets secured with walnut strips pinned into the sides to hold in place (or screwed/temp glue). That allows for the grills to be removeable if needed, and keeps it looking like a solid walnut cabinet instead of baltic birch or other. The inside at the back will be painted black as well for a nice finished look when the amp is installed. No stain on this piece, just nice walnut sanded to 320 and oiled.
I posted a link of the process I normally use here, although this one is more custom.


PXL_20260702_222516755.jpgPXL_20260702_222612547.jpg

PXL_20260702_223359575.jpg
PXL_20260630_173842188.jpg
 
Re: PU Adhesives - must be clamped securely. Foam has zero bond strength. It is easily removed with a card scraper. Dry runs are mandatory. For small & single use sizes Gorilla is tops. In 6 oz or bigger bottles PL and Excel are cheaper. Store inverted for maximum shelf life. Buy a gallon of acetone too. Contact cement and epoxy rollers work great for PU too.

This set of 8 dining chairs was made from a stack of 3/4” Philippine mahogany I scored from the Recycler. As was the table base in the background. All the flat blanks were laminated with urea formaldehyde resin. Respirators and goggles mandatory, but excellent color, thin glue lines and stronger than you know what. The curved show pieces are multi-ply bent laminations from 2 part molds using PU. All structural joints are thru-pegged, full mortise and tenon using PU.

26 years on they’ve been reupholstered once with one needed repair. These adhesives are worth getting to know outside of chairmaking.
CONVAR7690.jpeg
 
Last edited:
Change of pace and woodwork-ish.
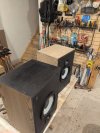
A pair of speakers that had been painted black and I was asked to redo them as the paint was flaking/peeling off in places. After sanding to prep you could see they were ash/oak veneer in decent shape. Convinced the owner that a full sanding and a walnut stain over the black in the pores would be a nicer way to go than repaint black. Don't think they'll be disappointed once the oil and wax goes on after the stain dries a few days. PXL_20260705_122217011.MP.jpgPXL_20260706_153650000.jpg
 
Last edited:
Change of pace and woodwork-ish.
A pair of speakers that had been painted black and I was asked to redo them as the paint was flaking/peeling off in places. After sanding to prep you could see they were ash/oak veneer in decent shape. Convinced the owner that a full sanding and a walnut stain over the black in the pores would be a nicer way to go than repaint black. Don't think they'll be disappointed once the oil and wax goes on after the stain dries a few days. View attachment 3796303View attachment 3796305
Are those Snell speakers?
 
Just sanding? Didn't need stripping?
Just sanding. The old paint came off like powder using the ros, barely clogged the paper - not sure what kind of paint was previously used. Once I realized they could be saved from repainting I offered the option to the owner. Just followed up with some hand sanding and stain.
 
Last edited:
This live edge Koa slab has been hanging around as a headboard for 25 years. I got it and 2 other planks from the guy who bought it from the guy who brought it over from Hawaii before the 1964 ban. He had it for 30 years saving it for the right project. The 2 planks became our dining table, but the live edge slab is a "potato chip" with one end kicked up and twisted. Planing it flat would remove the live edge and half the thickness. Maybe it'll work in the living room for the audio system?
IMG_2378.jpeg


This was transition project from big furniture using big machines to small projects without tablesaw, jointer and planer. Naturally being limited to a bandsaw, slider, drill press and handwork made it feel like going Krenov. The live edge work felt very Nakashima so things got real Zen Woodworker. A series of mockups were done arriving at the final design which is based on traditional Japanese pattern sawhorses.
IMG_4399.JPEG


I had a nice walnut board that was just enough for the stands, but only if I used all of it, as-is without machine jointing and planing or ripping on the tablesaw. Synergy is a beautiful thing.
IMG_4665.JPG


1 board to 10 blanks for parts. The triangles keep the matched pairs together where the arrows point to the surfaced reference face for marking out the joints.
IMG_4670.JPG


Applying just the right amount of sweat. Note the big finger eating machinery in the background waiting for Habitat to come pick it up. Somebody got a smoking deal on a really nice 50" cabinet saw at the Restore. Couldn't sell it for a 1/4 of it's worth, so Final Score - Pay It Forward 1, Flippers 0.
IMG_4684.JPG


I like to tint epoxy for filling borer damage, bark inclusions, and loose/missing knots. West Systems is my go to.
IMG_4789.JPG


Card scrapers work great leveling the infill.
IMG_4811.JPG


Koa Kaos 1.0 with the big Dahlquist LBM - and yes the sap wood stays. Along with the grain it says (to me anyway) that this walnut board was air dried, not steamed and turned gray. So special wood for the sawhorses as well.
IMG_4853.JPEG


IMG_4856.JPEG


Koa Kaos 1.1 without the DQ-1W and some basic cable management.
IMG_5347.JPEG
 
Back
Top Bottom