• The move to the new server is done. There are some software and database maintenance updates in process. This has us passing the hat around to help out. We appreciate any donations. Seriously, even a dollar helps. The payment page may be found here - https://www.audiokarma.org/support.html

Woodworking and the tools you use and projects and wood porn.

Very nice. I have two slabs of Cuban mahogany like that, that I wonder if I'm ever going to get the courage to use.

Love the clean lines on the sawhorses.

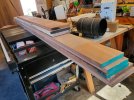
I recently picked up a Veritas low angle jack plane after years of struggling with a faulty old Stanley, and I was amazed at how much easier it was to dial in. My most recent project was just taking a board of Afzelia roughly 4"x6"x7' (also got this from the same old dude who sold me the mahogany) and making a 1x16x6' top for a sideboard, and I made liberal use of the jack and and later a card scraper, so much more pleasurable than the whine and scream of finger-eating machines. Also my first time using curved cauls for a panel glue up (duh), worked wonders and I barely lost 1/32 of thickness!

I used 1/2 of one of my Cuban planks for an heirloom gift which was very under appreciated by her parents, but really intended for my “Dark Mirage” granddaughter Carli. Just be sure.

Thank you for the compliment, that’s exactly what I was going for. I considered and may still add komiko panels above the stretchers.

I got my No. 5 1/2 Stanley Bailey jack plane from a street vendor in TJ. She called it a plana doora. The sole was concave from planing door stiles. The funny thing is that I was there with our church youth building a house because they needed someone to hang the door.

edit: very nice plane from our northern neighbors. Ditto for FS Tools saw blades.
 
Last edited:
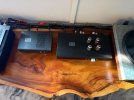
Wire management is done for now. The right speaker cable’s reach is maxed out. I’m not a fan of festooned cables, so we’ll see if I can live with it. It’ll be a month or two before I’m braiding any speaker cables, carpal tunnel release 2.0 next week.

IMG_5420.jpegIMG_5416.jpegIMG_5417.jpeg

More infill process pics
IMG_4788.jpegIMG_4790.jpeg
IMG_4831.jpeg

I used this cordless router for the first time to level the notches. These aren’t real saw horses, if they were they’d be drawbored & pinned through mortise & tenons not screwed, but these may need adjusting down the road. I’m pretty healthy outside of Uncle Art’s (arthritis) handiwork so making my own future accessibility accommodations here as well. It’s actually quite satisfying. (queue the chairman - I did it my way)
IMG_4709.jpeg

This is the main machine in my new semi-Krenov shop. A ‘47 Delta metal cutting bandsaw with 6” riser, aluminum fence, Carter bearing guides and urethane tires.
IMG_4669.jpeg

No tablesaw, no dado set, no problem. Roughed out the feet with a forstner bit.
IMG_4729.jpeg

Do not try this at home! These Blue Point chisels are for paring, not chopping. Scary sharp, but too hard, hence the fly weight mallet. No dado? I need to get a couple mortise chisels and another marking knife. Going to go Japanese or German?
IMG_4706.jpeg
 
Last edited:
Circling back to the great dust collector experiment here's a teaser for a cyclone dust separator. Configured to see what the ol' shop-vac can do. The design can easily be scaled up to be used with a real dust collector. With the vac unit directly mounted and a full 4" input it shouldn't have the CFM loss of a bucket-top dust separator. The concrete form will be shortened because I think a 48" sixteen inch diam. cylinder is a little overkill..

IMG_20260730_211834-XL.jpg
 
Last edited:
A little work on the project today. I cut some particle board for a top and for a bottom to fit the 16" tube. I routered grooves in each piece to fit the tube and a hole for an input flange. I also cut the tube down to 34" from the original 48". While the direct fit on the tube for the vac will work, it's not worth it. The blower inside the vac has a whopping two inch intake so putting the vac directly on top of the tube wouldn't increase suction. Now my separator can be used, with the right connector, with any wet/dry vac or dust collector system.

IMG_20260731_212220-L.jpg
 
I've got (approx) 99% of the parts to begin construction but I have to decide between a tapered-cone cyclone or a Thien Baffle arrangement. Virgin territory here folks. The "How hard can it be" gene is kicking in. A dust collector/chip separator with a Thien baffle seems like it could be made in a more compact packsge. I'd like it to be at least somewhat portable, having casters to be able roll it around. I have more homework to do before proceeding.
 
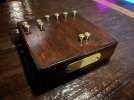
I had a bunch of complex mini remotes to control lights in our vintage wine bar basement. The white plastic remotes looked very out of place, there were too many remotes to deal with, and people were always hitting the wrong buttons — so I built a mechanical remote box around them. I suspect this is the world’s first analog universal remote :)


IMG_1637.jpeg

IMG_1639.jpeg

IMG_1642.jpeg
 
The plot thickens... :naughty: Big wind coming.

View attachment 3813199
I did a test run yesterday of the VEVOR DC100. Good suction and air moving. My simple set up will be using a 4" flexible hose connected to one machine at a time. It's basically the same machine as the DC100 but with a 4" input instead of a 6" and a different dust filtering arrangement The DC100 is rated at 800 CFM instead of 560 CFM. Both machines have the same 1 HP motor and 9" impeller. Down the road I'll probably add a filter canister in place of the stock dust bag connected to a restrictive 4" outlet.
Now back to the dust separator project.
 
Last edited:
The DC is intended as a wall mount unit but I don't have a convienient spot to do that so I think I'll make a stand to support it. Nothing fancy but maybe make it have folding legs for easier storage :idea:
 
Ta Da', my new dust collector. Just not the big one. I'm still working on that and thinking I should cut it down to a more manageable size. I really don't need a 30-gal. capacity DC. In the meantime, since I FUBAR'd the Dustoper thinking I knew more than the engineers who designed it, plan B. I had this little cyclone I got off eBay months ago mainly because it was cheap so I thought why not give it a go. A test run with it mounted on a 5-gal. bucket and it works as good as the much more expensive Dustoper from HD. I cut some wood pieces to mount it on top of a bucket I savesd from from a STANLEY wet/dry vac that died. Ideal for small dist makers like sanders & jig saws and for floor cleanup. Twice the capacity of a 5-gal. bucket and it has wheels :rockon:

IMG_20260902_092852.jpg
 
If you have rotted wood that you can't replace (e.g. it's vintage, it's too difficult replace, etc.) and you can't repair (with putty for example) because it doesn't have any structural integrity, I stumbled onto a product that's amazing. It's a two stage process -- 1) you pour in the "wood petrifier" liquid until it has soaked into the rotted wood. (it has a consistency more like water than glue, so it's easy to absorb by the rotted wood). If it's a vertical panel, you can brush it in also. Once that dries, the internal rotted section will be hard as rock, or maybe wood :). Then there's a 2-part epoxy putty that you use afterwards to fill the gaps and restore the surface. The putty goes on very easy and it’s easy to sand smooth. Once cured, the epoxy is stronger than the wood.

I used it on fence panels where the 8' 2x4's tend to rot in areas, and they can't be replaced (requires hundreds of nails for all the slats, nailed in from the opposite side that I don't have access to). I had tried putties and glues before, but anything I tried just crumbled internally. With the wood petrifier, the internals become like solid wood and the 2-part epoxy is easy to use to finish it. I have something like 20 fence panels, and the slats are all good, but some of the 2x4's were about to fail just in certain areas (I know from experience that all you need is one weak area anywhere along the 2x4 for them to break). I was able to fix them all with one PC-Woody repair kit -- highly recommend.


61U0SDxMPuL._SL1000_.jpg


Stock photo from Amazon listing -- not mine, but this type of repair is doable based upon my experience with it
6115Ii-b1IL._SL1000_.jpg
 
Last edited:
Project "Big Dusty" is proceeding along. Fun fact. If you paint a cardboard concrete form with oil based paint it still raises fibers that need to be sanded down. The funny looking thing in the second pic is a Thien baffle. It's purpose is to keep the dust and chips in the barrel and not be sucked up into the piping to the dust collector. It's going to be sanded, primed, painted and sanded some more to within an inch of it's life. I'm thinking the smoother the surface is, the better it works. The same with the upper section of the cyclone. The smoother the surfaces are, the more air velocity you have, the better the separation works. The inside of the concrete form has already been coated with gloss polyurethane. The better to keep those happy dust particles where they belong.

IMG_20261005_120343-L.jpg
IMG_20261007_094805-L.jpg
I have that same type of work table, paint marks and all.
 
The deck boards had be replaced because the original MDF ones got wet and deteriorated. I never got around to drilling new holes for the clamps and such tho'. They need to be replaced again due to various "oopsies" :biggrin:
Black & Decker, right? I got mine in the late 70's/early 80's.
 
Back
Top Bottom