• The move to the new server is done. There are some software and database maintenance updates in process. This has us passing the hat around to help out. We appreciate any donations. Seriously, even a dollar helps. The payment page may be found here - https://www.audiokarma.org/support.html

JVC QL-?? owners thread

What strikes me funny is how @fish mojo has the exact same problems. I have had my lf 41 since new 1981 and it didn’t develop this issue until 2005 or so. I always thought it was in the start switch but finally figured out what was happening (most won’t believe me) by realizing that there had to be a separate auto engage switch activated by the start button. I had opened it up before but didn’t know what I was looking for but once I realized that it had to be a separate switch (not the start) I found the problem.

It would be nice to know if his has a similar setup once it’s fixed.
 
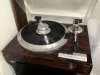
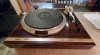
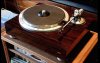
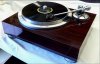
I have 2 QL’s, the Y77F and Y55F. The Y55F serves as redundancy and as my office TT. The Y77F is a beast with a heavier plinth and larger DD motor. Both function exactly the same, but the Y77F has my heart!
 

Attachments

  • 1C0E653B-EF1D-4860-BF19-5311DA5DC252.jpeg
    1C0E653B-EF1D-4860-BF19-5311DA5DC252.jpeg
    79.4 KB · Views: 46
  • BD3A3D01-C798-448F-83DC-93647B9C979C.jpeg
    BD3A3D01-C798-448F-83DC-93647B9C979C.jpeg
    80.2 KB · Views: 47
Congrats for saving the ql-y5, it was a nice turntable and your family had taste for owning it. Oxidation is the first enemy of those elder turntables.

Make work the turntable then recheck how the capacitors are looking after. You may have surprises.

It's highly possible it is the same issue as those turntables have diseases looking the same depending on the kind of turntable. Now in Japan, they usually clean everything before checking the caps and such.

The ql-y77 is a rare mighty beast indeed! Congratulations on owning it, cherish it and keep playing both of them is the best way to prevent any issues. The 77 was the huge top of the full automatic line and is even rarely seen. I don't think it was rarely sold at the time but more likely that people kept them.
 
Congrats for saving the ql-y5, it was a nice turntable and your family had taste for owning it. Oxidation is the first enemy of those elder turntables.

Make work the turntable then recheck how the capacitors are looking after. You may have surprises.

It's highly possible it is the same issue as those turntables have diseases looking the same depending on the kind of turntable. Now in Japan, they usually clean everything before checking the caps and such.

The ql-y77 is a rare mighty beast indeed! Congratulations on owning it, cherish it and keep playing both of them is the best way to prevent any issues. The 77 was the huge top of the full automatic line and is even rarely seen. I don't think it was rarely sold at the time but more likely that people kept them.

I had to order mine from Japan. They are like hens teeth… The manual for this is only in Japanese. I work for a Japanese company, so I have people who can help. Thank goodness it shares a lot of the electronics with the Y55F. I had an IC go on my Y77F in April. My repair shop in NYC had to wait 10 weeks for the replacement. Good thing I had the 55 to fall back on.
 
After watching the repair results from Skypants posted video, I saw at the 34 min 30 seconds mark that the repairman had the same thoughts as mine. But, I don’t think it is anywhere the same now. I have a feeling that it will be in the start switch and possibly in the control board (ic chip or in the circuit path).

I too thought it was a switch in the arm, but the setup is completely different in this Y3-F. Microprocessor controller makes me think that it’s not a separate mechanism with a micro-switch. Probably best to leave it up to the repair shop.

Good luck with it! Nice find Skypants.
 
Well, you had luck to find the IC for the ql-y77, even if you had to wait a bit. Not all high end turntables with electronics had the same luck. It's nice for you to have people in Japan to rely on.

That's why it's very important to use a good quality power surge, star wired with some protections, to give a good electrical feed to the turntable.

The video could still be useful so thanks for posting it. The ql-y serie is more complicated, like small computers enhancing everything in it. It's quite sad we aren't able to reproduce that, I do love analog but I love technology as well, I had a ql-y44 once and I am still curious about how a modern computer could handle a turntable. I am afraid though it won't have the same quality the Victor have.
 
I’m going to attempt round 3 of repairing the sagging tailpiece/counter weight on the QL A7. I have some new material. Also have some hope that I might be able to get the short tailpiece apart or semi apart to replace the damping rubber.

Currently I have some that is not strong enough to hold up well. I will take a few pics and maybe post up. I have a few different ideas for improving my last attempt.
 
Good luck for it, pics are always welcome!

I have an aftermarket heavyweight that may fit the tonearm, if needed. It was designed for another Victor turntable but it seems it fits also the ql-a7.
 
My first JVC was a QL-Y5F. Loved it. I sold it and I regretted doing so. Played nicely, especially with the DL302 Cartridge I saved up for. I've finally acquired a QL-Y55F (Which I always wanted) and recently was lucky to snag a QL-Y7. Both are very well built - from the "golden age" of Japanese tables. As with any nice piece of gear, the key is to maintain. They were ahead of their time- bringing new technologies to the market. 20220512_182346_resized.jpg 20221231_184809_resized.jpg
 
The QL-Y Series came out around 1980 thru 1983-4.
In any case, JVC was doing stuff ahead of the pack in the mid to late 70's as well, yes.
 
Victor rocked from the 60s to the 90s on turntable market. And their 50s hifi apparels looks quite good but I can't get any information except they were pretty well engineered.

Turntables era in Japan ended in the 90s with pretty good pieces, 70s were the boom in quantity, 80s were the time where technology improved a lot but it was all bases on the 70s for a niche or for the end in a glorious blaze of the lp. Whatever time you are looking for, there is always a very nice turntable made, so golden era is quite relative.

Nice to see those two turntables from Victor finding a loving home and being respected, enjoy both of them !

Desertrat is onto something as for the mighty TT-101 and some others dd such as the DD-100 of Micro Seiki, it is a way to fix them (even if both examples are whimsical and will need more than that with heavy knowledges to work nicely).
 
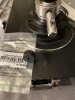
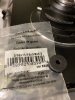
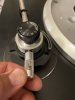
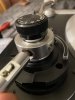
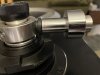
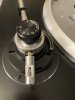
5D99B8CC-8366-4472-8D98-674658F826DE.jpeg 2B1BAC0E-D64B-4CD0-BBAA-8424B418C40E.jpeg 4208E7DE-9E6B-4B0C-88DF-A4105FB398C8.jpeg 0229D098-3DD5-4F18-A540-A16FF1559729.jpeg 9383032B-FBE2-4B76-B76B-B8513FAD43AE.jpeg 85C67E2D-7566-43FF-8922-7BFDFB503DAD.jpeg 14A615AC-2132-4796-BDEF-4F74F6F00213.jpeg E9AE6870-1E51-44A5-A311-93823B07C701.jpeg I am on to my 3rd attempt to circumvent total disassembly of the tonearm to replace the old deteriorating rubber damper on a QL-A7.

The dreaded sagging of the tailpiece had occurred. I attempted a fix using a shim at first with the original aging rubber. It lasted about 6 months before sagging returned.

2nd attempt all old rubber was removed save the tiny amount inside the bearing housing and replaced with a light weight black “foam” packing material that was easily cut to fit tightly and give support. Lasted about 6 months before the rubber inside the bearing housing collapsed. Sagging ensued to a lesser degree but was annoying. Difficult to adjust vtf when needed and sagging limits how much adjustment is available.

This third attempt is with a hard rubber bushing from local hardware store that is relatively close to needed. Slightly larger and I had to trim off about 1/16” or so of the thickness. I cut a slit vertically to the tailpiece axis to insert the dampening rubber. This has to be done in order to install it without total disassembly of the tonearm and the wires as I understand it.

I looked under the bearing housing (with great difficulty) and I cannot see a way to remove the washer from the splined shaft. I don’t see how it is attached and I don’t know how much dissembling it would take to get the tail piece apart.

I believe by placing the cut on top and the solid rubber on the bottom of the shaft it will hold as gravity will force the tailpiece into compression obviously at the bottom. No force is at the top as it will try and pull apart. Pictures are included. I regretted not taking pictures of my fine Neanderthal cutting skills used to trim down the new hard rubber bushing. I had installed it to check fit and it worked so well that I didn’t want to take it apart again for pictures of the cuts.

It looks as though this repair will last longer than 6 months. I’m estimating that it will last 2-3 years at least until the rubber deteriorated or compresses too much for proper function. It has resulted in the least amount of deflection so far and looks perpendicular even at maximum extension of the counter weight. I can improve the fix by carefully gluing the rubber back together or using a band to hold it tightly together but I don’t think it’s going to be necessary. One could also use a tie with polyester thread much like tying a fly for fly fishing. A myriad of methods or a plethora of fixes, a virtual cornucopia of methods come to mind to repair the cut that was placed in the bushing to insert it.

This was an easy fix for anyone who is willing to remove the old rubber and replace with a newer rubber bushing. If this ham fisted Neanderthal can do it, I believe anyone can.

Wish me luck with this one.

DR

 
The JVC QL line are great tables that don’t receive the love they deserve. They look great sound great work great. I have been fortunate to have owned Ql-A5, Ql-A7, Ql-75, Ql-95. All of those stayed for a few years then found new homes but I currently have a QL-10. I got it two years ago at a very reasonable price and though it works great I tried it and put away. My plan for this year is to recap the TT-101 motor and reflow all the solder joints in order to put it in service. I don’t want to take chances and risk the “run away motor syndrome “.
 
I really hope you can fix it and wish you best of luck on that, desertrat. Thanks for the pictures and explanation. Have you see one of the dismantle topic about this tonearm? I can link it to you otherwhise.

What was wrong with the QL-10? It's supposed to be a TT-101 with a special plinth, no? Check out for almost invisible solders as well, those TT are great but delicate to maintain. Also, they need a low humidity environment to work at their best because humidity makes the PCB to warp a tiny bit on those.

The QL-95 must have been something, the tonearm needs a special care to show all its potential however as they were part of a new line of tonearm from Victor and few informations are available on them. They were fixing the rubber issue of the UA-70xx tonearm line.
 
I really hope you can fix it and wish you best of luck on that, desertrat. Thanks for the pictures and explanation. Have you see one of the dismantle topic about this tonearm? I can link it to you otherwhise.

They were fixing the rubber issue of the UA-70xx tonearm line.

Sure, post up the link. I tried to follow one earlier, years ago, but it was too confusing with the way it was worded and lack of instruction for this old slow learner. I ended up getting confused with the step to get the tailpiece unthreaded from the bearing housing.

Heck, last night I had it completely free floating around in the housing and couldn’t figure it out. It’s hard to see underneath the underside of the housing and to see what is securing it in place.

I understand why it’s designed to free float, just not how it is secured inside the housing. Looks like a washer or maybe a C clip of some sort. I’m thinking that is why you have to remove the whole assembly to turn it over to get to the snap ring C clip washer or whatever it is holding it together yet free floating to allow the rubber to dampen vibrations via weighted tailpiece.

But, I don’t think it looks half bad with my quick fix. I think it’s going to be quite functional for now and last a few years, perhaps more. I would like to get some more durable urethane material if this deteriorates too quickly.

I doubt that JVC thought that it would ever have to be dissembled or replaced.
 
Back
Top Bottom