FireGuruMN
Active Member
I bought a pair of MGII last fall on CL for $200.00 with known issues. They sat around during the winter because there was no way quality control would allow stinky glue in the house. I once finished off an entire office with Victorian woodwork, built in shelves, wood ceiling and did all the staining and sealing indoors over the winter. There is not enough ventilation in the world to make me do anything like that again.
One speaker had the sock and wood removed so I knew there was a LOT of delamination that needed fixing. The previous owner even had the repair kit from Magnepan to make the repairs. He just did not have the patience I am guessing.
So now that the grass is green in Minnesota it is time to have at it.
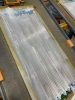
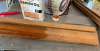
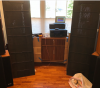
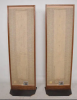
Here is what MGII's look like if it matters:
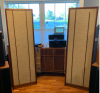
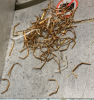
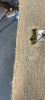
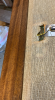
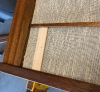
I said LOTS of delamination right:

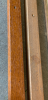
At least the ends are firmly attached. If you don't know the theory behind these speakers here is the executive summary:
Firstly, I tested the speakers to ensure that all the wires were conducting all the way through. Basically hook them up and make sure sound is coming from everywhere on the mylar. If areas are dead then you have to find the break and fix it. It's mostly a long continuous run so it will be obvious if something is broken. Mine were all good so if you have broken ones this post is no help.
There are many many opinions about how to reattach the wires. Google away. I will wait. . .
The repair kit that comes from Magnepan actually contains an instruction sheet on how to make the repairs. It is about as useful as the sex education class I had in 8th grade. That is to say, not much use in the real world.
So my plan:
I started on the thin tweeter wires. I think I have more wires separated than most people. I don't know the history of these but it was not being stored in a museum for sure.
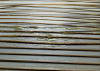
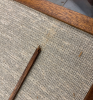
This is a really bad area with a tear in the mylar also. The wires are about 1/4 inch apart.
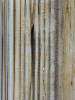
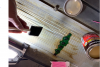
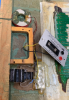
That might be a burn more than a tear because the wires were black. But they are not broken so I moved on. Setup a light so it casts shadows of the separated wires:

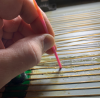
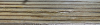
For the tweeter wires use as little glue as possible to hold them down. If the mylar gets heavy it will not make high frequencies as well. Basically I held the wire in place and brushed over it with some glue. Many of my wires were too long for whatever reason. It is important that the wires be lined up with the magnets but they have to be glued down. I ended up making waves in the wires to keep them over the magnets and glued down. Not the best choice but the other option is to pull the wire off all the way to the end and that was not going to happen in my world.
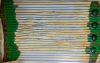
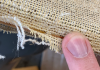
Not pretty:
Continued. . .
One speaker had the sock and wood removed so I knew there was a LOT of delamination that needed fixing. The previous owner even had the repair kit from Magnepan to make the repairs. He just did not have the patience I am guessing.
So now that the grass is green in Minnesota it is time to have at it.
Here is what MGII's look like if it matters:
I said LOTS of delamination right:
At least the ends are firmly attached. If you don't know the theory behind these speakers here is the executive summary:
- The face of the speaker has long strips of magnets.
- Behind that is a mylar sheet.
- Wires are glued to the mylar sheet.
- Current flows through the wires from your amplifier and the mylar gets sucked in and out from the magnets.
- That makes music.
- There are thin wires for high frequencies, thick wires for low frequencies. Weights on the mylar to make the frequencies even lower.
Firstly, I tested the speakers to ensure that all the wires were conducting all the way through. Basically hook them up and make sure sound is coming from everywhere on the mylar. If areas are dead then you have to find the break and fix it. It's mostly a long continuous run so it will be obvious if something is broken. Mine were all good so if you have broken ones this post is no help.
There are many many opinions about how to reattach the wires. Google away. I will wait. . .
The repair kit that comes from Magnepan actually contains an instruction sheet on how to make the repairs. It is about as useful as the sex education class I had in 8th grade. That is to say, not much use in the real world.
So my plan:
- Use acetone solvent to remove the old glue.
- Use DAP contact adhesive to glue them back down applying it with tiny disposable makeup brushes.
- Apply the Magnepan glue at the end as recommended in the instructions because the only other thing would be to dump it down the drain.
I started on the thin tweeter wires. I think I have more wires separated than most people. I don't know the history of these but it was not being stored in a museum for sure.
This is a really bad area with a tear in the mylar also. The wires are about 1/4 inch apart.
That might be a burn more than a tear because the wires were black. But they are not broken so I moved on. Setup a light so it casts shadows of the separated wires:
For the tweeter wires use as little glue as possible to hold them down. If the mylar gets heavy it will not make high frequencies as well. Basically I held the wire in place and brushed over it with some glue. Many of my wires were too long for whatever reason. It is important that the wires be lined up with the magnets but they have to be glued down. I ended up making waves in the wires to keep them over the magnets and glued down. Not the best choice but the other option is to pull the wire off all the way to the end and that was not going to happen in my world.
Not pretty:
Continued. . .