• The move to the new server is done. There are some software and database maintenance updates in process. This has us passing the hat around to help out. We appreciate any donations. Seriously, even a dollar helps. The payment page may be found here - https://www.audiokarma.org/support.html

Member's DIY audio rack pictures, post 'em!

That's a very clever design, but if you want to make it not so darn heavy, and use less wood, consider using thinner sheet goods with internal bracing... essentially a hollow frame with a thin "skin" and thin cross pieces internally, like a guitar or an airplane wing.

Heavy is a good thing for me, but, if using ¾" baltic birch ply, I estimate it would cost me ~150$ of wood alone. MDF might be a cheaper option. I see the finish as either painted to fit a specific room or veneered, so all will be covered up anyway. I would go for painted were I to do it.

Hope the joints are structurally sound as I sketched them, I'm no expert in this area, but it seemed good this way. Glued and screwed naturally.

az
 
Well, can't let you guys have all of the fun! Here is mine.
100_1238.jpg


Wife works at Home Depot so I scored some 1" counter top material for free. Laminated it with plywood for the finished look. Kept in under $100 ($99 to be exact).

I used 3/4" hardware. Couple more coats of poly and she is done!
 
Heavy is a good thing for me, but, if using ¾" baltic birch ply, I estimate it would cost me ~150$ of wood alone. MDF might be a cheaper option. I see the finish as either painted to fit a specific room or veneered, so all will be covered up anyway. I would go for painted were I to do it.

In my mind I'm picturing the top shelf sagging under it's own weight. Since only the edges of the center layer in any panel are exposed, you could cut out large 'holes' in the areas that are sandwiched between the inner and outer panels, or, to save on material, use just narrow 'planks' of the same material along the edges.

Hope the joints are structurally sound as I sketched them, I'm no expert in this area, but it seemed good this way. Glued and screwed naturally.

Unless it's going to show as part of the design, consider staggering those joints where there are 2 or 3 ends that are the same length ending perpendicular to another panel, ie, cut the middle layer 1 thickness shorter and extend the mating middle panel 1 thickness longer... do the same with the 3rd layer... sort of like a stairway. The steps will interlock and add some rigidity to the joint and will keep it from racking if there is no back.

Just some things to consider...:scratch2:
 
In my mind I'm picturing the top shelf sagging under it's own weight. Since only the edges of the center layer in any panel are exposed, you could cut out large 'holes' in the areas that are sandwiched between the inner and outer panels, or, to save on material, use just narrow 'planks' of the same material along the edges.


Unless it's going to show as part of the design, consider staggering those joints where there are 2 or 3 ends that are the same length ending perpendicular to another panel, ie, cut the middle layer 1 thickness shorter and extend the mating middle panel 1 thickness longer... do the same with the 3rd layer... sort of like a stairway. The steps will interlock and add some rigidity to the joint and will keep it from racking if there is no back.

Just some things to consider...:scratch2:

Sagging of the top shelf is a possibility. My vision of the design has it unsupported, purely for looks, but for practicality, a central support rod would not screw up looks too much and prevent this problem nicely I think.

Making the joints in a "stairway" style was my first idea, but I drew like this since it would be much less of a hassle for a not-yet-too-experienced woodworker such as me, when it comes to the fitting, and it would not show with the final finish.

I don't quite have the room for such a unit at the moment unfortunately, so it will go unbuilt for quite some time I'm afraid.

jjtucker2 - nice job on this flexy, it looks great!

az
 
I recessed vertical tracks on the inside of the rails and you can put the L-shaped shelf supports anywhere needed. The shelves would rest on top of the supports and were totally hidden. Rather clever if I say so myself j/k :D.
 
I may need to build one of these soon. Two questions - how solid is the rack once it's built? Does it "flex" at all or is it sturdy? (I'm picturing my 1 year old grabbing onto the supports).

What do you use for feet? Do you cover the threaded bolts with something? Thank you.
Tiga
 
I made this a few years ago. Adjustable shelves, all solid curly maple. Rather heavy duty.

367415417.jpg

367297401.jpg

367297386.jpg

:jawdrop: Wow, that looks amazing, I would love to have a shelf that looks the beautiful, all I have is slightly modified shelfs from Salvation Army.
 
I made it with stout mortise and tenon joinery. No bolts or screws. No feet, but that would be simple if you wanted them. I used analine dye on the darker and left it un-dyed for the top and bottom plates, lacquer finish and hand-rubbed with pummice/rottenstone. Since I had it on carpet, I simply fastened the upper portion to the wall. No movement at all. TT sat on top and was very isolated as the top/bottom were sorta floating on hidden spikes. Didn't have any plans, just winged it as I went. I rarely use plans since I have been building furniture for a spell now, just need a good visual. :smoke:
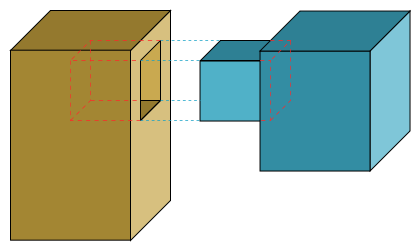
 
Nicely done Jeff M! Being 100% solid maple that must weigh a ton. This design looks like it would work well if you pegged the tenons with a contrasting wood. Maybe not with the curly maple (it needs NO dressing up) but if you were using a less showy wood.

The chatoyance on those curls looks amazing. I'll bet they danced when you had it out in the sun. By far my fave wood. This takes the DIY rack up a level! Very inspiring. :thmbsp:
 
I had to look it up... :shame:
Did you machine or with hand tools it, which machines/tools are used to get this result?
This is a very elegant way of building cabinets...
420px-Mortise_and_tenon_joint.svg.png


It kinda shows! ;)
You can use a mortising machine to cut the mortises and a table saw to cut the tenons. You can also do it all by hand with drill, chisels, and saws, too.
 

Attachments

  • IMG_0001_1 (4).JPG
    IMG_0001_1 (4).JPG
    105.3 KB · Views: 266
  • IMG_0002 (2).JPG
    IMG_0002 (2).JPG
    88.8 KB · Views: 247
Last edited:
Thank you all for the compliments :yes: . As far as the tenons, they are not through tenons, so no pegs are used. It was very heavy with all the shelves in place. I ended up trading it for a preamp a few years ago. I will make another, but will do a few things different.
 
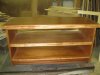
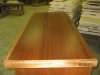
Here's my quick "equipment rack". The top is sapele with african mahogany trim, sides and shelf are mahogany.


Cheers,
Steven Z
 

Attachments

  • 242322_1903912689835_1602291593_31932968_2306443_o.jpg
    242322_1903912689835_1602291593_31932968_2306443_o.jpg
    66.6 KB · Views: 472
  • 243080_1903912889840_1602291593_31932969_5465676_o.jpg
    243080_1903912889840_1602291593_31932969_5465676_o.jpg
    64.6 KB · Views: 304
  • Table.jpg
    Table.jpg
    50.9 KB · Views: 430
Back
Top Bottom