• The move to the new server is done. There are some software and database maintenance updates in process. This has us passing the hat around to help out. We appreciate any donations. Seriously, even a dollar helps. The payment page may be found here - https://www.audiokarma.org/support.html

Record Bin From single 4 x 8 Sheet of Plywood - Plans

Dioder 4 piece light strip set from Ikea for $30, hidden behind 1 1/4" trim. This set fades or flash colors or can be set to stay on your choice of color from the palette. Switch/remote is attached on an approximately 36" cord. Super easy to install. Lighting for top shelf in the works. BTW, thanks to the original poster and the hordes of others who have built and posted pictures. Much appreciated.
 
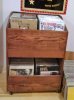
Here's mine. I added a drawer which is great for storage but is a pain in the butt for viewing the records in the lower bins. Most of this is oak veneer plywood with solid oak along the front. I also added some sturdy caster to make moving it easier.
 

Attachments

  • IMG_20160521_193547297.jpg
    IMG_20160521_193547297.jpg
    47.7 KB · Views: 528
  • IMG_20160521_193555611.jpg
    IMG_20160521_193555611.jpg
    39.5 KB · Views: 517
Just finished building my record bin! Question: I have no idea what kind of plywood I used (maybe it's birch, but I doubt it), but was wondering what grade sandpaper to use to dull the sharp edges and get ready for priming and painting? Any thoughts?
I used 3?4" I believe, and I was thinking of putting "qharter round or whatever it is on the edges. What should I ask for at the store? I don't want anything too round but enough to make it look "finished". Thoughts?
 
Just finished building my record bin! Question: I have no idea what kind of plywood I used (maybe it's birch, but I doubt it), but was wondering what grade sandpaper to use to dull the sharp edges and get ready for priming and painting? Any thoughts?
I used 3?4" I believe, and I was thinking of putting "qharter round or whatever it is on the edges. What should I ask for at the store? I don't want anything too round but enough to make it look "finished". Thoughts?

Wrong!
 
Just finished building my record bin! Question: I have no idea what kind of plywood I used (maybe it's birch, but I doubt it), but was wondering what grade sandpaper to use to dull the sharp edges and get ready for priming and painting? Any thoughts?
I used 3?4" I believe, and I was thinking of putting "qharter round or whatever it is on the edges. What should I ask for at the store? I don't want anything too round but enough to make it look "finished". Thoughts?
You should get an assortment pack, start with Coarse to shape, Medium to get rid of imperfections then Fine to get that smooth finish. You can use Extra Fine between coats of paint to give the next coat something to bite. If you paint on something with too smooth a finish, it will peel.
 
Just finished building my record bin! Question: I have no idea what kind of plywood I used (maybe it's birch, but I doubt it), but was wondering what grade sandpaper to use to dull the sharp edges and get ready for priming and painting? Any thoughts?
I used 3?4" I believe, and I was thinking of putting "qharter round or whatever it is on the edges. What should I ask for at the store? I don't want anything too round but enough to make it look "finished". Thoughts?

Is the grain on your plywood attractive? if so, you may want to consider using Watco Danish Oil or something similar to bring out the depth, and then coating with a wipe on polyurethane finish to protect the surface. Spray on or brush on are also options, though spray on in cans can get expensive as it doesn't go that far (a cabinet has a lot of surface area), and brush on takes time and patience to apply without getting dripping. If you go with oil/poly, you can sand with a 100 grit paper, then with 150 prior to oiling. Not necessary to sand between oil and poly, but wipe down with a tack cloth before applying the poly. I would not start with an 80 grit paper on plywood veneer as the outer veneer is typically very thin and 80 grit is quite aggressive- you're likely to sand through to the under layers if you aren't careful. When sanding plywood, it isn't necessary to apply much pressure as you aren't trying to shape it, just smooth out the surface. Allow the oil to dry per instructions on the can before applying the poly. Painting is more forgiving regarding surface prep, I wouldn't sand beyond 100 grit.

Regarding trim, if you have a decent table saw and router, you can make your own putting a bevel or rounded edge on the trim pieces. If not, you can easily use a iron-on edge banding to give yourself a finished look. To avoid an Ikea look, you can use an edge banding (or trim, for that matter), with a contrasting color/grain. This stuff is super easy to apply, a kid could do it, and can be trimmed to the width of your plywood using a simple razor/utility blade after application (3/4" plywood is typically slightly under the stated size). Edge banding can be found at any woodworkers supply shop (Rockler, Woodcraft or better yet, your local mom and pop shop).
 
thanks for info. guys!
rudderless, I am going to paint it white, so I need to sand first apply primer, sand again lightly, and then paint. I might consider youe suggestion for my next one, as I have 4 more to build, and it would be nice to have a wood look with a a deep colored look to the grain. Thanks! Your advice on trim very helpful. I just Googled the iron-on you suggested! I don't really have any power tools, or the confidence that I won't chop my fingers off. lol
 
I'm in Tacoma Washington. In the unlikely event you are local, I'd be happy to help you make some really nice trim in my shop. Also, you shouldn't need to sand between your primer and finish coats unless you have drips or brush marks. Primer is formulated for paint to stick to it. Not to dissuade you from sanding, just think it may not be necessary and working for the sake of working takes me away from things I'd rather be doing. Finishing is my least favorite task of woodworking...
 
You don't have the matching audio rack yet?? Get on it!
IMG_4888.jpg
 
Back
Top Bottom