• The move to the new server is done. There are some software and database maintenance updates in process. This has us passing the hat around to help out. We appreciate any donations. Seriously, even a dollar helps. The payment page may be found here - https://www.audiokarma.org/support.html

Record Bin From single 4 x 8 Sheet of Plywood - Plans

Hey everyone - this thread rocks, and I've already gotten to the point of having the wood cut, staining it, and am now prepared to assemble. Planning on some glue and screws to keep her nice and sturdy.

But - how have you guys been beginning the assembly process? Just curious if people have been connecting the sides via the shelves first, or fastening the back to the sides and putting the shelves in second...

Any advice?
 
Hey everyone - this thread rocks, and I've already gotten to the point of having the wood cut, staining it, and am now prepared to assemble. Planning on some glue and screws to keep her nice and sturdy.

But - how have you guys been beginning the assembly process? Just curious if people have been connecting the sides via the shelves first, or fastening the back to the sides and putting the shelves in second...

Any advice?

First thing to do is to make sure the pieces that should be the same size are. Shelves should match each other, sides should too.

The Shelves, back and front pieces should all be the same width. The sides sandwich these together.

(When I say 'run a screw' I mean drill a pilot hold then drive a screw in. Drilling a pilot hold will prevent the wood from splitting. The pilot hold should be about the same diameter as the shaft of the screw.)

Find a nice flat surface that is a good working height. Lay the back panel down. Set the sides next to it like an open book, with the sides being the covers and back being the spine.

Draw a line across the bottom of the back panel and side panels to line the bottom shelf up with. Do the same for the top shelf. Set the bottom shelf along the line, rise one side panel up so that the lines align with the shelf. Run a screw through the side panel close to the front into the shelf. Check the alignment, correct if needed and run a second screw close to the back side. Do the same for the other side and top panel. Now you can add the shelf fronts and attach the back.
 
ImageUploadedByTapatalk 21371530848.229218.jpg

Great design this!

Many thanks to my step-father for making me a couple of these. We jazzed it up a bit by fitting 'vintage' HMV iron badges:

ImageUploadedByTapatalk 21371530977.655056.jpg

and stained it to match our previous project, the hifi stand:

ImageUploadedByTapatalk 21371531029.153202.jpg

using a mix of walnut-stain, beeswax and a 'wash stain' to add 'ageing'.

Very happy with the result! Many thanks for publishing this clever design!!
 
Matt, those are beautiful. I really like the badges too. They add a touch of nostalgia, yet gives them class. Great build!
 
Just wondering if anyone who's lived with one of these for awhile has any input on the amount of space between the two shelves. Looks like the original dimensions have 24" or approximately twice the size of a record cover.

I like the idea of adding a drawer under the top shelf for odds and ends, 45's, or CDs, but obviously that would diminish the available room above the records on the lower shelf, unless extra height was added to the side panels.

Is 12" enough, too much, or not enough? :scratch2:
 
I find the height on the design to be 'bang on' for access to LP's on the bottom-shelves, especially those at the rear.

I think any reduction would make viewing the covers difficult.

Just my opinion...
 
OK, so I've been working on mine. Progress is slower than I would like because the cuts done at Home Depot were rather imprecise... 1/8 to 1/4 inch off from end to end for each cut. Plus I think one or two cuts were not correctly measured from the get-go. Their saw also left pretty ragged edges. Rather then screw something together that looks like something out of Dr. Seuss, I've been struggling with the tools I have on hand (mostly circular saw and router) to try to square up all the edges and get the sizes of the 4 main panels correct. It will end up being a bit smaller than the plans. Just need to cut out the smaller pieces and then I think I can begin screwing things together. Good thing it's going to be down in the basement, because it's not going to be a brilliant piece of woodworking/cabinetry.

ddk
 
I'm sure it will come out fine!

(My step-father is a retired carpenter, so I essentially 'cheated', and got away with sourcing the castors, badges and doing the staining!)

That said, my dad was impressed with the design. Said it wasn't too bad a task.
 
I find the height on the design to be 'bang on' for access to LP's on the bottom-shelves, especially those at the rear.

I think any reduction would make viewing the covers difficult.

Just my opinion...

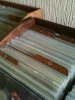
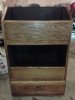
Having built mine by repurposing an old entertainment center, I can attest to that. I should have move the top shelf up several inches, but spaced out on fitting that one. It will be ok, and aside from a few cosmetic issues from the old material that I couldn't overcome, and a few oops moments, it came out ok enough to go into the living room lol. I cant believe how mismatched the color and grain were on this entertainment center. It was way worse than before I helped it along
 

Attachments

  • 0702132108.jpg
    0702132108.jpg
    54.3 KB · Views: 762
  • 0703131701.jpg
    0703131701.jpg
    53.1 KB · Views: 742
  • 0703131702.jpg
    0703131702.jpg
    76.8 KB · Views: 599
Looks fantastic!

I LOVE the vintage badge on the front, it really sets it off well!


Sent from my iPhone using Tapatalk 2
 
Here are mine still cleaning and cataloging about half my stuff. They are getting filled as I feel like doing some, my buddy made these 1 extra sheet to make them this way.
:)
bc2cb8ed-c8b1-4b0c-9a23-b8255a351ba3.jpg
 
I love the 'record dividers'. Really unique!

Looks like you have quite a collection!

I'm currently struggling with a WAF issue, so all LP's CD's Cassettes and Minidiscs are going to be relegated to a spare room!

Hoping to get the record-bins and matching shelving all across one wall, making it the 'music room', and the lounge the 'listening room'.


Sent from my iPhone using Tapatalk 2
 
Matt C I hope in the future to have a dedicated listening room so the WAF goes away :).

Sent from my SPH-L710 using Tapatalk 4 Beta
 
Tambour Doors: Contemplating One Sheet Record Bin Mod

Hi,
Noob here, my year old vinyl collection is outgrowing the six IKEA Snack bins I have on Metro steel shelving. I really like the plywood bins but IKEA saw fit to discontinue them and their replacement, the PRANT bins.


If money were no object, I'd have made, or build, lateral file cabinets 3 drawers high by four feet or so. The other idea would be regular file drawers built in a modular manner so i could add more to a wall unit as needed; I'd like the ability to break it down for moving.


Although I really like the one sheet record bin concept, I was wondering of a way to increase the WAF quotient even more. Maybe some modifications, including tambour doors, perhaps one big one for the top, and two for the bottom.


Perhaps it is too ambitious for a noob, but I'll do some footwork and see if it could work.
 
Here's mine so far... In order to get WAF I had to build a lid for it as part of the deal. I tried some friction lid supports from lowe's last night and they didn't work at all. I'll try some of the spring-loaded ones next.


Just need to finish up the molding, sand, stain and lacquer...
 
Back
Top Bottom