• The move to the new server is done. There are some software and database maintenance updates in process. This has us passing the hat around to help out. We appreciate any donations. Seriously, even a dollar helps. The payment page may be found here - https://www.audiokarma.org/support.html

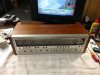
SX 1250 FROM SCRATCH

I have to agree. Silver is much much better for low resistance, but unless it is in a sealed environment with an inert gas or something similar, it is going to oxidize and cause problems. Gold, alhough not a great conductor, doesn't oxidize the same, maybe rhodium would have been a better choice.

EVERY SX-series I have ever owned has needed the switches cleaned. If you do it as PM every year or so, or use the switches periodically, you're fine. I don't remember this ever being a problem when they were new but it is likely that Pioneer did not expect us to still be using them nearly 45 years later!!

I guess if the quality and performance curve continued after the SX-xx50 series into the next couple of decades we wouldn't have revived these, but since the '80s and '90s saw profit margins crush the build quality and performance levels start to level off, ... '70s gear is worth owning again. Oh well.

Great project BTW, and I'd probably enjoy it too.
I am old enough to remember the sales pitch for an SX1250..."Its a lifetime investment!"....well, I'm still here!
 
Do you mean to say that I could send mine to Mark for cleaning?
No, but you could ask. He is always saying how much work he has to do so I would not hold my breath or count on it. Might be cheaper to invest in a ultra- sonic cleaning machine and a jug of de-oxit. You could measure the contact resistances to see what they are to determine if there are any issues that require attention.
 
I am referring to every switch in the signal chain use silver plated contacts which oxidize over time and make unreliable connections. It was a bad design choice. Silver contacts are fine for high power, low resistance contacts but for low current signals paths it was the wrong choice. I guess their thinking was, once the contacts oxidize, so badly to affect the signal paths, throw it out in the junk and buy a new one.
MTF reports that he uses his propitiatory chemical mix and ultra-sonic cleans them. Even then, I am sure there are times they are so bad that they need to be disassembled and cleaned properly. I have no experience doing this myself, but member zeb, aka Bob, and some others have mastered it from what they have shown. I know it is a royal PITA. I could probably design a new switch board using a gold plated contact relay faster :) The choice is yours alone, I am just here to follow along and eat my
:lurk:
I just cleaned the silver output transistor connector pins on my SX-1050 power amp (they had a lot of black) with some Wright's Silver Cleaner and Polish (no ammonia) on a cotton swab, then some water on a swab, easy peasy. I used a pipe cleaner on the female sockets. If when I get into a silver clad switch I will try the same thing.
 
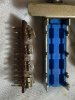
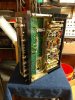
Are you talking about this type of switch?
IMG_1389.JPG

It is a PITA for sure, but not terribly difficult. Mostly just time consuming as you have to be so careful with the process. It's absolutely true that the sliding contacts are extremely delicate and can be bent quite easily, so great care must used when handling them.

Notice the two different types of sliding contacts above. Obviously, you cannot mix them up when reassembling.

The trickiest part is the reassembly. I first tried dropping the sliding contacts into the plastic housing and then putting the base on while gently slipping the fixed contacts between the fingers of the sliding contacts, but the fingers are much too delicate and sliding contacts aren't held in the plastic housing with enough precision for that. Instead I first mounted the sliding contacts on the fixed ones, much like you see above, then reassembled.

Note that I had never done this before and so didn't know I couldn't do it, which is probably why I succeeded.

There are more pictures in "Cuda's SX-838 Refurb Thread".
 
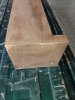
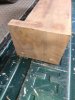
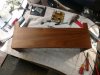
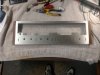
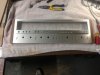
Piddlying around with the wood cover and faceplate while I wait for my Mouser order. Also, I ordered most of the cabinet components I needed from Daclacorp, a company that evidently specializes in vintage audio parts, they have a lot of them. The two things I still need are the 2 tone controls, 166A and 167A. Those are available from you know where but, THEY COST! IMG_20200422_133612969.jpg IMG_20200422_133631042.jpg IMG_20200422_133652842.jpg IMG_20200422_134920808.jpg
 
Note that I had never done this before and so didn't know I couldn't do it, which is probably why I succeeded.

89506922_492382084778523_7271361906797969408_n.jpg

That's my explanation for almost every repair I've ever done on... anything. This is great though. Thanks for the pics... I've been wondering what those look like inside.

To the OP: very cool quarantine project. I'll be following along with this one!
 
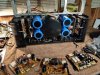
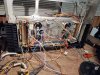
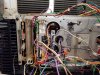
Well, 7-1/2 months later and I'm back on it. Turns out, the covid thing hasn't affected us much after the initial 2-3 week panic. In fact, this has been a busy year for me. But as is normal, the Holiday season is here and business is slowing down so I have a little extra time. The next step is to figure out the chassis wiring puzzle. I installed some unrestored plug-in boards to aid in getting all the wiring and plugs neatly in place. I will rebuild these boards after I get all the wiring in place. Looks like I have more than enough to get the job done but even with a reference receiver this is going to be a tedious process.
 

Attachments

  • sx1250 ak.jpg
    sx1250 ak.jpg
    198.4 KB · Views: 51
  • sx1250ak.jpg
    sx1250ak.jpg
    186.4 KB · Views: 52
  • sx 1250 ak.jpg
    sx 1250 ak.jpg
    155.3 KB · Views: 51
My local Ikea doesn't seem to carry these Pioneer SX-1250 knockdown kits. :cool:
Looks pretty good. It's amazing to think what actually went into manufacturing these.
 
Back
Top Bottom