• The move to the new server is done. There are some software and database maintenance updates in process. This has us passing the hat around to help out. We appreciate any donations. Seriously, even a dollar helps. The payment page may be found here - https://www.audiokarma.org/support.html

Who here on AK is using 3D printed parts?

I don't do any 3D printing but I have read posts about printing Turntable parts. Quite a few years back it seemed there was problems printing gears that were hard enough to work properly. Have problems like that been sorted out now?
About a year ago, I printed a gear for a big and heavy desk pencil sharpener. Still works fine today. I guess it all depends on the application but I do print tons of stuff and hardly have any fails.
 
What kind of printer are you using?
I have a couple bambu's the P1s, the mini and a H2D. the 'trick' is to get something out that doesn't look of layer lines and children's plastic toys. I've gotten pretty good at that - mostly because it's been fun. trying weird ideas etc.
 

terracode​

That's great stuff - you clearly some skill and experience in CAD I wish I had. What program are you using primarily?
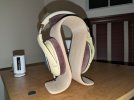
Thanks. I use Tinkercad and Meshmixer for allot of my parts designs and rework. For more organic designs I use Blender. I have also been playing with Dune3D and Fusion 360. I usually use Tinkercad, though. The headphone holder isn't my design. I also have a Creality Ferret Pro 3D scanner that is very handy.
 
Thanks. I use Tinkercad and Meshmixer for allot of my parts designs and rework. For more organic designs I use Blender. I have also been playing with Dune3D and Fusion 360. I usually use Tinkercad, though. The headphone holder isn't my design. I also have a Creality Ferret Pro 3D scanner that is very handy.
It's always nice to see self-designed 3D prints. Keep it up!
 
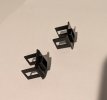
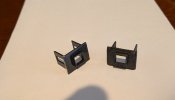
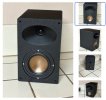
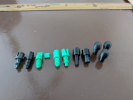
Needed some grille pegs for my 4301B, took some trial and error, in the end revised the design and used flexible TPU rather than a brittle PLA copy of the original. I'm using FreeCAD and a Bambu P1S w/ AMS (although I'm feeding the TPU directly from my drier).

Original on left, each iteration until the final part on the right. Black is my TPU, green is PLA. I was playing with different print orientations of the PLA to prevent snapping.

1783196120705.png

1783196202866.png

1783196216460.png
 
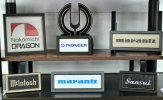
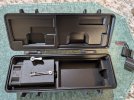
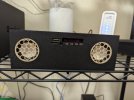
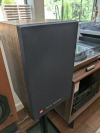
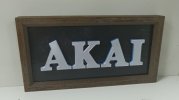
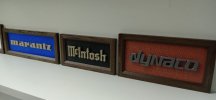
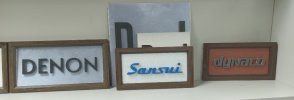
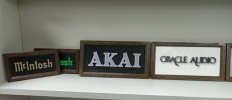
After a fair amount of trial and error, I managed some fairly convincing wooden frames using my 3d printer.
 

Attachments

  • 20260722_073953.jpg
    20260722_073953.jpg
    58.7 KB · Views: 13
  • 20260722_073937.jpg
    20260722_073937.jpg
    45.7 KB · Views: 9
  • 20260722_073932.jpg
    20260722_073932.jpg
    48.5 KB · Views: 10
  • 20260722_062844.jpg
    20260722_062844.jpg
    32.1 KB · Views: 13
  • 20260722_062834.jpg
    20260722_062834.jpg
    45.8 KB · Views: 13
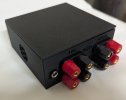
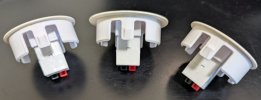
I've had some good success printing speaker binding post plates and capacitor spacers (for smaller filter caps). It's been a steep learning curve, however, learning the 3D modelling software (I'm using Fusion360). The next thing I need to try is is to model and print some new turntable hinges for a few tables I have with broken lid tabs.
 
I'm starting to convert my ESL-63s into ESL-989s by mounting the drivers in a 3060 t-slot frame. There will be separate 2020 frames to hold the dust covers and a 1/2" wire mesh on the back and front sides of each speaker. Those two frames will be held on the main 3060 frame with 3D printed brackets that will mount on the 3060 frame with screws and t-nuts, and there will be additional clamps the hold the 2020 frames securely against weather stripping tape on the 3060 frames.

Here's one of the 3060 frames set up in front of the ESL-63 on its stand:

ESL-63 redux frame compared to original.jpg

Here it is with one of the blue 2020 dust cover frames in position:
ESL-63 redux 3060 frame with 2020 frame.jpg

Here's one of the corner clamps- they screw directly into the ends on the horizontal members of the 2020 frames:
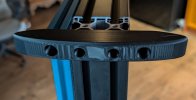
ESL-63 redux printed dust cover corner clamp.jpg

Here's a CAD render of the dust cover clamps.
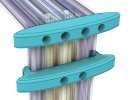
ESL-63 redux CAD render of dust cover clamps.jpg

The clamps are elliptical and stand out beyond the frames so they will support cloth socks held away from the underlying speaker frames/mesh. I intend to use thin, stretchy material for the cloth socks, hoping that the resulting speaker will look somewhat sculptural. In the end I may not use socks on them at all, in which case the clamps will be redesigned/printed.

When it's done I intend to be able to remove the mesh/dust covers by unscrewing the middle clamps from the 3060 frame, and unscrewing the 4 corner screws from the corner clamps. I expect to be able to replace the dust cover frames without having to install new film.

I'm also looking at using Wago 221 lever nuts to wire the drivers so that there will be no need to solder and unsolder wires in case the speaker needs to be serviced.

 
Back
Top Bottom