• The move to the new server is done. There are some software and database maintenance updates in process. This has us passing the hat around to help out. We appreciate any donations. Seriously, even a dollar helps. The payment page may be found here - https://www.audiokarma.org/support.html

ADS 1230 or ESS 1a

Hey Sleeper,
first let's thank Squirrly for allowing us to jack the hell out his thread. Thank you Squirrly!
From a purely tweaker by" EAR" stand point,and knowing the basic ins and outs of speaker fundamentals, yes, the phase plugs help. In theory at least, with out a bunch real smart guys coming in hear nay naying.
There's a lot of upper frequency for a 12" woofer to produce and the higher frequencies are produced in insides of the woofer. The dust caps "audibly" buzzed.So I removed them. Just put your ear to a woofer you're self to test this theory.
Also I discovered last night , the "contour" controls that I really find extremely valuable are too much for it's own good. Because the Heils are dipole, backing off adding too much messes with they're phase. Start at 0 , add or subtract only slightly. When correct ,vocal images are more solid instead "ghostly"

Not being able to leave well enough alone, this morning I bypassed the two stock cheapy , poly caps with Thetas, and was very amazed . The highs are now "airier" and more open with better resolution without edge. A must do!
 

Attachments

  • IMG_1906.jpg
    IMG_1906.jpg
    39.4 KB · Views: 24
Some of the earlier models had what amount to a whizzer cone under the dost cap to aid transition the Heil.
I think they also crossed these a bit lower-700hz.
In the stages of my final revisions on my AMT3's-after 3 years or so-thank god for t-nuts, and quick disconnects!
Settled on caps, resistors, drivers and damping, and a little additional baffle bracing.
So finally I will be able to play them, with out a bunch of wires running from them, and crossovers on the floor/etc.
I'm sure it will be another 6 months plus before they are all done-kids, wife business, life, but's it's been fun and informative for the most part.
The main problem is now with the revisions they weigh about 138 pounds each-so a major bummer with my old/bad back to move!
At some point I have a collection of pictures I will post-on a new thread-and quit stealing space on Squirrley's thread!:thmbsp:
I suppose once I get them done, I will have to get a pair of AMT1a's.
Cheez....the life of a Heil addict.........!!!
 
Last edited:
Show and Tell...............ALWAYS APPRECIATED!!!!!!!!!!!!!:banana::banana::banana:

My prior post should have read 1 1/2 lbs. per cu ft. for polyfil.

That's for up to 3 cu ft. over that 1 lb. per cu ft.
 
Last edited:
Jack the thread, feel free. I learn from all of it. I appreciate all the comments.

Here is what I came up with for inside dimensions of the ESS AMT-1a

I took my internal measurements in three sections of the cabinet. There is a shallow (3”) pedestal. Above that there is an almost cubical space and above that there is the space the 12” woofer and passive are part of. So the measurements are for the three sections going from the ground up.

Section 1 Pedestal:
11 5/8 X 11 5/8 X 3

Section 2 Base:
Because these next two sections taper there is a lower measurement and an upper measurement.
14 X14 (Low)
13 ½ X13 ½ (Upper) this section is 11 inches tall
Section 3, Driver section:
12 1/16 X 12 1/16 (low)
11 5/8 X 11 5/8 (Upper)
This section is 13 ½ tall

These measurements do not add up to reflect the external dimensions regarding the overall height measurement. Even if the thickness of the wood panels are added the external dimensions are greater than what I would have expected. I rechecked my measurements several times. I believe there is space below the floor of the pedestal section.
 

Attachments

  • DSCF1961.jpg
    DSCF1961.jpg
    51.4 KB · Views: 12
Jack the thread, feel free. I learn from all of it. I appreciate all the comments.

Here is what I came up with for inside dimensions of the ESS AMT-1a

I took my internal measurements in three sections of the cabinet. There is a shallow (3”) pedestal. Above that there is an almost cubical space and above that there is the space the 12” woofer and passive are part of. So the measurements are for the three sections going from the ground up.

Section 1 Pedestal:
11 5/8 X 11 5/8 X 3

Section 2 Base:
Because these next two sections taper there is a lower measurement and an upper measurement.
14 X14 (Low)
13 ½ X13 ½ (Upper) this section is 11 inches tall
Section 3, Driver section:
12 1/16 X 12 1/16 (low)
11 5/8 X 11 5/8 (Upper)
This section is 13 ½ tall

These measurements do not add up to reflect the external dimensions regarding the overall height measurement. Even if the thickness of the wood panels are added the external dimensions are greater than what I would have expected. I rechecked my measurements several times. I believe there is space below the floor of the pedestal section.

Thanks Squirrely!
Nice data to have for the future!
I bet there is space underneath.
The AMT3 is similar-fairly small internal dimensions for it's overall size, (adding the mid woofer tube that runs front to back )as the cabinet is a box in a box, except for the front and rear panels.
It's 1 1/2 inches on the sides vs 3/4 inch on the front and rear panels.
The woofers mountings are recessed 1/4" which makes bracing the baffle a good idea, and mandatory with any much heavier then the O.E. Alnico woofers.
It's made even worse with the O.E. applied back silicone-which is hard on the particle board.
I started with a thinned (isopropyl) coat of slow dry epoxy, and a few coats of regular thickness to strengthen them up.
Also a new coat of paint (did one pair semi gloss, one gloss) followed by a clear sealer to stabilize the old particle board.
Both the AMT1a's and 3's have a unique shape, and classy look that stands out of the crowd of wooden boxes, "what are those"?
Then the sound blows them away!
 
Great info about Nelson Pass being involved in the design of the early ESS speakers. I used to have 2 PA-5 Stasis amplifiers. The where rated at 100wpc and punched way above their weight. Detailed and plenty of punch. I tried them bi-amped with Vandersteen 3’s. I don’t know if it was the room or what, but it didn’t work for me. The Vandersteens came and went pretty fast. I hung onto the PA-5’s for a while and went to tubes. I still think the Nakamichi PA-5 and PA-7’s are great amplifiers. If I want to get back into solid state I would consider these again.
 
I think my early 4 coil AMT3's might have had him envolved.
They had a 16 resistor Zobel for each woofer-32 total, and used 4 ohm woofers as well. 4 ohm midbass drivers and had a 2 fuse circuit-one for the Heil, and one for the midbass.
After a bit of research, I'm adding another mod to my AMT3 cab's.
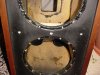
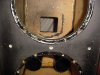
I picked up a gallon of Cascade Audio VBX-1 sound deadening-brush on compound to apply to the front and rear baffles.
http://www.parts-express.com/cascade-vb-1x(1g)-sprayable-acoustic-damping-compound-1-gal--268-256
I would have liked to add another brace-half way across the front baffle between the mid cutout and the upper woofer.
Without removing the midtube, it would be very difficult to install a "c" shaped brace to hold the baffle section firmly against the front baffle, specifically drilling the 3 pilot hold and then installing the screws-very little space.
The compound dries rock hard and is supposed strengthen the surface it's applied to, particularly wood.
It's a non toxic water based compound with no fumes.
From the few people I have talked to, (plus the reviews) it works well in this type of application-stopping vibrations, and strengthening the underlying surface.
Should be interesting!
The knock test on the right hand side-the same area where the stock port is on the left hand side-should easily determine if it's working.
The area between the woofer where the current brace now sounds like knocking on a bank vault!
Problem solved here.
The rear panel is not as bad-since it only had a small cutout for the input terminals, but it's still not as solid as the sides-so it will get the vbx-1 treatment as well.
I'm also mounting the crossovers on a felt gasket to decouple them.
From these photos, I see I missed getting epoxy a couple small areas around some of the mounting holes-probably from a late night session!
Those were the old holes for the stock 4 ohm woofers-I originally installed Hurricane nuts here when I got them-till I decided to mod them as well.
They had 4 holes, and were not a standard spacing.
On my newer set-some of the original holes were in such bad shape, I had to relocate all the new holes, and build up the damaged areas, were the old hole were with epoxy.
They guy used putty to seal the refoamed woofers, and did a job on a number of the screw holes.
Too bad they didn't use t-nuts like the AMT1a.
 

Attachments

  • ESS AMT3 026.jpg
    ESS AMT3 026.jpg
    62.3 KB · Views: 15
  • ESS AMT3 033.jpg
    ESS AMT3 033.jpg
    58.4 KB · Views: 17
  • ESS AMT3 032.jpg
    ESS AMT3 032.jpg
    98.4 KB · Views: 17
  • ESS AMT3 029.jpg
    ESS AMT3 029.jpg
    97 KB · Views: 19
  • ESS AMT3 028.jpg
    ESS AMT3 028.jpg
    43.5 KB · Views: 18
  • ESS AMT3 039.jpg
    ESS AMT3 039.jpg
    59.6 KB · Views: 19
Last edited:
Cool Mojo,
is that clear coat looking stuff, is what the Cascade looks like?

I did the "Phase Ear" mod. using open cell foam. I tried them on different locations and found a compromise to where they're essentially hidden to the rear of the ATM, gaining about 75% of the benefit in upgraded sound, vs, having them to the sides, which I really don't like the looks of. It is an essential mod "upgrade", which had me re-adjust the contour controls. Mostly to the -. Although I have seen this done with other bi-polar ribbon panels, thanks Mojo for bringing fourth this tweak for the AMT. The pictures just shows my experimenting with placing CDs first , then the foam. One of the aspects of the improved sound is the elimination of a "horn honkiness" that I didn't realize was there. After all, these are horn loaded.
 

Attachments

  • IMG_1913.jpg
    IMG_1913.jpg
    40.8 KB · Views: 21
  • IMG_1912.jpg
    IMG_1912.jpg
    60.5 KB · Views: 22
  • IMG_1911.jpg
    IMG_1911.jpg
    44.7 KB · Views: 17
  • IMG_1910.jpg
    IMG_1910.jpg
    50.4 KB · Views: 20
  • IMG_1917.jpg
    IMG_1917.jpg
    52.8 KB · Views: 23
  • IMG_1922.jpg
    IMG_1922.jpg
    37 KB · Views: 21
Stan Man,

Thanks for the pictures. I had a clue what this would look like but your pictures make it very clear. I am guessing your foam is about 1 ½ X 3 X 5. I am waiting for gasket tape to re-assemble the speakers. I will experiment with the foam wings soon.
 
Nice job on the wings.
I don't blame you not like the looks.
I run the grills on the AMT3's, kids etc.
No-the clear stuff is the slow dry epoxy.
These baffles in this picture are actually in decent shape compared to my other pair.
They would have been fine if not for ESS using the evil black silicone to mount and seal the woofers.
Ironically, they also used it to mount the coils and caps,(along with hot glue on the occasion-a mix) and worse under some of the PC boards-which is a real bummer to deal with on a crossover refurb.
I'm thinking they had some of the 2 post mounts fail under warranty, and glued them down with silicone as well to prevent this.
I have one crossover set I bought that didn't have this-one is pictured with Dayton caps. The first set of crossovers I recapped had a huge blob in the middle of each board!
I actually thought about coating the inside surfaces of the speaker baffle with it, as it also strengthens the wood, and probably has some anti resonance properties as well.
Cascade apparently goes on purple, and dries light grey.
Who knows, I may try the Cascade and top coat with epoxy.:scratch2:
It seems to dissimilar materials seems to work better in many instance when dealing with vibrations.
The problem with epoxy is to get it to soak in wood, you need to thin it-which also weakens it-so you would need two coats.
It's also pretty running, so you would need to baby sit it till it sets up, so it doesn't puddle at the bottom.
The large bottles are about $16 a crack.
The Cascade is supposed to soak in wood-but particle board is a bit different then plywood, but being water based, it should penetrate fairly well.
I figured this is a bit cheaper route, and it's made more for the specific purpose I was looking for.
I ran epoxy in all the cabinet seams, and also ran some silicone.
The slow dry epoxy really takes a week or two-sometimes more to fully cure and be rid of the stickiness.
The advantage is once is cured, it's much stronger then the fast dry types, plus you have more time to work with it.
The white port blocker is a mailing tube end, I will spray some Quite Coat on them to keep them from vibrating.
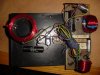
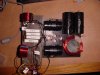
On the refurbed stock crossover, I completely rewired I ( 18 gauge O.E. color coded tinned hookup wire), used Dayton caps and resistors-stock switch and will use new inputs and fuse holders.
Most of the black wires are labeled jumpers to the caps. I used the evil black silicone on the caps, along with screw eye nylon ties. Big caps-plus I think it will keep anything from vibrated vs hot glue. I did add some additional hot glue to the bass/woofer inductor. (The Erse caps on my hardwired/tweaked crossover are a bit shorter and smaller then the Daytons).
I also removed the 2 stock plastic post mounting the crossover board in favor of some aluminum post(Digakey) that attach from the back with a small machine screw, and a nut and washer combo to secure the board to the post.
As you can see, this supposedly mint crossover board (off Epay) was subject to over driving, and/or a resistor failure that burnt the board (brown section under the resistors.
I repaired the top with epoxy, and the traces luckily didn't lift of melt, but I did run a small jumper from on of the affected areas to be sure.
This stock board will go in the later pair.
I originally recapped the boards on this pair with electrolytes, and will save these crossovers for another project-I didn't want to dig in them again, and scored these pair of board for $50/pr.
 

Attachments

  • ESS AMT3 Stock Crossover 004.jpg
    ESS AMT3 Stock Crossover 004.jpg
    83.6 KB · Views: 22
  • ESS AMT3 Stock Crossover 003.jpg
    ESS AMT3 Stock Crossover 003.jpg
    86.8 KB · Views: 19
  • ESS AMT3 Stock Crossover 002.jpg
    ESS AMT3 Stock Crossover 002.jpg
    67.8 KB · Views: 27
  • ESS AMT3 Stock Crossover 001.jpg
    ESS AMT3 Stock Crossover 001.jpg
    91.1 KB · Views: 34
  • ESS AMT3 Stock Refurbed Crossover 001.jpg
    ESS AMT3 Stock Refurbed Crossover 001.jpg
    90.1 KB · Views: 35
  • ESS AMT3 Stock Refurbed Crossover 002.jpg
    ESS AMT3 Stock Refurbed Crossover 002.jpg
    79.9 KB · Views: 34
Last edited:
First AMT3 Crossover Rebuild.

This picture is the first set I did a number of years ago-electrolytic, new wires and resistors. Stuff I had laying around basically.
This was the set with the huge blob of black silicone in the middle of each board!
I was running the stock woofers with this setup, then the OCS 1040Sf's, before I decided to really mod these to what I think they should be.
The hardest part, as mentioned was finding the right woofers, and then be willing to due the cabinet mods and porting, as both these sets have very nice cabs, not mint-but close enough.
Some aren't willing, as they may want to sell them-at around 1k a pair on a given day.
Myself, they are a investment in sound-and the mods have improved them considerably, but could care less what someone would want to pay for them-as they aren't for sale.
Audio is a hobby for me, so I don't have to justify anything as a dollar "investment".
When ever I pass, I bet who ever ends up with them will appreciate not only the sound, but the work I put into them.
I worked up a brief paper to stick in each pair (super stock, and super mod) explaining what I did, and why, with parts #'s, manufactures, etc.
You know-for what ever that's worth............
 

Attachments

  • ESS AMT3 001.jpg
    ESS AMT3 001.jpg
    127.2 KB · Views: 30
Last edited:
Bracing Between Midtube and Woofer Opening

After some thought, I figure out a way of easily installing a brace here.
Using a stock piece of pine board, 3/4" x 1 1/2".
Install (3) 8-32 Hurricane nuts on one side of the 3/4" side-to coincide with 3 holes on the baffle.
One hole by the stock port tube, one hole between the woofer and midtube opening, and one even spaced on the right hand side.
Using 3x2" 8-32 machine screws, along with epoxy.
This way, I can get away with not using the "c" braces.
Not sure why I didn't think of this before, the thought actually just donned on me.
I think I was thinking on line of the woofer opening brace, and wanted to tie it to each side for stability.
This midtube brace is more of a stiffener then anything else, see how it goes, have to round up some 2" screws.
This hopefully with clean up the bass response, and provide some good structural integrity.
Each Dayton St255-8 is almost 13lbs ea, while the stock woofer were maybe 3.5lb to 4lbs., a lot of weight for this design, and baffle thickness, as well as the condition of the mounting surfaces.
I will post a few pics to give you all a look.
 
I have little experience in this hobby thus far so I get to come up with ideas that come from ignorance. The beautiful thing about that is it will be outside the box. It takes some knowledge for us to create the boxes that limit our creative processes. So, as I put my childlike brain to work, I have an idea. I read about the acoustic dampening products you guys are using to reduce cabinet vibration and I don’t know what these products are. I assume it is a coating that sprays on the wood. I think of what I know of that might dampen cabinet vibrations and I come up with……..wait for it…………..Paper Mache. There are premixed packets at Michael’s craft stores. It may not be practice for inside a cabinet because it would not adhere to the wood. Panels could be made on wax paper, cut and shaped and then glued into place. Then I thought about the foam wings for either side of the Heil on the AMT 1a’s. What I like about this idea is that Paper Mache can be shaped (sculpted) and painted. I could put a color die in the mix so it hardens black and does not require paint. This would allow me to sculpt a piece and then rough up the outside to enhance the sound absorption. If this works the wings can be any shape that visually blends with the speaker. I may experiment with this once my woofers are back in the cabs. Right now I am waiting for gasket tape to come in the mail.
 
I have little experience in this hobby thus far so I get to come up with ideas that come from ignorance. The beautiful thing about that is it will be outside the box. It takes some knowledge for us to create the boxes that limit our creative processes. So, as I put my childlike brain to work, I have an idea. I read about the acoustic dampening products you guys are using to reduce cabinet vibration and I don’t know what these products are. I assume it is a coating that sprays on the wood. I think of what I know of that might dampen cabinet vibrations and I come up with……..wait for it…………..Paper Mache. There are premixed packets at Michael’s craft stores. It may not be practice for inside a cabinet because it would not adhere to the wood. Panels could be made on wax paper, cut and shaped and then glued into place. Then I thought about the foam wings for either side of the Heil on the AMT 1a’s. What I like about this idea is that Paper Mache can be shaped (sculpted) and painted. I could put a color die in the mix so it hardens black and does not require paint. This would allow me to sculpt a piece and then rough up the outside to enhance the sound absorption. If this works the wings can be any shape that visually blends with the speaker. I may experiment with this once my woofers are back in the cabs. Right now I am waiting for gasket tape to come in the mail.
Sure-all good ideas. once you get the shape down, seal it up with paint or sealer so it doesn't absorb in moisture and mold/etc.
I think your AMT1a cabs are pretty stout-the knock test usually will tell you.
With the Cascade VBX-1, I was originally looking for something to substitute for a midtube brace-once I figured it out-I will still use it on the back panel and some on the front.
it's really hard to say what a difference it will make-I venture a small improvement-but that's fine as they all add up.
Most tweeks usually gain you a little here, little there.
We all start out from some where
For me, it would have been nice to have a forum like this 30 years ago or so, as you just had magazines and the guys at the audio shops.
This forum and Goggle are really you friend for information.
RonC was really helpful for me here, and indirectly go me started on my AMT3 mods, and pointed me in the right direction on the Dayton woofers.
I still tried a number of other viable woofers that came around here cheap, but they Daytons are the ticket.
THE AMT1a' IMHO are fine the way they are.
I like the idea of adding a midbox, but that drawback with them is fairly minor.
The main problem with the AMT3's is clean bass output that matches the rest of the speaker.
In reality I would have been happy with them stock, and was for a number of years.
But got the tweek bug, and wanted to how much I could improve on them.
 
That's also the nice thing about threads like these, is you can avoid the "know it alls"-that things have to follow a graph-they must be like this etc.
I personally like people that are innovative with what they have, like folk art etc, and have been a bit wary of those who tend to put everything in a neat box.
Great for them! Lifes never been that way for this cat. nor most people I would speculate.......
I really vary on how much I do this, I'm so busy lately I take the easy way out sometimes, instead of thinking things out more like using paper Mache etc.
I don't think it's childlike at all, its called innovation!
But I do like experimenting with new or interesting products, some are boon, other bust, or in between (usually).
I have been in sales for years-so I have to play the consumer role once in awhile!:D
Good excuse!..........
 
Last edited:
I have little experience in this hobby thus far so I get to come up with ideas that come from ignorance. The beautiful thing about that is it will be outside the box. It takes some knowledge for us to create the boxes that limit our creative processes. So, as I put my childlike brain to work, I have an idea. I read about the acoustic dampening products you guys are using to reduce cabinet vibration and I don’t know what these products are. I assume it is a coating that sprays on the wood. I think of what I know of that might dampen cabinet vibrations and I come up with……..wait for it…………..Paper Mache. There are premixed packets at Michael’s craft stores. It may not be practice for inside a cabinet because it would not adhere to the wood. Panels could be made on wax paper, cut and shaped and then glued into place. Then I thought about the foam wings for either side of the Heil on the AMT 1a’s. What I like about this idea is that Paper Mache can be shaped (sculpted) and painted. I could put a color die in the mix so it hardens black and does not require paint. This would allow me to sculpt a piece and then rough up the outside to enhance the sound absorption. If this works the wings can be any shape that visually blends with the speaker. I may experiment with this once my woofers are back in the cabs. Right now I am waiting for gasket tape to come in the mail.

My worry would be that paper mache would not really stiffen the box and would cut down on the box volume. This could change the bass response.
Have you considered corner battens?

As I have alluded to before I have seen "Waveguides" made out of fiberglass and resin to direct the Heil both forward and backwards.
I note that folks also use foam along side the Heil. These two methods are not really the same. While they both prevent wraparound the waveguide is much more directional in nature. Does anyone have any thoughts on this?
 
I looked into what a waveguide is. Intuitively I was thinking horn. Here is a link to the article I read.
http://www.gedlee.com/downloads/What is a Waveguide.pdf
It makes sense that a horn is a wave guide. If we want we can put a bell on the Heil and have a horn. What would we gain and what would we lose? I have little exposure to physics so what I have to say is from intuition rather than education. Here goes. In the ocean waves move at different speeds. The amplitude of a wave form is adjusted by the shape of the bottom (wave guide) or the amplitude can change as a result of one wave overtaking another. In this case the energy is additive and amplitude is increased. As far as I know, all acoustic wave forms are moving at the same rate. Tone is a function of wave frequency and not amplitude. I am guessing that loudness is a function of amplitude.

By putting foam on the sides of the Heil sound is absorbed by transforming the sonic energy into mechanical energy. The foam vibrates and absorbs the sound. With no foam the sound can wrap around the tweeter and have create sound canceling and other distortions as the waves from the front of the heil mix with the waves from the back of the heil. I haven’t experimented with this yet, but I understand the value of the foam wings. If we use a waveguide, sound will bounce. If sound waves come from the heil in a radial fashion then bouncing the wave could create the same distortions that we want to prevent by using the foam wings only the overlapping waves will be from one side of the heil and overlapping on the same side of the heil. A horn design with a wide bell will have minimal or no overlapping waves from the redirection of waves. My guess is that if the sound from the heil is restricted too much the wide soundstage and cool dynamics could be reduced.

The coolest wave guide I have seen is the JBL Paragon. The engineering that went into calculating the horn placement relative to the curve of the convex wood slab must be intense.
 
Thanks for the explanation Squirrely!
I asked because of the use of Fiberglass and resin (non-absorptive material)
vs. foam in the wings. I thought the attempt was to direct the sound waves rather than absorb them. The use of foam seems the way to go.
 
I have seen some "horned" Heils, but haven't tried anything.
The fairly even dispersion horizontal of the great heil, not sure you could improve much.
The limited vertical dispersion is intended to keep the sound waves from bouncing off the ceiling and floor-I would assume.
 
Back
Top Bottom