• The move to the new server is done. There are some software and database maintenance updates in process. This has us passing the hat around to help out. We appreciate any donations. Seriously, even a dollar helps. The payment page may be found here - https://www.audiokarma.org/support.html

Butcher Block Flexy Rack Build - Finished

Of course the pitch of the rod gets courser unless find fine pitch threads. Open end wrenches get bigger, too.
Have not worked on mine. I have shelves from this thread. May do this spring. McMaster Carr is great source. I've used MSC also.
Think I'm leaning to black oxided hardware.
Have fun on project.


I was considering black oxide too. MMC doesn’t carry it in 1 inch though. The poster up there I quoted seems to have found it! :)

My only worry is that a 4 foot height is too tall.
 
I was considering black oxide too. MMC doesn’t carry it in 1 inch though. The poster up there I quoted seems to have found it! :)

My only worry is that a 4 foot height is too tall.

Your right to think it through ahead of time. I'm thinking 3' for mine. At first thought 4'. Mine will be 4' wide butcher blocks. I tube amp on top shelf. Need overhead access for bias setting, maintenance. Possibly one TT on top too, if feedback, stability isn't an issue. Also, if I don't do casters, moving it for cable maintenance willbe impossible. So then would havo to be open around sides and back to fit my head and arms. I need two hand access to attach wires etc.
I think Soundmoter recommended Putting bottom shelf close to floor for stability.
Im stiil not commited on size of forstner bit to use. My set is in 1/8" incraments. Do 3/4" for 5/8" rods? 11/16" available online.
 
Last edited:
Your right to think it through ahead of time. I'm thinking 3' for mine. At first thought 4'. Mine will be 4' wide butcher blocks. I tube amp on top shelf. Need overhead access for bias setting, maintenance. Possibly one TT on top too, if feedback, stability isn't an issue. Also, if I don't do casters, moving it for cable maintenance willbe impossible. So then would havo to be open around sides and back to fit my head and arms. I need two hand access to attach wires etc.
I think Soundmoter recommended Putting bottom shelf close to floor for stability.
Im stiil not commited on size of forstner bit to use. My set is in 1/8" incraments. Do 3/4" for 5/8" rods? 11/16" available online.

I haven’t gotten that far yet, to where I need to start figuring out how to put the thing together/holes/etc. just deciding on materials.

This should be fun!
 
I haven’t gotten that far yet, to where I need to start figuring out how to put the thing together/holes/etc. just deciding on materials.

This should be fun!
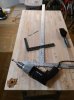
I bought a drywall T square to help accurately layout hole pattern. Given over 4' between diagonal holes for my double wide unit.
May clamp a 2' plus metal ruler at one end. Parallel to short side. Slide T square along it. All holes will be square to that stationary edge. Reducing variation between shelves.
Good luck and post finished unit pics.
 
I got my threaded rod, nuts and washers from Zoro.com. The shelves are 24"x18"x1 3/4" maple cutting boards. I purchased mine from overstock.com but they are still available on Amazon.
 
IMG_20180421_131430.jpgIMG_20180421_143342.jpg
After few months, have started project.
Picked best side up on first shelf.
Used drywall t-square to layout hole pattern on first shelf. Square to narrow end. Far two hole marks were 1/8" differant spacing to neartwo. I corrected to same as near two.
Drilled after using short square to align drill 90° to surface best i can see from above. Drilling 3/4" for 5/8" threaded rod.
Plan is to transfer to each of next two shelves individually from first shelf, with forstner bit through first shelf. Hope holes in first shelf did not wander too much.
* Major breakout at a couple holes on bottom. Shouldn't show if not on top shelf front.

* Should have put scrap board under when drilling to limit breakout at bottom which was substantial on couple holes!!!

edit: I did some damage control repair of wood breakout on bottom. Used white glue and hair dryer to work glue into shreaded wood to make solid. Not posting pic!

If you are going to have monoblocks or other heavy gear, might consider five or six rods for double wide Flexy. See my comments at end of build. Four worked for me.
 
Last edited:
IMG_20180425_120947.jpg
IMG_20180425_114252.jpg
Sanding top and edges with 220. Noticed a couple dings on top.
Pic is trying to show ding. I'll try a wet rag under warm iron. Hopefully won't have effect on glue.

Able to completely remove dents in top with wet rag under hot iron.
 
Last edited:
IMG_20180425_150436.jpg
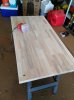
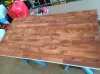
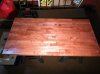
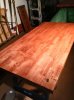
I cleaned off dust with mineral spirits on rag. Used Sherwin Williams Wood Classics oil stain. Applied with micro cloth. Wiped off. This is on bottom of shelves. Its blotchy.
Won't use mineral spirits on top and sides. Maybe cause of blotches?
After staining, will polyurethane finish.
 
IMG_20180425_170742.jpg

EDIT: From Sherwin Williams store and poster Lucky Pierre here. Birch has difficulty taking stain. Can get blotchy. Should have used a wood conditioner prior to stain? Maybe a lighter color stain also. I'm no woodworker.

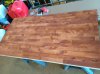
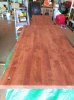
Stained top and edges. End grain on short ends is darker, opague. Color in this pic is more red than actual.
 
Last edited:
The blothcy-ness was not caused the mineral spirits. It is because you are trying to stain birch. Birch, like maple, is really difficult to stain evenly. If you want even staining, before you go any further, consider sanding down to remove all of the old stain. Stain penetrates, so you might not even be able to. If you decide to go this route, you have to sand all of the old stain, treat the birch with a water-based wood conditioner, then stain with a water based stain.

Pine, also, doesn't take stain well. If you want to stain pine, you have to treat with a conditioner first. You can use oil based stains on pine, though.

End grain will always stain darker than the face.

Birch is also best stained with lighter colors.

Sorry to be the bearer of bad news.

Here is a good link:

https://www.popularwoodworking.com/projects/the-way-wood-works-birch
 
Last edited:
The blothcy-aren'twas not caused the mineral spirits. It is because you are trying to stain birch. Birch, like maple, is really difficult to stain evenly. If you want even staining, before you go any further, consider sanding down to remove all of the old stain. Stain penetrates, so you might not even be able to. If you decide to go this route, you have to sand all of the old stain, treat the birch with a water-based wood conditioner, then stain with a water based stain.

Pine, also, doesn't take stain well. If you want to stain pine, you have to treat with a conditioner first. You can use oil based stains on pine, though.

End grain will always stain darker than the face.

Birch is also best stained with lighter colors.

Sorry to be the bearer of bad news.

I'm going with what I have. I sanded the tops with 220. The tops look better than the bottoms. Not a pro job, but will meet my needs. Too late to go lighter stain. Stain was $20.
But, thanks for your comments and info link.

Edit: If could go back, might stain lighter color. But still looks good. Sanding it all off would be lot of work. And maybe not possible in wood cracks.
Edit #2: Satisfied with end finish. Just end grainat narrow ends got too dark.
 
Last edited:
I should also add that if you go this route, you should start aggressively. 80 or even 60 grit. You may have to take off 1/64 or even 1/32 of an inch to get the stain off. I recommend using a half sheet orbital sander for the coarse grits, if you have it. You can then switch to a random orbital, for 100-150 grit. For the final sandings, 180 and 220, you should sand by hand with a good, comfortable sanding block.

After 220, wipe the wood liberally with mineral spirits and look at it under a strong light. You can see any left over swirl marks this way and correct with further fine sanding.

I like General Finishes Arm-R-Seal for poly. It is a 50/50 poly/tung oil blend. Wipes on and off easily and it dries relatively quickly. Considering the shelves are low use, you can get away with two coats.

Or, you can just live with the stain and finish away.

I've enjoyed following this thread. I am doing something similar with some wide pine planks that were air dried for 30-40 years.
 
Have not yet ordered hardware. Want black oxided look. I want locking non-marring casters for easy rear access. Trouble is, have not found black casters. Painting would be a PIA. Threaded 5/8-11 mount versions are expensive. Leaves under shelf surface mounting 4" diameter, to get load capacity.
 
IMG_20180425_150436.jpg IMG_20180426_110409.jpg
Trying to repair blotchy problem.

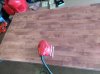
I've sanded with 150 with slow effect. Went to 100. Sherwin Williams manager said to do. Slow going. Don't have orbital sander.
Now useing 60 grit. Making some progress.
 
Last edited:
IMG_20180426_115919.jpg
I give up.
Just going to restain this shelf back to match other two.

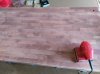
I restained it alike other two. After two people said they thought shelves looked fine.
 
Last edited:
Back
Top Bottom